
 Good morning, Crafting Chicks readers! My name is Sarah McKenna, and I blog at Bombshell Bling. I am thrilled to be here today as part of the Mother Hen Holidays guest posts to kick off the SKELETONS week! As all of my regular readers know, I have a thing for Jack Skellington. He is my boyfriend. I kid, I kid, but I do love my man Jack and our family looks forward to watching his movie, The Nightmare Before Christmas, each and every October. In fact, my kids are actually dressing as Jack and Sally this year for Halloween! My lanky, lanky little boy should pull that off just perfectly!
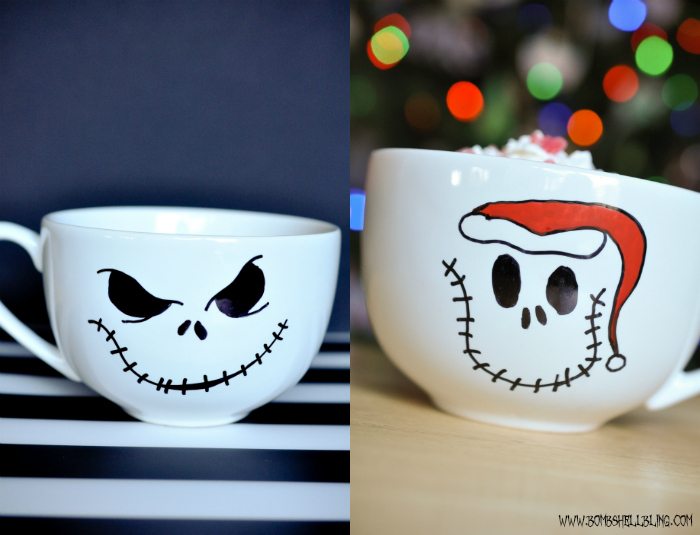
I always think of Jack and his movie as a Halloween event, but technically the movie really celebrates Christmas too, doesn’t it? I don’t want to say too much more in case you haven’t seen it, but the movie really revels in the magic of both holidays and what makes them unique and special. If you haven’t seen it, find it and watch it! Yes, it can get pretty creepy, but it’s not too bad overall. I don’t do horror . . . there is none of that.
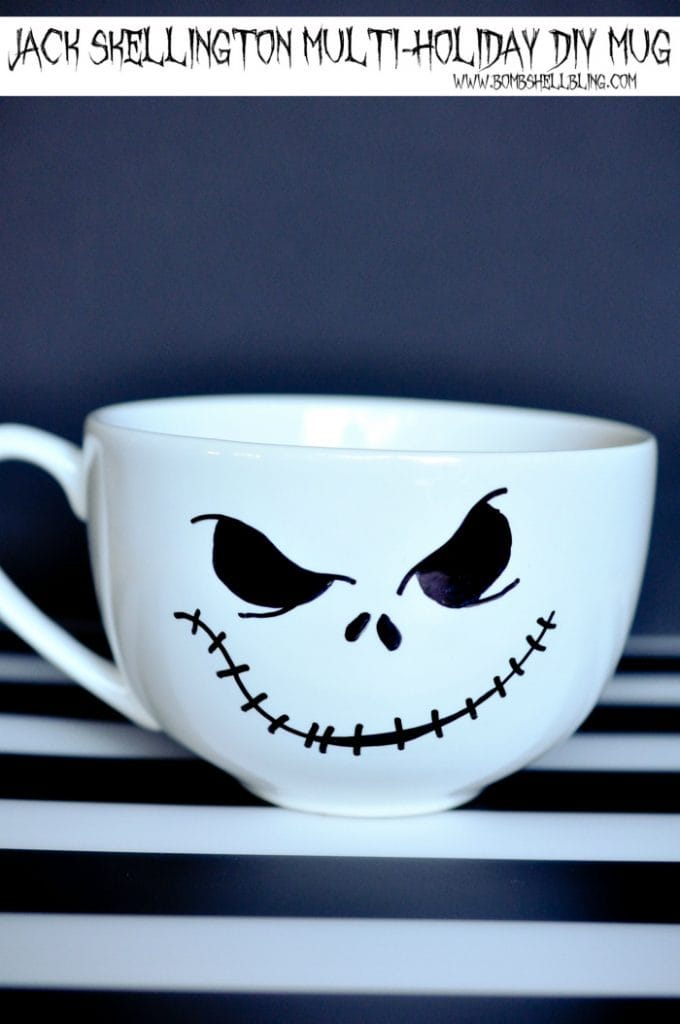
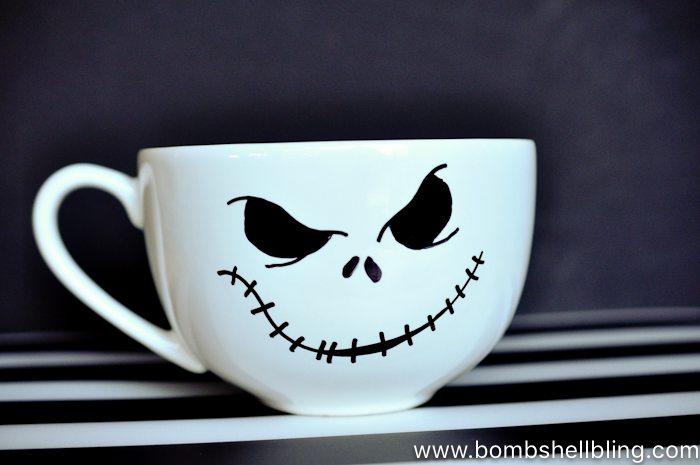
DIY Jack Skellington Mug
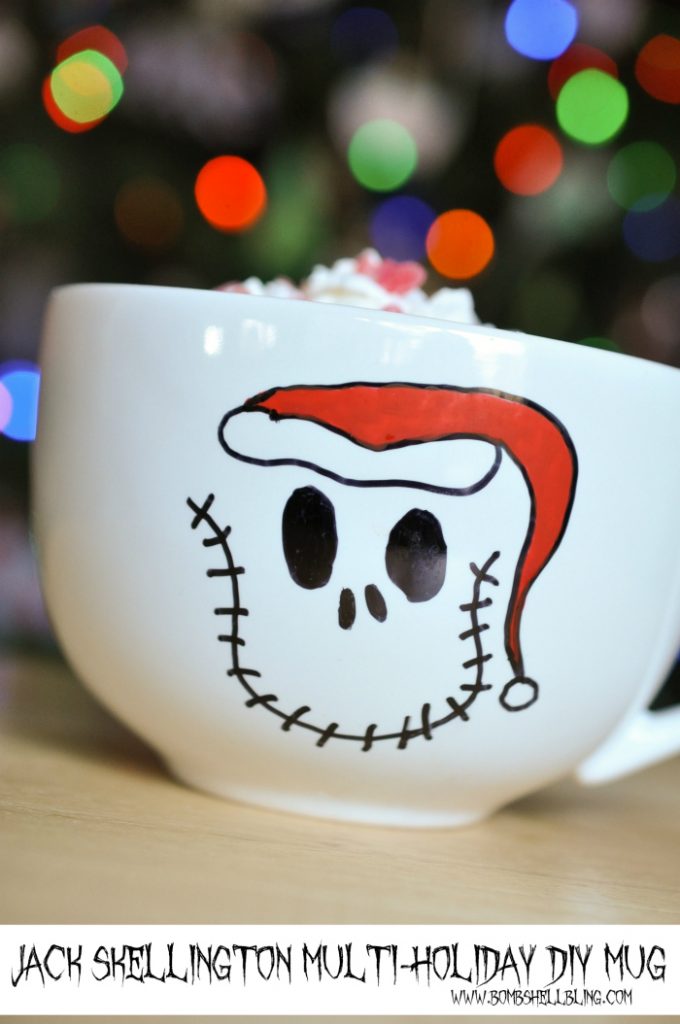
Now, let’s talk about how you can make this festive Jack Skellington Multi-Holiday Mug. Essentially, I took a dollar store mug and I freehand drew a face on each side with a permanent marker before baking it briefly in the oven. Yep, that’s it. Now, I know that may sound a bit too simple for some folks, so I did make a PDF for you with the faces on it that you can trace if you would like. I could not find the original mug to trace, but I looked at the pictures of the mug and did my best to make them look the same.
PRINT OUT THE PDF OF THE JACK SKELLINGTON FACES BY DOWNLOADING IT HERE.

Of course, if you don’t want to trace the face you can always just do what I did and look at the pictures and freehand your mug with a permanent marker!
After you are done drawing your faces, let the mug dry out for several hours on the counter. After it has been drying for quite some time stick it in the COOL oven. Now turn the oven on to 350 degrees and allow the mug to sit in there while it heats. (This prevents cracking.) Allow the mug to bake for about 30 minutes at 350 degrees. Now LEAVE THE MUG IN THE OVEN and turn the oven off. Allow the oven to cool completely. (This also prevents cracking.)
That’s it! If you want to make sure your mug lasts a long time then hand wash it, as the dishwasher can take off the design from a permanent marker.
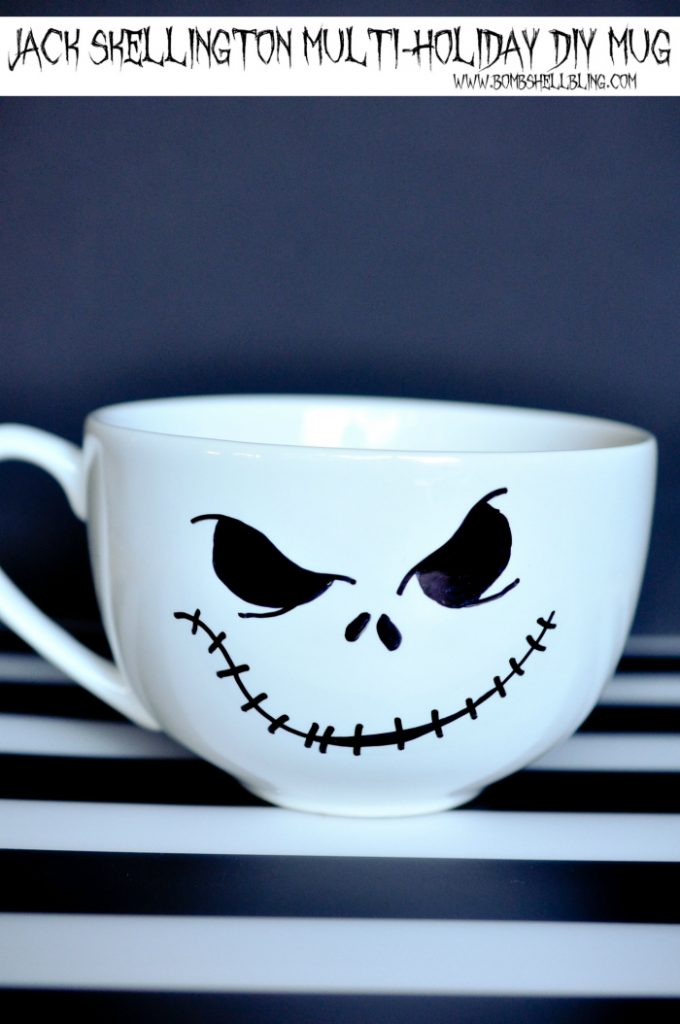
That’s it! Now you have a Jack Skellington mug that is perfect for apple cider at Halloween or hot chocolate and whipped cream at Christmas. Drink up!
If you would like to see more Jack Skellington and The Nightmare Before Christmas projects then check out these projects from my blog:

I am really in love with the sharpie mug idea but I am really struggling with the end results. I have baked at various temps for varied times and even with hand washing only my designs disappear. Do you have any tricks? This mug is a super idea but am afraid to waste more time.
use the oil based sharpie paint pens and bake at a low temp for a longer time. you’ll still have to hand wash, but it’s a much more permanent solution 🙂