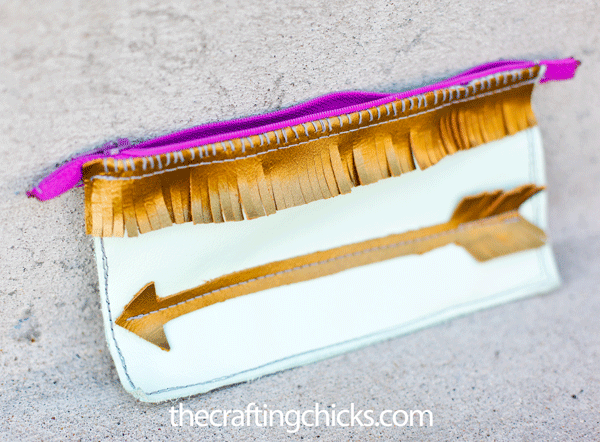
Hey friends, today i’m posting a leather fringe tribal wallet. I was headed off to Vegas to visit some friends and discovered that my gigantor wallet just wasn’t going to make my traveling easy, so I made a quick wallet. This is a great wallet because it’s simple, has character, and it’s a great conversation piece because it’s a little different. You could even tell people it’s a Hunger Games survival wallet and just watch when they look at you like you’ve gone crazy, bwahaa, yes i’m a total nerd.
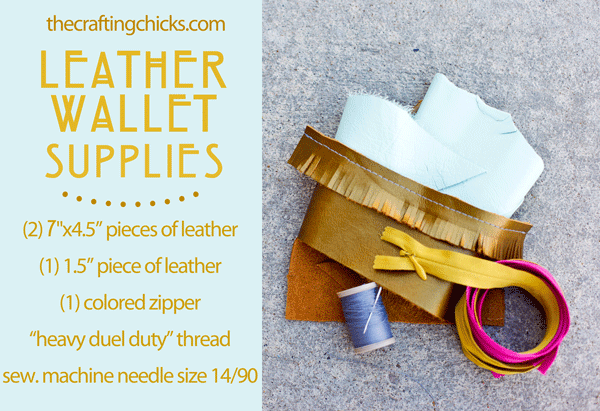
TIPS: Check out the supply list and gather supplies.
- Wallet Size: You can really make your wallet any size. I chose to do a 7″x4.5″. I figured out this size by placing my check book over the leather and measuring a fair space around the check book. I figured if I could fit my check book, I could fit my cash and other things nicely with a little room to spare.
- Leather choice: If you are sewing on a machine, it’s best to use a leather that’s not too thick. If you wanted to use a thicker leather, you could hand sew, but I chose to use a thinner leather that I could sew through on my machine.
- Purchase Leather: I live in Salt Lake City, and purchased my leather the mint and the gold in a large piece from TANDY LEATHER COMPANY. I shared the two pieces with friends because they were very large. The gold piece I cut from for the arrow I purchased from the clearance rack and paid about $22 and the mint green piece was $120 for a large piece (that I shared with friends) I should clarify….the pieces I split between 4 people was about $30 and I used about $2 worth to make the wallet, wahaaa, yes $120 wouldn’t be worth it, I have tons left to make other projects! If you go when they have sales you can get a great deal. LOVE THE COLORS I FOUND.
- Needles: For hand stitching I chose a simple needle and I definitely recommend using a thimble since the leather can be difficult to pierce.
- Sewing machine needle: There is a thicker and stronger needle used to sew on leather. It’s the needle sized at 90/14. If you go to any craft store, they should be able to direct you to these. Regular needles may break easier and give you a harder time.
- Thread: Heavy Duty thread is required to sew through and hold the leather. You can find this at any craft or sewing store.
- Sewing: crank your stitch length up to a 4 otherwise it will rip your leather by making your stich length any smaller.
STEPS:
- cut out the 3 main pieces of leather: the two pouch pieces (2)7″x4.5″ and the fringe piece (1.5″x7″). Take fringe piece and cut the slits in the fringe (about 1/8″ slits)
- sewing a line on the fringe piece (the line that in the above photo sits below the hand-stitched piece.
- cut out an arrow and fringe the end of the arrow and sew a line down the middle of the arrow onto the front piece.
- Sew the zipper onto the two piece (before they are stitched together).
- sewing the pouch together (wrong sides facing each other) since the stitching is going to be on the outside.
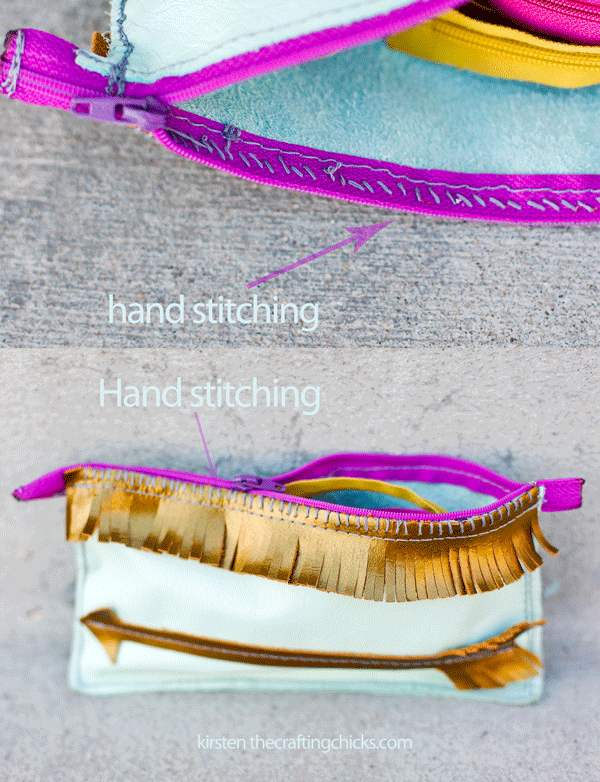
- cut the zipper where you want to end it and burn the edge so it doesn’t fray. Also do a little hand stitching over the zipper where you want to end (shown below)
- hand stitch the top of the fringe piece to the leather making the front stitch straight and the back of the stitch diagonal (shown below)
- TA-DA you are done!!!!!!
Have so much fun with this…you could do just about anything to jazz this up by using colors, stitching, symbols and whatever else you wan to embelish it with. While you are at it, you could watch Hunger Games and eat popcorn. Have you ever sewn with leather? What did you make and what was your experience?


Cute!
You make it look so easy!