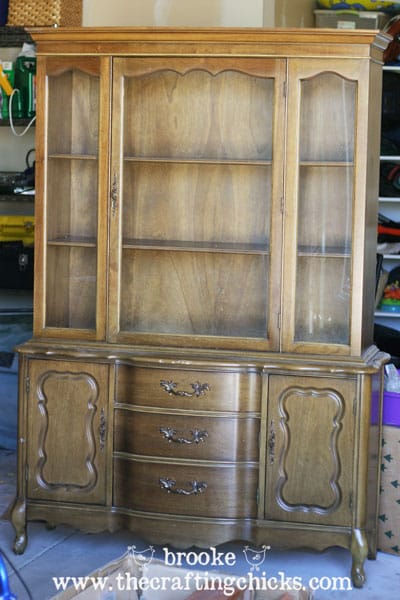
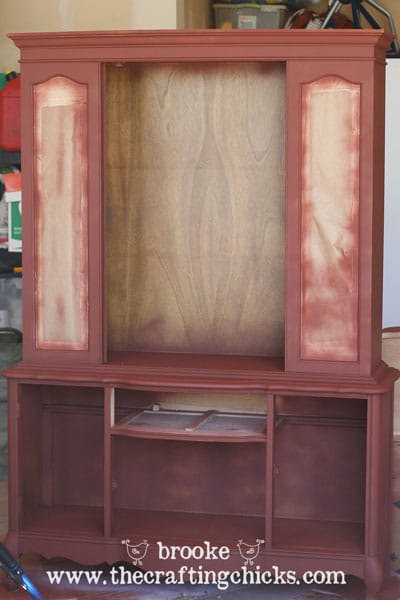
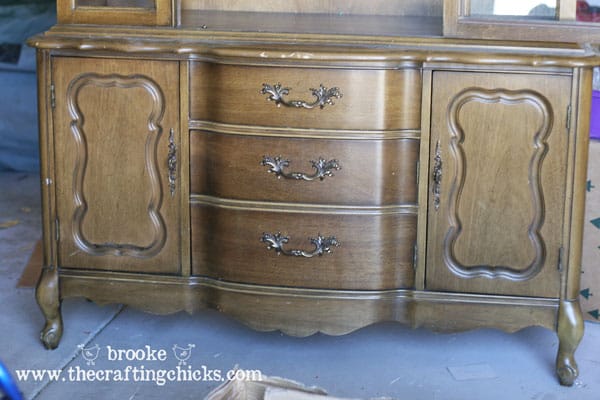
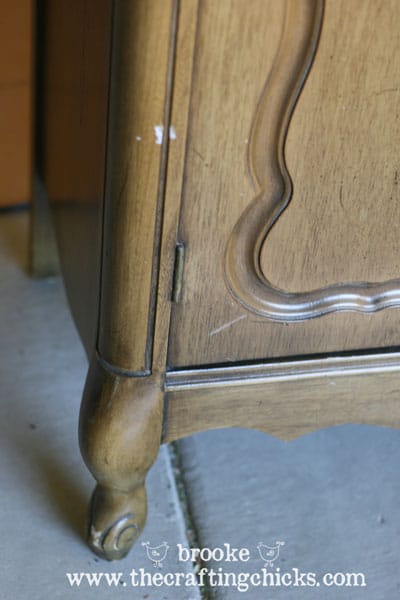
My friend gave me her grandmother’s lovely dining room hutch several months ago, and I was so excited to give this gem a sweet makeover. Here is the BEFORE of my DIY Dining Room Hutch Makeover:
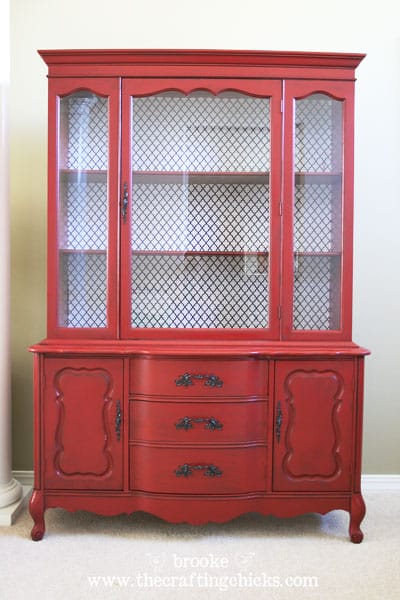
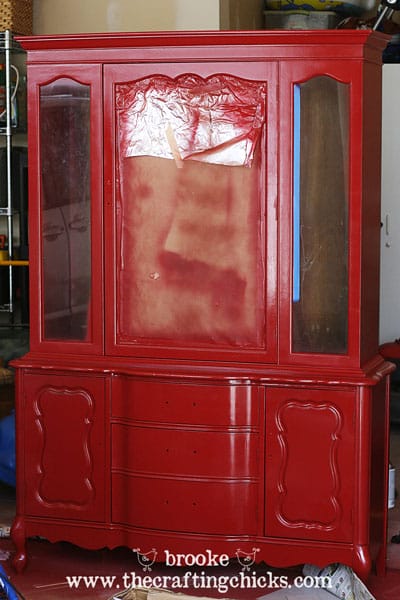
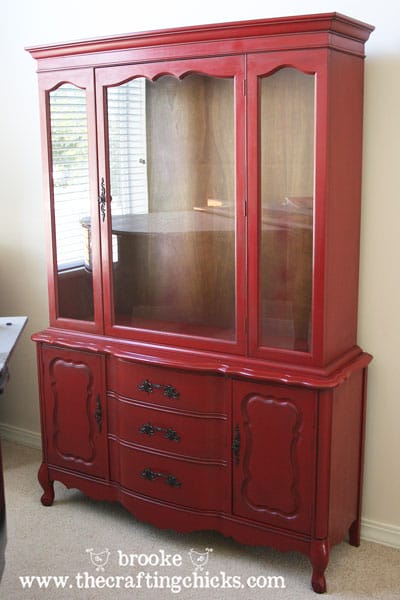
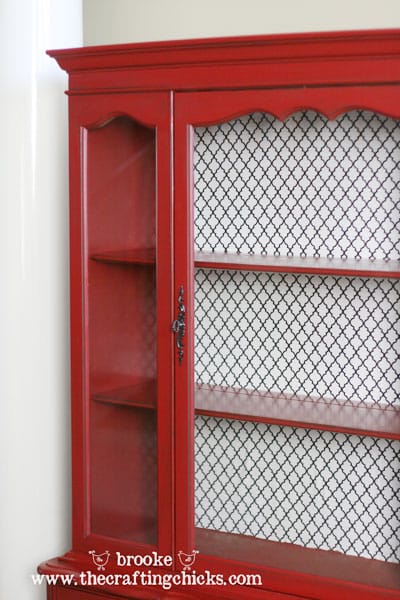
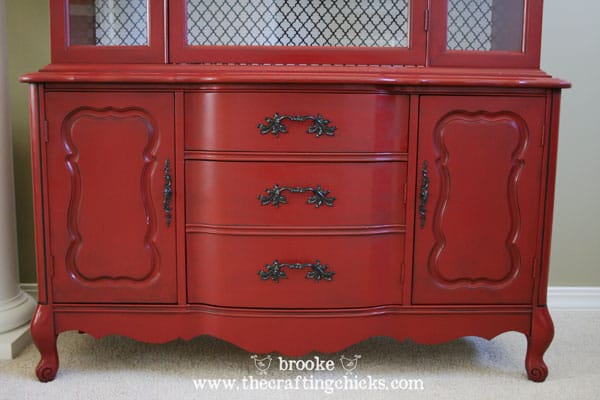
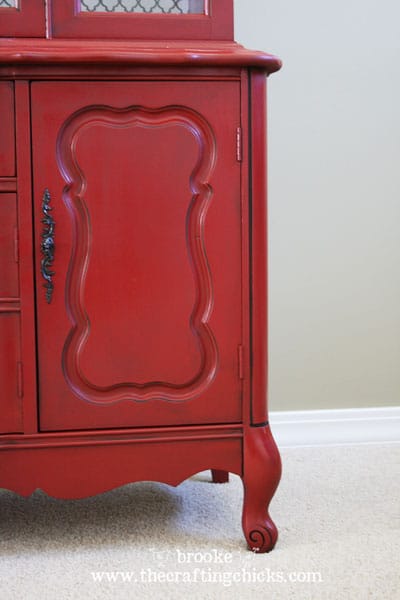
And I am CRAZY about the AFTER:
I just love her and stop and look at her all of the time. 🙂 I am thrilled with how it all turned out.
So, let’s chat about how I transformed the hutch into this lovely piece of furniture. First though, I want to give a shout out to my friend Brooke at All Things Thrifty for her awesome Spray Painting 101 tips. I highly recommend checking it out. The girl is a spray painting pro. There is a short video on there to show the correct technique for spray painting that was very helpful and a great resource.
Supplies for painting my dining room hutch:
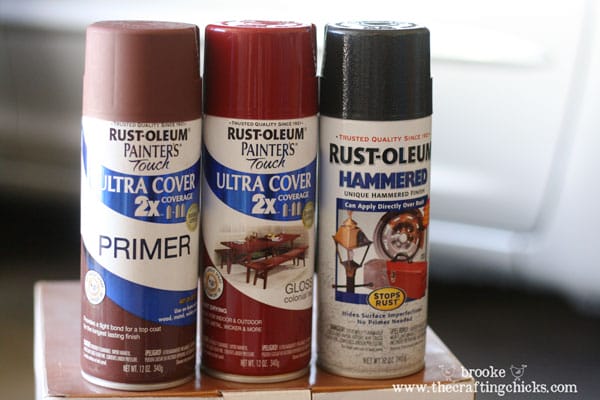
- Primer: I used a dark reddish-brown primer because I wanted to paint the hutch red
- I used Rustoleum Colonial Red spray paint in glossy for the entire hutch
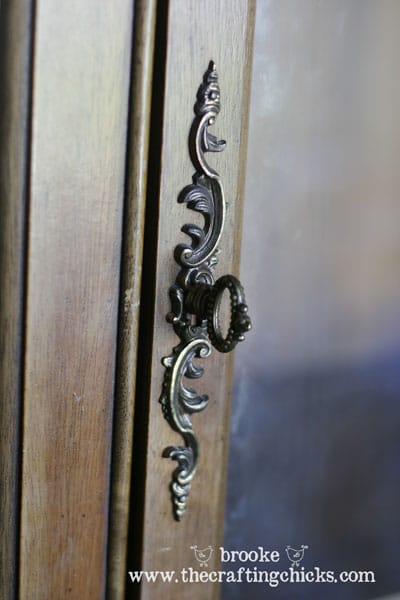
- For the hardware, I used Rustoleum Hammered Iron spray paint
- painters tape
- newspaper/paper to cover glass (I also used tinfoil to get all of the curves covered, because tinfoil bends!)
- sanding block
- cleaning cloths
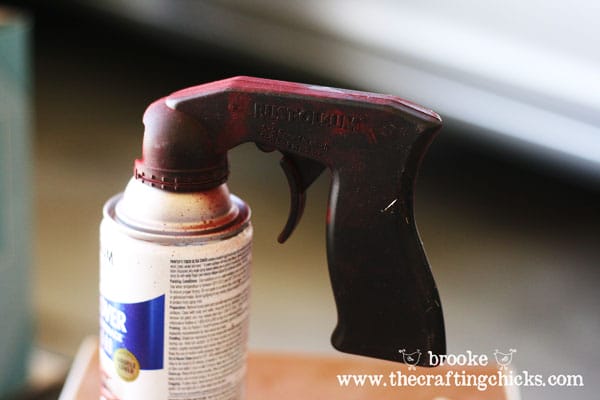
I would also recommend purchasing a spray paint handle. It makes it easier to control your spray and saves your pointer finger from painful death. 🙂 They are like $2 at the hardware store and worth every penny.
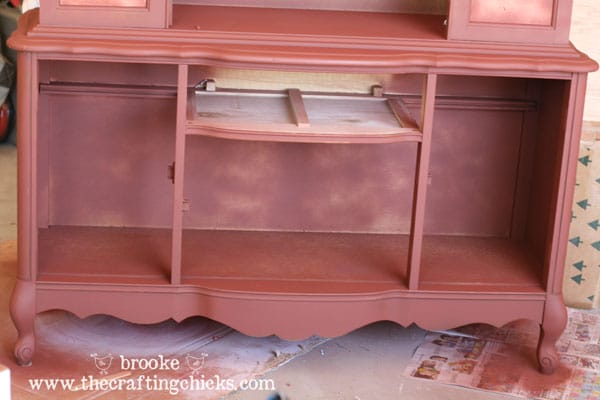
To begin this transformation, I cleaned the hutch, removed the hardware and doors, and taped off the windows. I lightly sanded the hutch but kept some of the dings and scratches. I thought it gave it some character. 🙂 I primed the hutch with 2 coats of the brown primer.
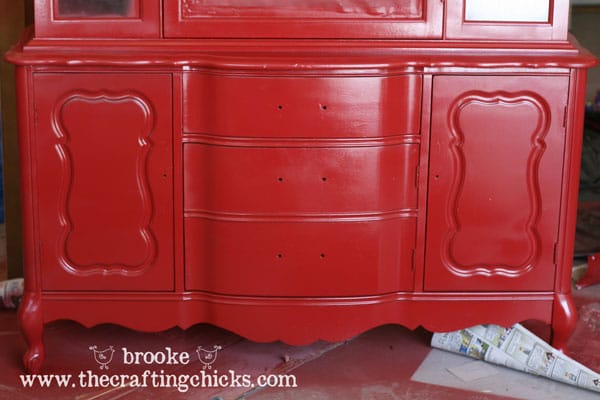
After the primer, I started in on the Colonial Red spray paint, spraying light and even strokes until the entire hutch was painted. I did about 3 full coats of red, letting it dry completely in between each coat of paint. Once the hutch was completely dry, I reinstalled the doors and drawer.
Another tip: to remove any overspray from the glass, just use a straight-edge razor and it will scrape right off!
Already I was happy with the transformation, but I knew I wanted some of those decorative details to pop more, and I wanted to tone down the bright red color a little bit as well. So I decided to use a glaze.
Supplies for glazing furniture:
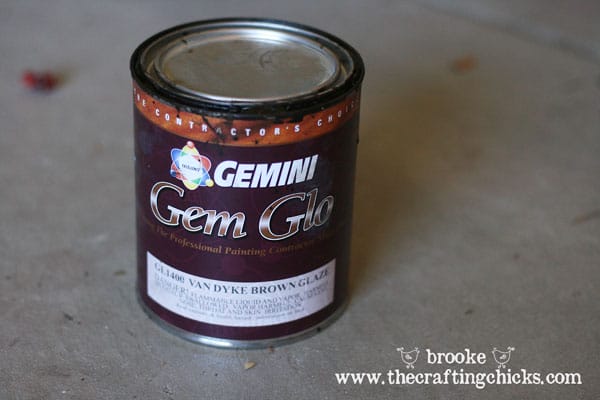
- Glaze: my sweet sister-in-law let me use her glaze, it was a blackish brownish tint. I did not even use very much of it, a little goes a long way.
- paint brush
- damp cloths
- gloves to protect your hands (I used those latex ones saved from when I worked as a nurse)
Brooke over at All Things Thrifty also has an awesome Glazing Furniture 101 tutorial that was helpful. I was scared, to be honest. I’ve never glazed anything before and nearly had to be convinced to do it by my sister-in-law. 🙂
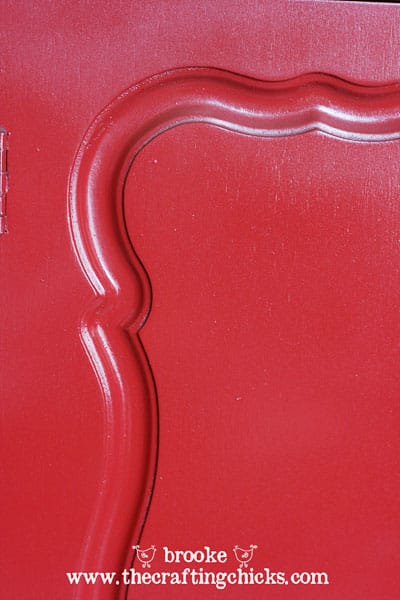
I started with my primed and painted hutch.
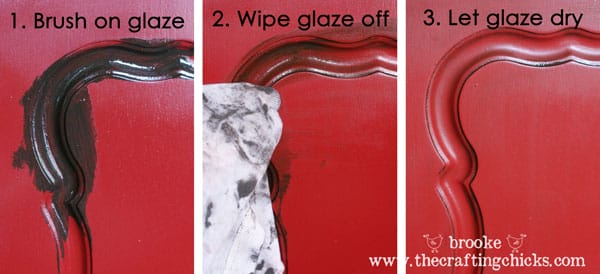
Then I painted on the glaze with a paint brush, getting into the nooks and crannies. After this I took a damp cloth and wiped off the excess glaze, leaving some of the glaze in the cracks to make the details come alive. 🙂 I also added a little bit on the flat parts to give it more dimension.
It took a little bit of practice to get the hang of it, honestly. But once I figured it out, I really liked the effect of the glaze. Hooray for glaze! I conquered my fear! 🙂 The great thing is if you mess up with the glaze, just repaint the original color and try again.
Okay, are you still with me? We’re almost done!
I was REALLY happy once my hubby and I brought the hutch into the house after the glazing was finished. I added the newly spray painted hardware (yes, I added the drawer pulls on upside down but I did it on purpose because I liked it!). But I still needed to work on the inside of the hutch.
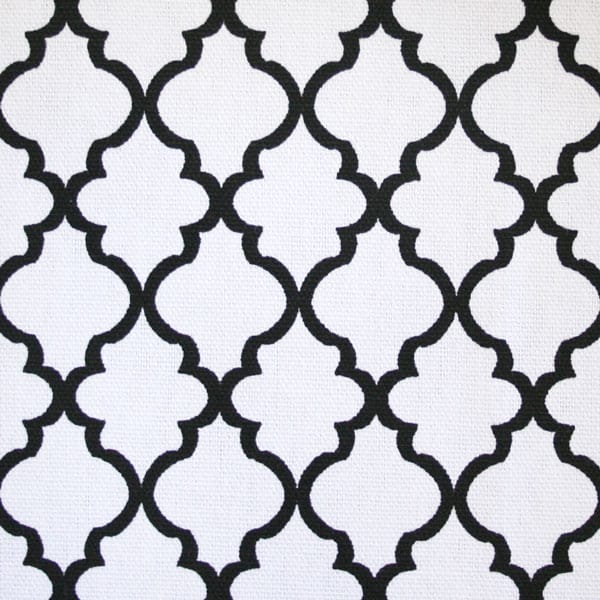
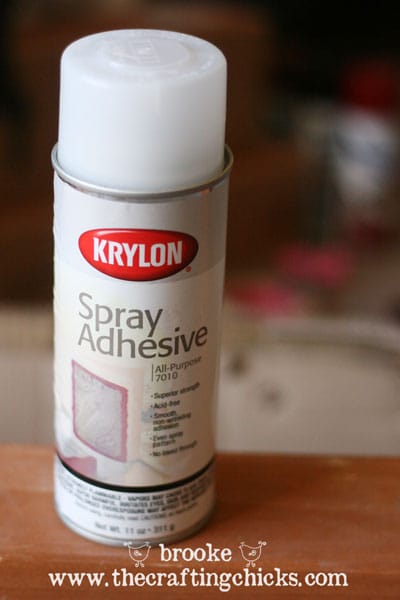
I decided to cover the back of the inside of the hutch with fabric. I found some great fabric at Hobby Lobby, cut it to size, and used a spray adhesive to attach the fabric to the wood.
I liked this sort of quatrefoil look of the fabric. It was a thicker cotton, so it covered well.
The spray adhesive was simple to use and worked very well. I sprayed in patches and smoothed out the fabric a little bit at a time to remove any lumps and bumps.
I LOVE the difference that fabric makes in the overall design!! Then I added the shelves back in, cleaned the glass, and jumped up and down with joy! 🙂
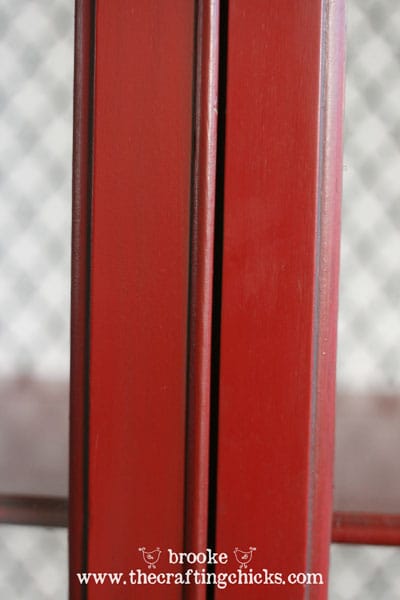
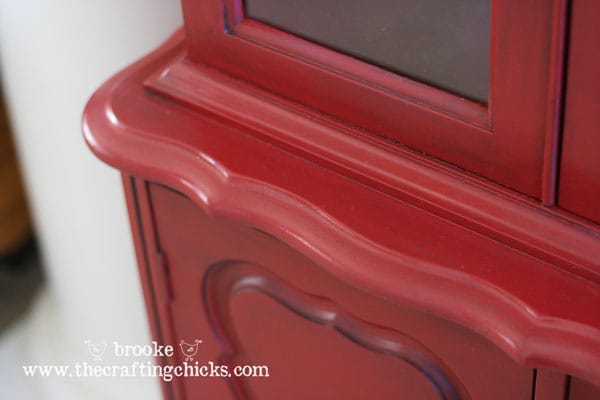
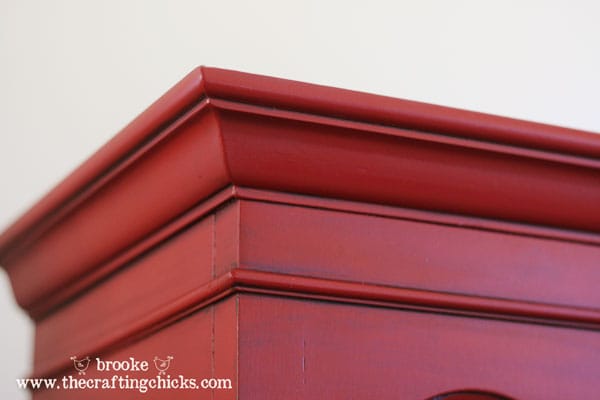
Here are some more before and after detail shots:
And one more time, the overall BEFORE and AFTER:
I ended up using 2 cans of primer and 5 cans of Colonial Red spray paint, and not quite half a can of the Hammered Iron paint for this project. I used a small amount of the glaze and about 1 yard of fabric for the inside of the hutch. Not too shabby! It’s amazing what a little bit of paint and a bit of work can do.
I love the curves and details, the color, the contrast of the black and white fabric, the glaze, everything everything everything!!! Now I can’t wait to fill the hutch with cute things and then start on another furniture makeover!
Linked at these linky parties:


Oh my gosh Brooke! GORGEOUS! 🙂
I have the exact hutch and needed an idea! Looks great! I have the matching table and may give that a go too!
I’m not usually a fan of painted furniture but piece needed something. I love your bold color choice and makes me rethink painted furniture. Well done
Wow, this looks wonderful!
Oh my!!! I love this makeover! Thanks for the tips and links as well. Super, super job!!
Wow! Looks great!
Has your friend asked for it back?! I love it!
Wow! What a transformation. I can’t believe you used spray paint for the whole thing. Nice job~
I almost do want it back! Great job!I love the fabric. It just finishes it. And the upside down drawer pulls. NICE! Now you should makeover the freezer. That’s way ugly!
Beautiful!!! I wish I could have seen this post before I spent a TON of money having a hutch and buffet re-done in antique white at a furniture restoring place!!!
WoW!!!! That is amazing Brookie!
OH MY HEAVENS GOSH TO BETSY SUE!!!! It’s even better than I imagined!!!! WOW!!! I SO want one of those to makeover now…..WOW! Cousin Brooke you are one CRAFTY CHICK!!! I LOVE IT!! I’M shrieking right now!
WOW!! This is stunning!! I LOVE the makeover
That thing rocks! You did a fab job – w/ spray paint no less! I want one too 🙂
I have the EXACT SAME furniture in our bedroom set that was handed down from my MIL {dresser with mirror, side tables, headboard, and highboy}. I wanted to get rid of it, but my husband wanted to refinish. I said, no way, but this gives me hope!
One of my favorite redos of all time. Seriously. It is so gorgeous!
That is so beautiful! I’ve never done a furniture refinishing project, but now I want to try one. Thanks for the inspiration!
That is seriously amazing! A friend was trying to talk me into something similar for my dining room table and now I think it’s worth a shot! Thanks a bunch! =o)
Oh my! That is seriously one of THE best DIY furniture makeovers I’ve ever seen! That furniture now looks like it would cost thousands. So adorable! You’ve totally inspired me to find an old beautiful piece to paint and add fabric to!
Brooke I knew I could expect something this cute comimng from you!! Its beautiful!! I just need to get lucky enough to find a piece of furniture that is cute like that to refinish. I love it, it’s my brithday present right? Lol…. no, seriously!!! 😉
Brooke,
This is soooo GORGEOUS! Just perfect!
Brookie, it looks fabulous! The project is very tastefully done and turned out beautiful! You’re a babalicious!!
That looks lovely! It really pops in that red. And I LOVE that fabric! Great job!
i couldn’t not comment. this is beautiful and super inspiring! I always want to do projects but I always chicken out…you did an amazing job, this turned out so well!
THANK YOU so much for all of your sweet lovely comments. Each one of them has made my day. xoxoxoxoxo
Everyone told me I was crazy to want to redo my hutch in red. Now I made up my mind FOR SURE..
I LOVE this. I’m a spray can convert now. Well done!
I came over via Blue Cricket Design. I’m IN LOVE with your hutch! I have one in my dining room that may be this hutch’s twin. They look exactly alike. Mine is ok, but your’s is GORGEOUS! Just bookmarked your page and am putting this on my To-do list!!! Thanks!
Are you freakin’ kidding me? You amaze and then amaze and then astound. No words. Can’t speak. Must sit down. Love.
oh my word I can’t believe you did that with spray paint!! I have to do that…I have a entertainment unit I’ve been wanting to redo…..I so want to do this! It’s absolutely beautiful. 🙂
i want one
Awesome. I need to do the fabric thing to my hutch now.
Wow! It looks fantastic!
I love the details you give. I look forward to doing my own furniture makeover! You make it look so easy 🙂
That is so dang cute!!! I’m eyeballing my hutch as I type this…watch out you big brown monster! Thanks for the inspiration!
GORGEOUS!!! My craft room is red, black, and white. That would look FAB in there! 🙂
~Lori @ Paisley Passions
Join my Linky Party Thrilling Thursdays
Looks FABulous!!!! That came out so nice! I’ve bookmarked this post as I have been wanting to paint our sideboard in red… now I’m really inspired!
AAWWSOME!!!!
Great transformation! Love the finished look the glaze gives it! awesome job!
LOVE it. Nice work!
I love this! It’s fabulous. The fabric is the perfect touch.
I love it! it turned out amazingly cute> great Job.
Love Love Love Love Love it. I’m definitely going to use this color scheme in my kitchen. I LOVE IT!
Amazing transformation!
P.S. Thanks for stopping by my blog!
I LOVE LOVE LOVE this!
That is a FABULOUS transformation! I love it!
I can’t even believe you spray painted this!!! I love it! It’s gorgeous! The red is so fabulous. Well done!
This is my first time stopping by…found you via All Things Thrifty. What an amazing transformation…you had me scouring Craigslist this morning looking for one of these puppies! I love the red and glazing is perfect. I am very curious as to how many cans of paint it took to do this. I know that red is one of the hardest colors to use, but you have nailed it! Beautiful work!
Hey! found you in the Nester’s tumblr. I made a hutch over a couple months ago that was almost identical, but I painted mine a plain ol’ white. LOVE the red!
OMGoodness!!! I have that EXACT same hutch. Was going to paint it white, with a charcoal gray interior. You have totally changed my mind!!! Red is my FAVORITE color!!! And, my walls, carpet, and trim are the same color as yours. I know it will look PERFECT!!! You did an AMAZING job!!!
It looks great, but aren’t the drawer handles upside down now? Just asking.
can I have one please?!
Stunning! the glaze made a HUGE difference, luv it.
WOW!! What an amazing job! I have seen many of these redone and I have liked them all but, haven’t wanted to go out and find one for myself until NOW!! LOVE LOVE LOVE the red!! Found you through All Things Thrifty! Great job!! oh and I like the handles “upside down” much better also.
It is GORGEOUS!!! I love the color, and cannot believe you did it with spray paint. Hooray for you! I am your newest follower 🙂
Oh my goodness….that turned out gorgeous!!!!!! I am completely in love with it…especially the red color!
I’m new to painting furniture and I’ve been working on a side table for, oh, I don’t know, FOR.EV.ER! I never thought to use SPRAY PAINT on furniture! I use it on everything else. I have a little cabinet I just picked up off Craigslist that I know has gorgeous potential, but have been dreading painting it because of my side table nightmare, but I’m going to try your technique!! 🙂
WOW, just beautiful!!! Now I love spray paint but I *never* would have guessed that you used it on that beautiful piece of furniture!!
That is amazing. I just love the glazing on it. Great job!
Wow that is amazing – I can’t believe you sprayed the whole thing. I’m doing a similar project right now. I have to say I’m rethinking my method of hand painting. I totally know what you mean about pointer finger death. It hurts!!!
Thank you for this amazing tutorial, great job!
So beautiful! I would never have guessed you did that with spray paint. What a lovely piece for your home.
STUNNING!!!! do you know i just passed up an almost identical hutch at the sal army–for $5! FIVE DOLLARS!?!??! i could kick myself now. you know, i think i will kick myself.
OMHeck this is astounding- I love this so much. I really do.
This one REALLY makes me want to get to work on a buffet & hutch I have out in the garage.
Love your blog!!!!
This looks ridiculously amazing! The red is so bold and I’m not sure I would even put anything in there. Well maybe some gorgeous Kate Spade china. But I love love love it!
What a great transformation and what a great post. I LOVE the red!!! Love it. I’ve been thinking of painting my table red. I think this seals the deal on that. Red it is.
Thanks for all the great tips.
Thisis absolutely wonderful!!! And your step by step process is great!!!! I am getting ready to do my grandmother’s old hutch too (looks very similar to this). I have one quick question….how much sanding did you do to it in the beginning? I have an electric sander and I am worried about exactly the amount of sanding it needs….did you need to do a lot, or just enough for the primer to stick?? Thanks so much! Amazing job!
WOW WOW WOW I LOVE LOVE that hutch!!! its exactly what I want for my room 🙂 you have done a GREAT job !!!!! book marking it so I can copy it 😉
This piece is great, way to go!
I absolutely love it!!
I have the same exact hutch that was my Grandma’s, and am really wanting to pain it like you did.
I love red in my house. 🙂
Absolutely amazing! Great Job!
stunning! love it! I’m featuring you in a post tomorrow about buffets/hutches on crazydomestic.com. feel free to grab our “I was featured” button!
This finished piece is absolutely fabulous…such inspiration!
(just one side note…did you intentionally put the handles back on upside down?)
Alrighty then…I have egg on my face…that’s what I get for not reading every single word of your post (I’m very much a visual person)
If you like those handles upside down…then upside down it is!!
my apologies 😉
You did such an amazing job!! My oh my, I never would have envisioned the after look – so gorgeous! Good for you, I’m sure it looks completely wonderful in your pretty house!!!
Brooke, THIS.IS.AMAZING!!!!! Is there anything you can’t do perfectly? I saw you on Channel 2 a few weeks ago and you awed me then too. Your family is so blessed to have you and all of your “skills.” (in the voice of Napoleon)
I just found your site from All Things Thrifty. Love, love, love the transformation. I’ve been shy about glazing because I’ve seen quite a few pieces of furniture glazed and the after glazed furniture seemed rather splotchy, especially when performed on light furniture. Your piece is so tastefully done and the hutch is gorgeous!
Thank you so much Monique! I’m so glad you found us! 🙂 I was scared about glazing too but it ended up being okay. If I made a mistake I just repainted that part and it worked out! Have a great day.
I-N-C-R-E-D-I-B-L-E!!!
LOVE IT! I am dying to know how many cans of spray paint you used? I am planning on doing the same thing to this puppy…
http://richmond.craigslist.org/fuo/2405353075.html
I absolutely love this! It looks amazing!
I love what you did with the hutch! I am planning to attempt to do the same thing to a hand me down I received. How long did it take you and how many spray paint cans did you need? Any help is appreciated! Thanks 🙂
Hi Jennifer! Thanks for your sweet comments about the hutch. I’m not sure exactly how long it took me to finish the project because I did it a little bit at a time over a period of several weeks (I have 3 young kids so I had to do it in spurts!). I ended up using 2 cans of primer and 5 cans of Rustoleum Colonial Red spray paint, and not quite half a can of the Hammered Iron paint (on the handles) for this project. Hope that is helpful to you! 🙂
How do you get someone to give you a hutch? I have been looking one for months on the cheap, so I am aobut to give up the ideal of every finding one and I am looking through the older post on ya’lls blog and I see this!! Awesome! not sure I could handle all that Red but you rocked it out!! New hope that I will find one, and hopefully soon!!
I am so excited to find this! I have a vintage 1930’s walnut veneer bedroom set that I want to paint and this is exactly what I’m going to do! Thanks for the step by step instructions! Love the use of the glaze!
I would LOVE to get my hands on an old buffet/hutch for my dining room too!
Wow wow! Love! A quick question?? Do u apply the glaze to the entire piece or just the accent spots?
Im doing this exact project right now! I love it! Thank you for the directions! It’s so easy and a magical transformation!! 🙂
Just snagged our second china cabinet project the today. I’m going to use your tutorial this time. I love what you’ve done. I found the link to this on pinterest. ~Megan
The Red is SO prettty. I love pops of color like that on traditional pieces.
This looks awesome! You did such a great job!
Hello! Love what you have done with the hutch! I have an old one too and would love to repaint it! Thanks for great steps and tips on how to do this!
Well done!
Thanks for sharing!
Colette
I ‘had’ that exact same hutch and wanted to redo it in red but it seemed overwhelming. I ultimately sold the hutch to someone who was going to redo it. I still have the matching buffet that I am going to re-do just like this. LOVE your results!
Thank you for sharing!
~Mary Ann~
I am so happy that I saw this post, I bought a china cabinet at the Salvation Army and was excited to refinish it like I did a small cabinet I the kitchen. I picked red and loved it in the kitchen. I have not finished my china cabinet because I was afraid the red would be to bold, on such a tall piece of furniture, after seeing your pics, I think my mind is made up. I was leaning towards a green color but love how goes looks in red. Funny thing is that my china cabinet must be the same maker because it looks very similar.
Oh, I’m so glad I convinced you. 🙂 I still completely love my red hutch even though it’s been quite awhile since I painted it. Do it, you will LOVE it!
I chickened out, my hubby really wanted green. So I did green with rubbed bronze hardware and an antiquing finish in a dark brown. The green really goes better in my living room anyway, so if I ever get a bigger house and kitchen I will just redo it again with red. Thanks for your inspiration. I’ll have to see if I can post you a pic.
Brooke! – this is EXACTLY what I want to do with my gorgeous dining hutch, table and 6 chairs! What a fantastic tutorial. I need some advice though…I live in an apartment so I’m wondering where you did your spray painting and how long you had to leave it to dry between coats. I do have a garage and a small patio but spray blow-back/around is a big concern. Can this project be done with paint brushes vice the spray?
Love the tutorial and your results. I am starting it on the Craigslist hutch I just picked up and wondering how the paint has held up? Any suggestions/tips since its been a couple years? Would you recommend using a protective finish? Thanks! It’s a great looking piece!
It’s held up beautifully! No problems at all. I didn’t put a protective finish on it, but it’s not in a super high traffic area of our home. Otherwise I would recommend putting some sort of finish on it, like polyacrylic. Good luck, and have a blast redoing your hutch!
EXCELLENT, EXCELLENT advice! Thank YOU!
I followed your instructions, used the same type of paint can holder and was **very** pleased with the results.
Your instructions and helpful hints were the best I’ve seen on the internet!
Julie
Just wondering if you put glaze all over the product or just in some spots? I am going to makeover a hutch and love, love, love the one you did!
Brooke
This is fabulous – I don’t know if I can ask questions here but I was just given a cabinet that is extremely similar to this and i wanted to make an antique white color and would love to use a dark glaze like you did on top. Do you think this would work using the process you used? Did you sand the cabinet first? You did a fantastic job on this!
Thank you!
Great instructions! This is exactly what I want to do with my old china cabinet. I was researching how to get that finished look and after reading through your instructions, I learned about the importance of glaze, so thank you!!! I also love the idea of adding a fabric background. Would like to know how many cans of spray paint you used.
Pretty outstanding job. Wow! I hope I can transform things like you do. I am in love with this piece!
Hello,
I found this on pintrest and its exactly the color I wanted for hutch. Mine is the SAME exact hutch I got from my grandmother. I also have the table, chairs and buffet server to match. I am very excited for my project. Thank you!
Awesome, Annie! How fun to have the whole matching set, I’d be so excited! Good luck with your project!
this is gorgeous! Did the spray paint have a very strong odor? (was it overwhelming when you put it in your house?
I love this hutch grat job! I am doing asmall one with Colonial red with paint brush you gave me some great ideas for mine thank you!!!
I have the same hutch that was my grandmother’s and was looking for ideas!
I can’t wait to refinish it now. Thank you for the awesome idea!