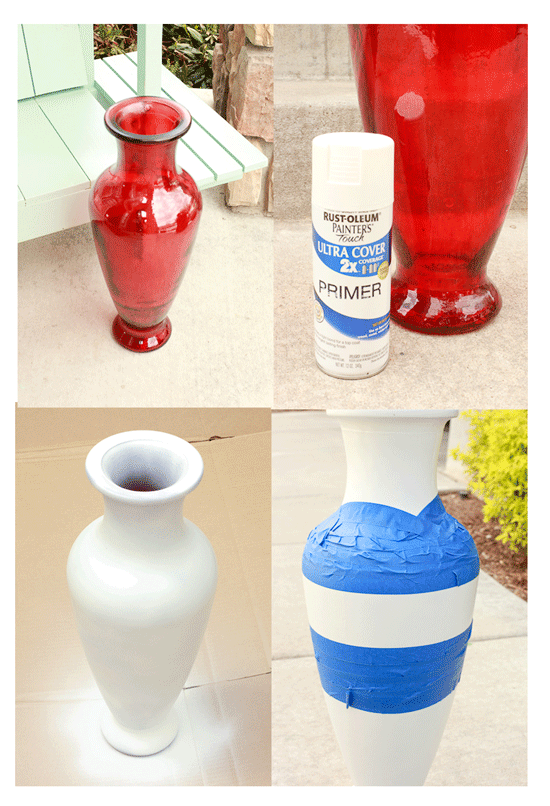
1. Choose a vase: mine is about 30″ tall. I’m sure there are rules to use spray paint on glass, and I pretty much abandoned them. I really like the Rust-Oleum Primer. It seems to cover VERY NICELY. The matte finish spray will give you a nice finish. Three coats of primer was perfect. I then put a sealer on top of the primer since I didn’t need any more spray paint on it.
2. Tape & Paint a Stripe: **TIP**: It’s tricky to tape a straight line on a piece with curves. One of the ways to do this is to measure from the top of the vase and tape, then measure to the spot where the second piece of tape will lay and tape. This way your line will be straight. When using painter’s tape on a line with edge that tapers in, use the very edge of the tape until you take it all the way around your piece. After this is done, push the lower side of the tape that isn’t touching the piece all the way down.
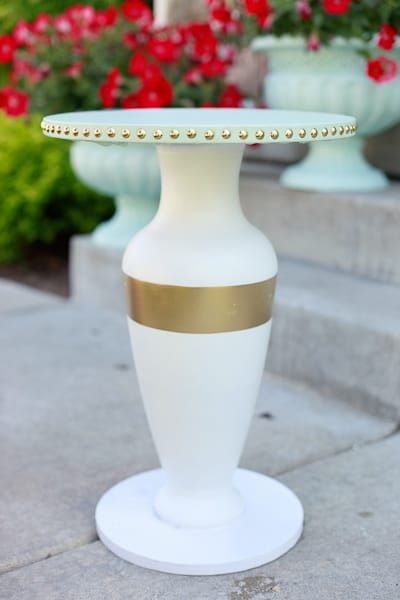
3. Gold Spray Paint: It’s hard to find a gold spray paint that is actually metallic. The one I found was perfect. It’s called Rust-Oleum Specialty Metallic spray paint (GOLD). It’s more of a matte metallic, which is exactly what I was looking for. I think there’s a find line between white trash metallic gold and awesome sauce gold.
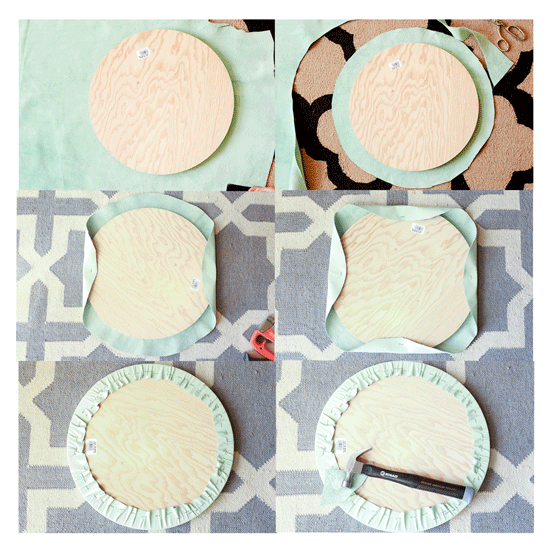
4. Leather Table Top: I used a piece of hardwood plywood that is 14″ in diameter. You could really use a variety of materials to cover the table top; I chose leather since I already a piece of it and it was absolutely the perfect color. If you remember my LEATHER TRIBAL FRINGE WALLET, I used the same leather for the table top. A couple tips:
- Cut the leather piece 3″ larger than your piece of wood (depending on how thick your wood is, mine is 3/4″).
- Use an industrial stapler and pull opposite sides (shown below) and staple so it stretches in all the right directions, otherwise, you would have the leather pull in strange places. Brooke from ALL THINGS THRIFY taught me that awesome crap. Thanks Brooke!
- Move around the piece until you have many opposite sides stapled then finish them off so it is stapled all around.

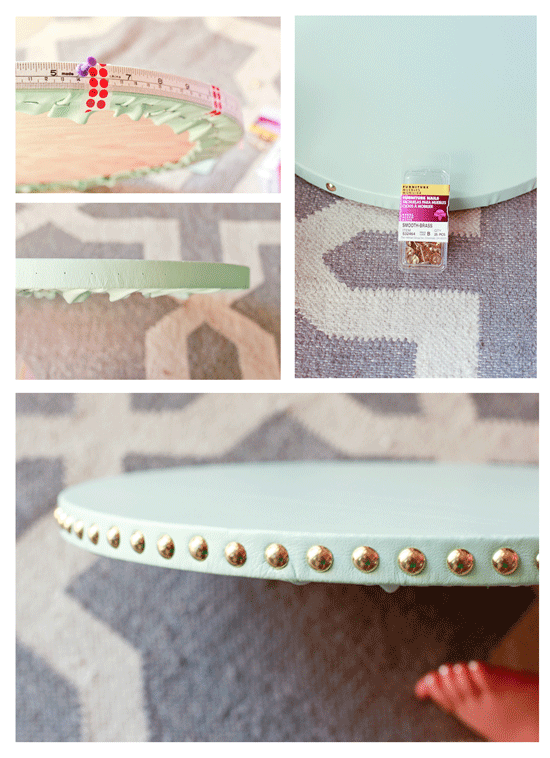
6. Glue the wood pieces to the vase. (don’t you love those little toes in that picture above) For this part, use E6000 generously. I will find out how great of an ideas this was in a couple months when it either falls apart or stays strong. I like E6000 because if you give it enough surface to adhere to, it will stay put for life. Also, it’s a great glue for glass, wood, plastic and a multitude of other materials. I think this time it’s pretty sturdy.
Sometime I know people cringe when nice wood is painted over or pretty glass, like my DAD, but I can’t help but think that it’s fun to make something I totally had no use for, into one of my favorite furniture pieces in my house.
HAPPY DIY-ING!
xoxo, KIRSTEN


Very crafty…love it!
That is gorgeous, I am just discovering my love for repurposing/upcycling/renovating old things.
SO IMPRESSED!!!!
Now I have a great idea for all the tall vases I see at thrift stores! Thanks!! 🙂
I love your courage! The table looks great, too!
You are very creative Kirsten!