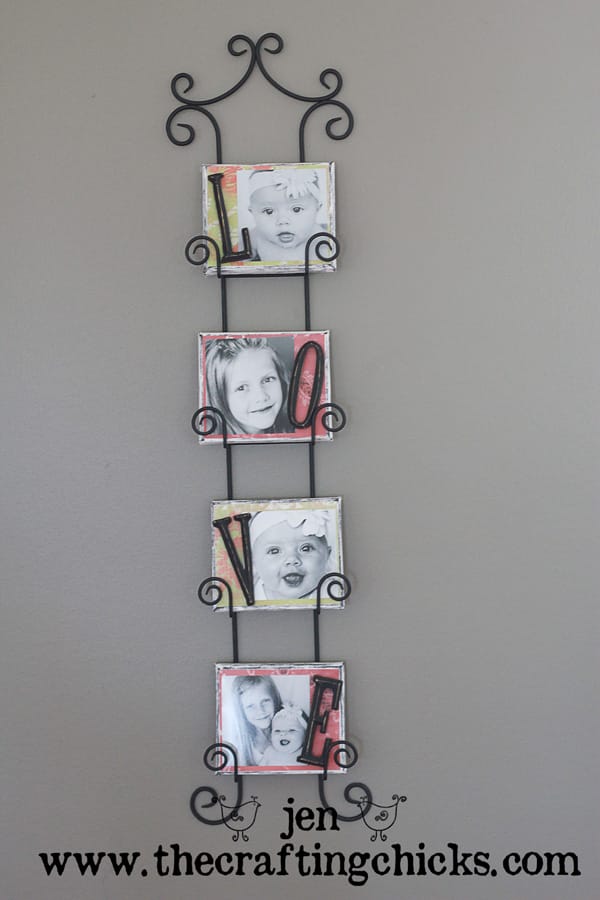
I love canvas! 🙂 I like to do all sorts of fun things with it (and there are a lot of fun things to do with it!). I also love photos (especially of my beautiful kiddies!). I wanted something fun using canvas and photos for my girls’ room. So I made this:
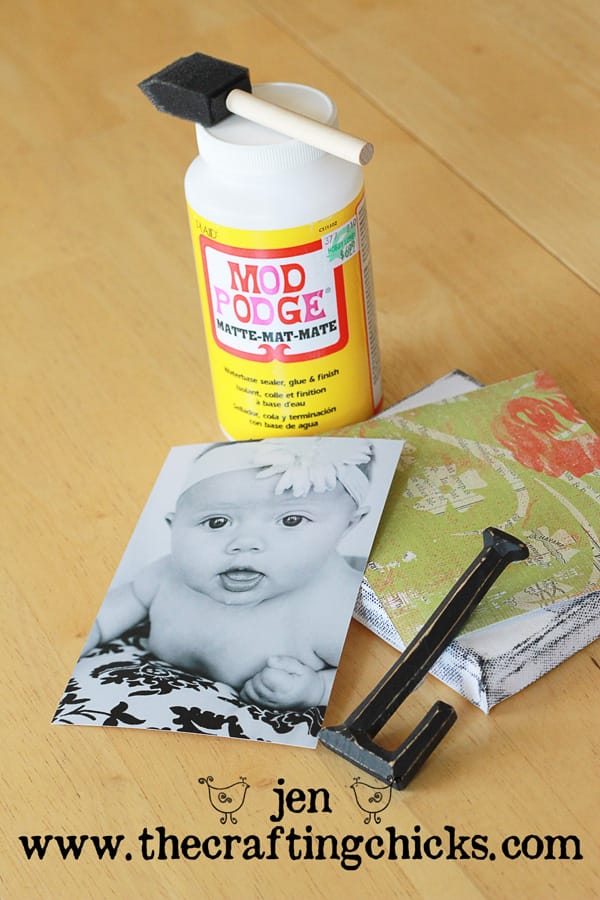
For this cute canvas photo wall hanging, you will need: canvas(I used 5×5″ squares), two pieces of coordinating scrapbook paper, Mod Podge, black distressing ink, black paint, 4 photos of your beautiful loved ones :), and wooden letters L O V E .
I cut 4 squares from my scrapbooking paper (2 from each pattern), next I Mod Podged a piece of the paper to each of my canvas squares. I inked the edges of my canvas before Mod Podging, but you can do it after you put the paper on or not at all depending on the look you want. 🙂
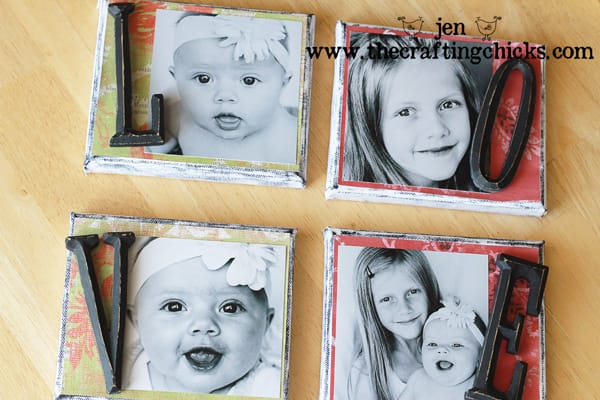
I cut each of my photos to fit on the paper with enough room left to put my wood letters on. I stuck my photos on and then hot glued my painted letters on the canvas. I chose the word LOVE, but you could do any word you like. 🙂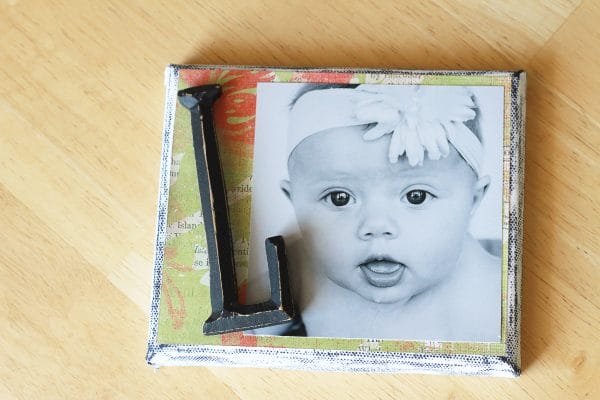
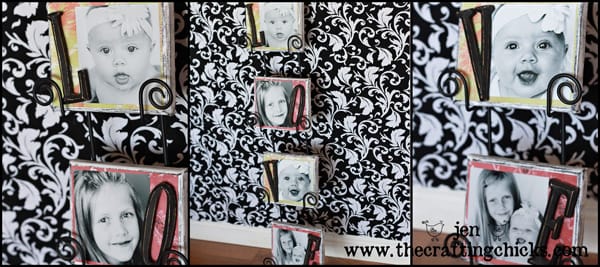
I hung mine on a plate rack. You can get them at most craft stores or the absolutely wonderful Tai Pan. You can also embellish them with fun things like flowers, jewels, ribbon, or cute little quotes.
I would love to see some of the neat things any of you fabulous folks have made using canvas! 🙂 E-mail us some of your fun canvas projects!!!
Other adorable projects using canvas from The Crafting Chicks: Jamies darling Monogram Wall

I absolutely love these!!!! Beautiful!!!!
I love these! your daughters are beautiful.
~Makalani
That is super cute!
This is AWESOME. I’m bookmarking this page so I can copy you at some point. Thanks!
http://spontaneousday.blogspot.com
SUPER CUTE! I like the plate rack idea too! I do a TON of mod podged stuff on my blog!
http://swainstonvinylanddezign.blogspot.com/
OK, this photo freak LOVES this project! Great job!
What a great idea! I love the letters you added too! what is black distressing ink? Like stamp ink?
Thanks! Distressing ink is just an ink pad that comes in some really cool colors. There are vintagey ones and ones to make something looked burned, and lots of others. You can find them at any craft store. 🙂
Wow, I absolutely LOVE this project! So adorable!
Thanks ladies for your sweet comments!!! I’m so glad you liked my little project! 🙂
This is so incredibly adorable! I LOVE it! I love the black and white photos for effect.
http://www.makingmemorieswithyourkids.blogspot.com
Oh, this is simply fabulous.. I LOVE!!
This is so darling!! I know exactly where I am going to put mine. I LOVE your blog and every day I look forward to what craftiness you girls are up to.
I love this idea! It’s soooooo stinkin’ cute!
I featured these on my friday favorites!!
http://lilbitofus.blogspot.com/2010/07/friday-favorites_30.html
Are you serious?? This is AMAZING! I am going to go do this RIGHT NOW for my daughter’s room. Only I’m going to do her name S-A-R-A-H and pics of her through the years. CAN’T WAIT! Love this blog!
So cute – the canvases and your little ones!
Wow what a great idea…I like it
Your imagination is reflecting in your home decoration. A simple canvas art gives your home a unique look and feel………..Thanks for this cute idea….
Aww! I love this idea sooo much! Thanks tons, I’ll be linking.
These are crafty and cute at the same time. I absolutely adore these! I will have to do this. What a great gift idea, too!
I LOVE this and know exactly where I want to put one. Only problem is, I can’t find a plate rack for four items anywhere! I’ll have to check the website you mentioned.
Okay, I checked the Tai Pan site and we don’t have a store anywhere near here. Do you remember which craft store you found the four-plate vertical rack at? I REALLY want to make this project! 🙂
Hi Cheri,
This plate rack actually came from a craft store in Utah called Ben Franklin Crafts. I think they are only in Utah. But lots of other craft stores carry them. I would try Micheals, Hobby Lobby, Joanns, or Roberts. I hope that one of these is in your area!:) E-mail us a photo when you get it finished, I would love to see it!!!:)
Thanks, Jen! I checked HomeGoods, Michaels, and JoAnns and didn’t find a four-plate version. I’ll check Hobby Lobby next weekend when I’m near one. If I can’t find a four-plate rack, I’ll use individual holders with lots of coupons. 🙂
Such a cute idea! I hope you don’t mind I shared it on blog!
How do you attach the photo once you’ve put the scrapbook paper on with Mod Podge? Do you also Mod Podge it or do you hot glue it on? Thanks!
Hi Beth,
I just used permenant scrapbook stickies to stick them on.
You could use pretty much anything probably to stick them
on. I like the stickies because they are not messy and they
work well at keeping the photo stuck on there. 🙂
I LOVE this project. I stumbled on your blog and it is adorable. I have a quick question, how did you get the edges of the canvas to look like that? I know you used ink but how do you do it? I am a sort of newish crafter so sorry if my question is a teeny bit lame. 🙂
Love this project! I am like Jaclyn and would like to know how you get the edge of the canvas to look like it did.
I featured this project on my blog today, hope you don’t mind.
xoxoxoxo!!
http://www.peaceloveapplesauce.com/2011/01/things-to-try-thursday-love-canvas-wall.html
I absolutely LOVE this idea!!! Adorable! I am thinking about teaching our 4-Her’s how to do this project for Arts and Craft Projects at the fair this year. Thank you so much for sharing your idea!!! 🙂
Hey, My name is Laura and I blog about tips for displaying printed Instagram photos. I have been doing lots of looking around to find unique ideas and I just want to let you know I love this idea! I love seeing the crafty ideas that people create to display their photos! thank you for the inspiration and thank you for sharing.
Where did u find that rack, I need one like that?