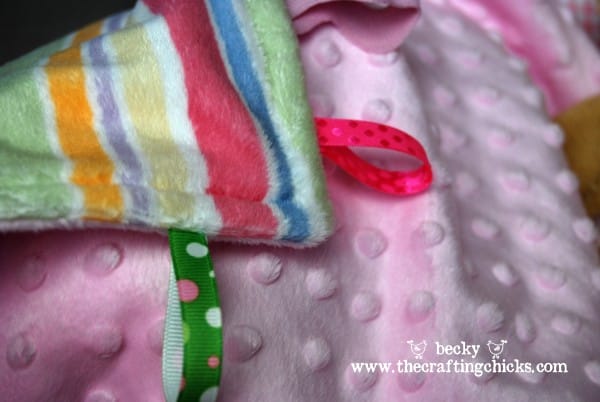
One of my cute friends gave me a blankie like this after I had my second baby girl. My little E loves it still. I thought it would be a fun thing to make for my new little niece, and it just so happens that when you make one, you will end up having enough supplies to make around 3. 🙂 Here’s what you need:

- Minky fabric (I made each of my blankies16″ x 16″ and used a solid pink on one side and a cute strip on the other side. I have seen smaller and slightly larger blankies.)
- Ribbons (I got a yard of 6 different ribbons for 3 blankies)
- cutting board and scissors or rotary cutter
- sewing machine
- thread
- straight pins
To begin, I cut my fabric into the size I wanted, the 16″x16″.

Next cut your ribbon to 6″ so that when they loop they are big enough for a baby to hold onto.
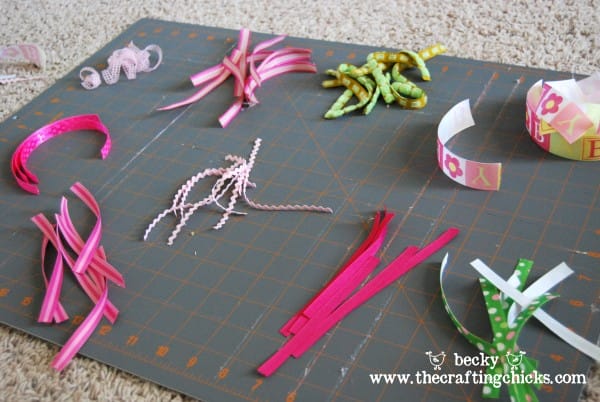
Take the ribbon and fold in half and start to pin on the edge of the blanket, placing the loop inside. I had 6 different ribbons on each side. Make sure to use different textures for those little hands and fingers to touch.

Next, take your other piece of fabric and place on top, wrong side facing in, and pin away.

Sew a straight line around the blankie making sure you leave an opening so that you can turn it right side out.
![]()

Once you have sewn around the whole blankie, leaving your opening, pull the blankie threw the opening and turn it right side out. Make sure that you have sewn through all the ribbon so that it is secure to the blankie.
Once it is right side out, pin the opening shut and do a finish stitch around the whole blanket so that you don’t have to hand sew your opening shut. (I hate doing that.)


Take your blankie off your machine and clip the loose string and you are done!
![]()
You can now be amazed at your handiwork! Now ship this baby off to let some of those cute squishy fingers enjoy it!
xoxox
Becky

I love these little tag blankets. I’ve seen people even sew plastic grocery bag in the layer to give it some krinkle when those little hands play with it. But it might be nice not to have the extra noise for church!! Thanks!!
Is it bad that I want one for myself?!?!? Those look so cuddly and make me want to take a nap!
Love this! Gotta make one for each of my baby girls, Kaseigh, 2 &1/2, and Ryleigh, 9 months and my oldest daughter,19, is expecting my first grandchild in July so I am anxiously awaiting the gender before I start any sewing projects for that one. These are adorable and seem so quick and easy to put together plus it uses up all those ribbon scraps and odds n ends outta the scrap shoe box! Thanx for posting this.
SO cute Becky! I love the colors, I need to make one of these for my Lily P. 🙂
Oh my goodness! This is wonderful! My girl would have loved one of these when she was a baby. She was always chewing on the tags of washrags. 🙂
I made one of these a few months ago for a gift and I sewed in an empty chip bag to make a fun krinkle-ly sound for babies. It was a hit and just one more step.
Super cute!
I’m going to have to try to make this! Thanks for the tutorial!
Very cute. I made some and a friend asked me if they met the safety code for children because of the possibility of toxins in the dye in the ribbon . I didn’t know how to answer. I contacted Offray ribbon, without a response. I really hadn’t thought about this before, and none of us wants to do anything to harm a baby. Do you know anything about this, or who I should ask? Thanks, Ginger
Yikes! I never thought about that either. To be honest I haven’t had any issues with my girls and the ribbon. I don’t even know where to start looking to find out. Sorry I’m not much help.
Becky
Love this! Thanks for the easy tutorial! This is first on my list for my best friend’s second baby, and I can’t wait to use your tutorial to get started!
I just want to add one thing for all the novice sewers out there (like me!) – minky is a little bit tough to work with, in my opinion, especially if you are just getting started and don’t have much experience. It slips and slides and it’s thick, etc. I just recently sewed with minky for the first time, making a nap mat – at my mom’s suggestion, I invested in a walking foot for my sewing machine, and it made things so much easier! Just wanted to add that info! Thanks again!