
Hi friends! I’m here today showing you how I took an outdated brass chandelier and turned it into a unique and awesome chandelier cupcake stand for Halloween! I love trash-to-treasure projects.

I found an ugly brass chandelier at the thrift store for $5 quite awhile ago (I couldn’t find my own “before” photo so I used a sort of similar one from here) . I was thrilled because I had come up with the idea that I wanted to turn it into a unique cupcake stand. Fast forward way too many several months of thinking about it and I finally started working on it! I took the chandy completely apart–which was strangely scary at first but then sort of liberating! 🙂 Pulled out all the wires and bits and pieces and basically made a big mess in my kitchen. Then I primed the parts and spray painted them all with a glossy white paint.

After the paint was dry I started putting it back together, making sure that the base was flat and that everything was level. I used six 6 1/2 inch thin wooden circles (found at Hobby Lobby for about 75 cents apiece) and a larger 10 1/2 inch circle (around 99 cents) for the center piece. I painted the circles with glossy white spray paint as well. You can use your favorite strong adhesives, such as E6000, hot glue or gorilla glue to hold it all together. It was kind of a pain to configure everything, I’ll be honest. But it worked out. And I didn’t completely lose my sanity.
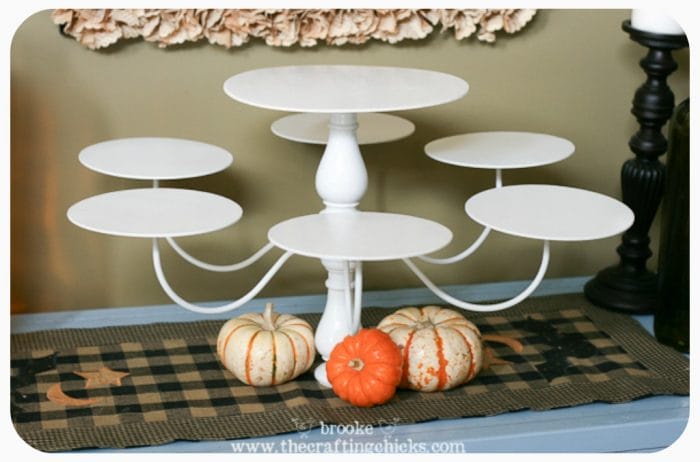
Here is my plain chandelier cupcake stand! The thing I love about it is that you can keep it simple or you can change it up for whatever party/event you have. Since Halloween is near, I decked it out with orange and black to dress it up!
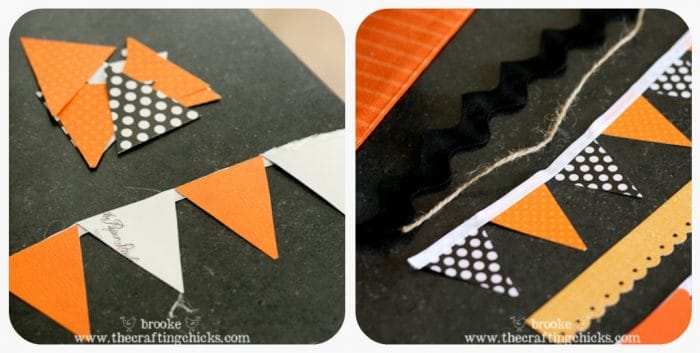
I wanted to make a few different borders around each of the circles, and since I am still in love with banners and pennants and scalloped edges, that is what I went with! I used some border punches for the scallops. I made a simple mini pennant by cutting out small triangles from patterned paper and hot gluing them to some thin ribbon. Loving the jumbo black ric rac too. Oh, and the pom poms! Easy.
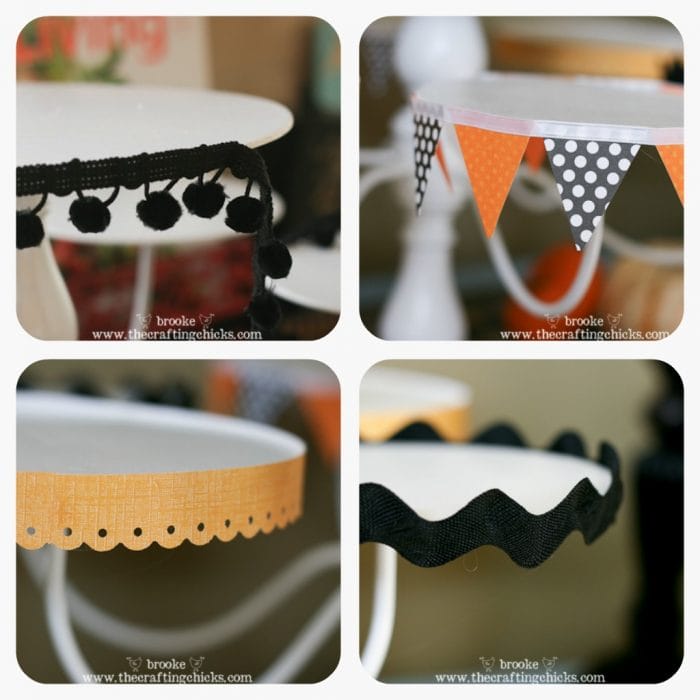
I made sure to use teeny tiny drops of hot glue to hold the trimmings onto the wooden circles, this way I can remove the borders and change them up for different holidays or parties. Maybe you could use velcro too?

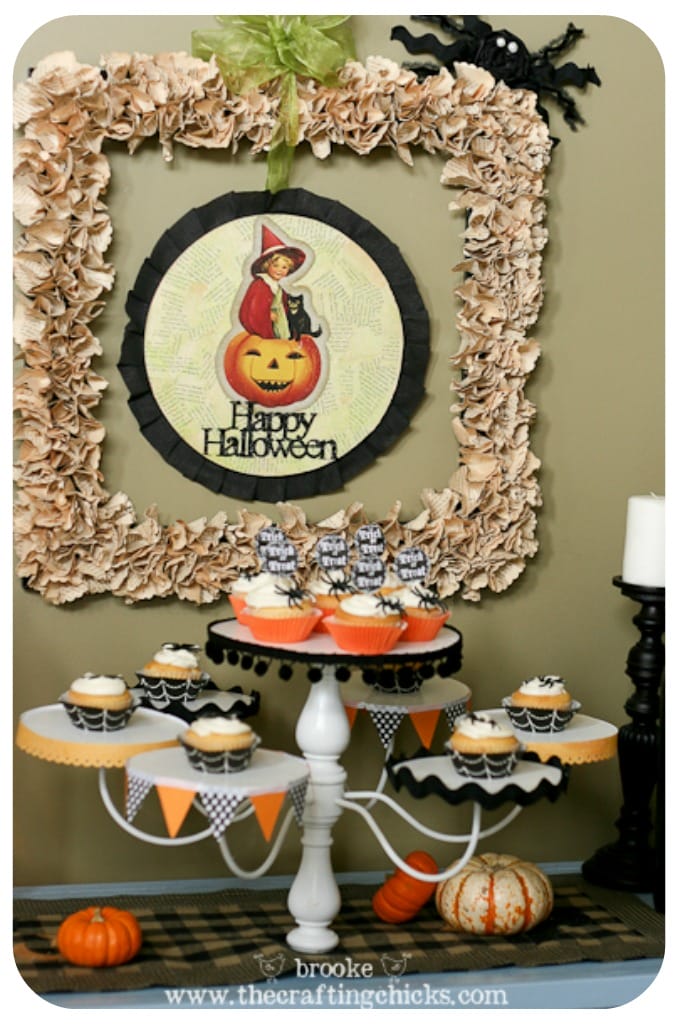
Now we’re looking festive! The last step was to load her up with some delicious Halloween cupcakes. I’m loving it! My family was loving it too. 🙂
While I like the simplicity of having one cupcake per small circle, I found that I could fit about 3 cupcakes into each of the smaller circles, and 6-8 cupcakes on the larger center circle. Or you could put one main cake in the center and smaller cakes on the outer circles. Lots of options here!
My chandelier-turned-classy-cupcake-stand!! (Right by my Square Halloween Wreath from last year that I still love.)

Now, to eat those yummy cupcakes! 🙂
ETA: I have a larger base that I’m adding to the bottom to help with stability. I realized this after I had taken all of the photos for this post. 🙂
**** Wanna hear a sad (but sort of funny now) story? While I was taking all of the photos for this post I accidentally knocked the stand and cupcakes all over and got frosting every.where. I had a mini tantrum and then hurried and cleaned it up and got back to taking pictures. Neat, huh! (i was so mad) The larger base will help now!! ****
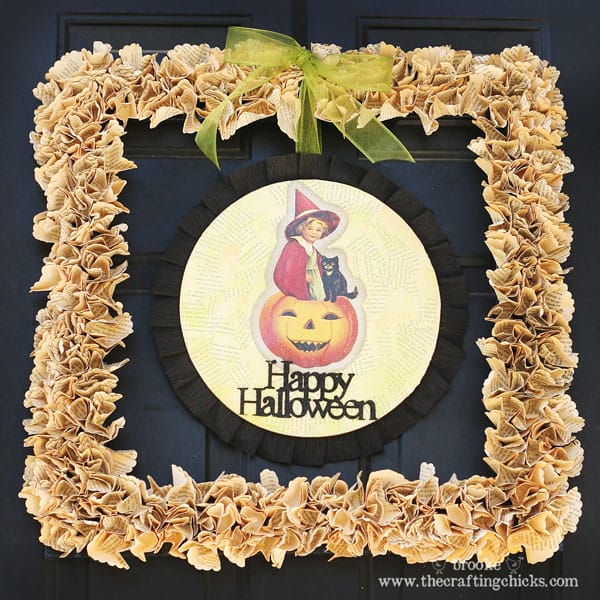
You can find instructions for the vintage square Halloween wreath here.

this is so totally cute! I’m on the hunt for an ugly brass chandelier now!! love it, thanks for the idea!!
LOVE this!!! That is absolutely adorable!!
One of the coolest cake stands ever! Genius idea Brooke. Oh, and you and Kirsten did a fabulous job on Get a Little Creative, so fun to watch you!
Thanks Kari!! 🙂 We had lots of fun doing the show!!
So neat! This would be cute for so many different holidays and events!
Oh I just LOVE it! I bet you could add a large base to make it more stable. Great idea!
Yes, I actually am adding a larger base to stabilize it better—just not in time to take the photos for this post. 🙂 I think that will definitely help. Thanks!
SO cute! It does look like it would be eadsily tipped over….I think I’ll get one more wooden circle and screw it in to the bottom to help keep it steady.
I saw that tipping coming as I looked at the pictures. How about one more big, one smaller wood circle. Paint, stack, glue on bottom.
Thanks, good idea! I actually already have a thicker wooden circle that I’m adding to the bottom that will be great. Yeah, I was so involved in this project that it didn’t hit me until I knocked it all over—of course it needs a bigger base!! Ha ha! Sometimes I like to learn things the hard way. 🙂
Absolutely love this idea but as soon as I saw it I wondered about it being tipsy – or easily falling over if it got bumped ~ then I read that last comment you made where it DID happen! Definitely would add a base to it to add stability – you could even make the base large enough to set MORE cupcakes out on it, so it would be a win-win situation! Now I am going to be looking for discarded chandeliers!!! 😀
Yep see my previous comment. I have a larger base that will help a ton. I love the idea of being able to add more cupcakes too! 🙂 Thanks!
Just had another thought while looking at your step-by-step photos again…if you make another one of these (or decide to re-make this one) how about turning it ‘upside down’ when you reassemble the pieces and the ‘top’ could be your base and you would turn the ‘arms’ upside down so that they are still facing up…would this work?
Good idea, it depends on your chandelier. I actually did try that but had a really hard time moving any of the “spindles” or whatever they are called. I think they were sealed in really tight and wouldn’t really budge. But maybe that would work on a different chandelier. Thanks!
Ok, this is genius! I need to hit our thrift store! So clever!
Jo-Anna
This would be a great display for Christmas cookies…it’s not too early to be thinking about that, right?
What a fantastic idea! It looks amazingly cute.
Oh wow, what a wonderful idea! It looks beautiful.
I love your cupcake stand! I made the wreath last year! You have once again inspired me. I will be on the hunt for a chandelier.
I love this site, I am a new follower. What a fantastic idea, great job!!
OH MY HECK! Brooke! You’re SO amaze me! So freakin awesome!
M
That was supposed to be you’re so freaking awesome and you amaze me! Got to love when kids interrupt me while I’m typing 🙂 wink wink
Adorable!! I shared it on my TT&J facebook page 🙂
xoxoxox
Jen
What a great idea! I have an old chandelier that I was saving for something! I also use old recycled CD’s for bases. That is fabulous (I guess since Christmas is near, I’ll do a Christmas theme one). Thanks! You inspired!
Love it! I just pinned it as well.Thanks!
WOW! Amazingly creative.. I just love it. If you start selling them, I will buy one.
Wow, what a wonderful idea…pinned! Thank-you so much for the awesome tutorial!
What a cute idea! I see these chandeliers all the time and would have never thought to do something like this. Thanks for the visual of the frosting everywhere! lol!
Very fun idea!
HOLY MOLY!!! I love it! AMAZING! xoxo
I was also worried about the base before I got to the end of your story and saw the comment that made me feel sane (I have mini tantrums too and wondered if I was the only grown woman that did this…but I’m far older than you, dear-I could be your mother!!) and had to laugh-nothing you CAN do but just go ahead and have your little “fit” or “tantrum” and I NEVER curse-until something like this happens-and I only use the D— word, not so bad but just not like me to curse at all!! I have my sometimes way more than “mini” tantrums and then have to get over it and then it takes awhile, but sooner or later I CAN look back and laugh about it!!
I’m REALLY GLAD you got a study base for it-b/c I could just see you having a house full of admirers looking at it-and have it fall over by some kid bumping the table-or worse-your own self bumping the table & nobody to blame but yourself…I always like to have somebody else to blame, though!! See? I’m STILL a child!! Want to say to a kid-YOU DID IT..not me!! They say “Nuh-uh” and I LOVE to say back “Nuh-uh” just like my sisters and I did as children!! I guess it’s sometimes not good to ever grow up!! I would NEVER say that to someone else’s child, though for fear of being strung up somewhere-after all this IS Texas we live in!! lol
I LOVE the stand and really want to make one now with some crystal beads (clear of course) strung from one side to the other for a very fru-fru looking one now!! It can STILL serve for EVERY holiday….I love “bling”….just as much as the next person….and can find a way to use it casually or formally!!
Great work and great idea and thanks for the funny story that makes me feel human!! 🙂
De3e
I LOVE THIS. SO creative.
such a clever idea – love all the different way each tier is embellished – I’m sure I must have one of those chandeliers in my stash somewhere….
I love this cupcake stand idea and would like to feature it on my web site. It’s so creative and fun!
wow, I have that same ugly chandelier in my dining room and can’t wait to change it- I was going to throw it away – now I know what to do once I change it. thanks for posting this great project.
that is a really cool idea that i would have never thought of. now i wish i would have kept the chandelars that i had.
I am a big fan of upcycling and this might be one of my favorites to date! I’ll have it on my FB!
Looks great! I, too, was really worried about the tiny base without something wider there. Then I read the little tidbit at the end and felt your frustration! I hate when things like that happen! Grr!! I’m glad it’s all fixed now and I’m sure it looks even better! Very nice and what a great way to upcycle something in a really cool way!
looks great!
Liz from Cakery Creation
https://www.facebook.com/Cakery.Creation