• Skip to primary navigation
  • Skip to main content
  • Skip to primary sidebar
  • Skip to footer

The Crafting Chicks

Ideas and Inspiration to Create Your Life.

  • Home
  • Meet the Chicks
  • Advertising/PR
  • Contact
  • Blog
  • Printables
  • Recipes
  • Holidays
  • Life
  • Sewing
  • More

Kids

Homemade Instruments

by Jamie · on September 6, 2010 · 13 Comments ·

1546 shares
  • Share
  • Tweet

DIY Music Instruments | Kids Activity

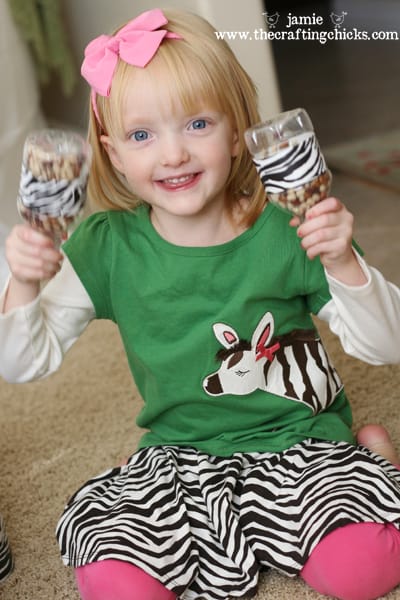
Make Me Some Music!  I made some homemade instruments for my kids and wanted to share! They were a big hit.

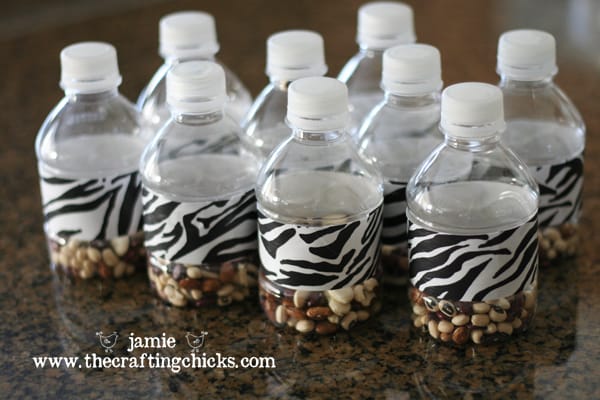
First, you need to gather some cute 12×12 scrapbook paper (I have been on a zebra kick lately if you couldn’t tell:), a paper cutter, and some clear contact paper.To make these shakers, you will need to save some mini water bottles. These little bottles were great to have around this summer whenever we were on the go. They are the perfect size for my little ones. Just rinse out the bottles well and then let them dry out without the lid. (But save the lids:)DIY Music Instruments | Kids Activity
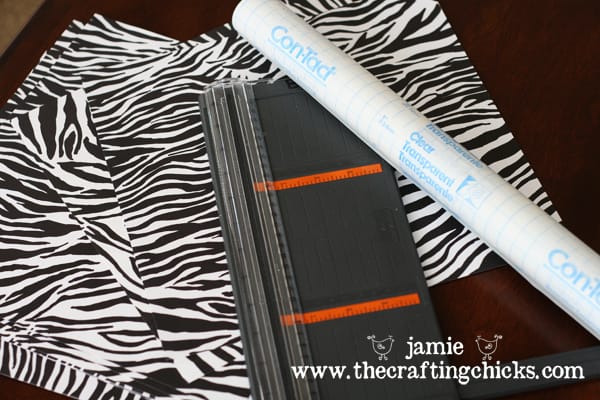
Steps to make the Water Bottle Shakers:

Step 1:  Remove the paper label and measure it. This will give you an idea of how wide and long to cut your paper.

Step 2:  Cut paper strips the size of your label.

Step 3:  Hot glue the scrapbook paper around your bottle. Hot glue works quick and well. You could use other adhesive like double-sided tape or glue sticks.

Step 4:  Cut strips of contact paper (just a little bit wider than the strips of scrapbook paper). Peel off backing and wrap around the scrabookpaper. If you don’t want to use contact paper, you could paint mod podge over the strip of paper.

Step 5:  Fill the water bottles with various beans or rice.

Step 6:  And for the final step, hot glue the lid back on.
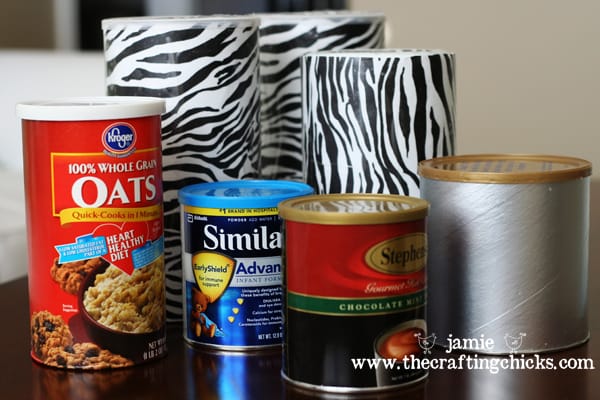
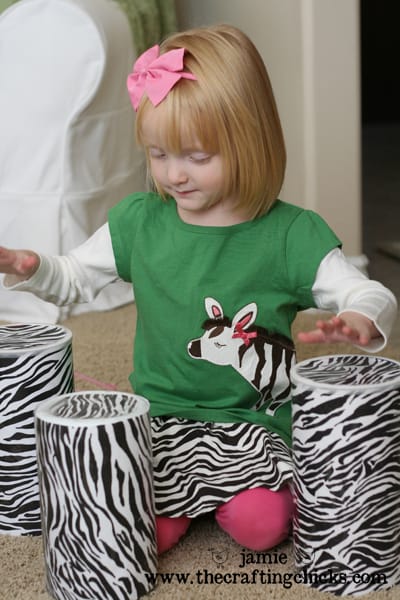
And to make the drums, gather cylinder cans, jars, or containers. Some great ones are hot cocoa mixes, baby formula cans, oats, cleaning wipes, and baby snack containers.

Step 1:  Lay out your paper and trace the top and bottom as your roll the cylinder over your paper. Also cut out a circle to cover the top by tracing the cylinder standing up. Cut out these shapes.

Step 2:  Hot glue paper around the cylinder. (you can use other forms of glue or double-sided tape)

Step 3:  Hot glue on lid.

Step 4:  Cover the sides, top and bottoms by measuring the same way as in step 1.

You can even add some beans, or rice inside the cylinder to make it a shaker/drum.DIY Music Instruments | Kids Activity

And there you have it…2 very cute ways for your little ones to make some music.

What are some other great ways to make homemade musical instruments?
Save

About Jamie

is the author of this post. Wanna know more about the Chicks? Click here. :)

Comments

  1. Jen says

    September 6, 2010 at 1:38 pm

    I LOVE this! My Derek & Jett would love making these, we are going to make them this week!:) Oh, and A looks adorable in her cute little zebra outfit.:)

    Reply
  2. Jennifer says

    September 6, 2010 at 10:23 pm

    Very cute! You can make homemade rain sticks out of cardboard tubes, nails, rice, paper, and tape. Simply put nails about 1/2″ to 1 inch apart following the line around the cardboard tube so that it makes a spiral pattern. Cover one end of the tube with paper and tape shut. Fill with rice and then cover the other end with paper and tape shut. You can make your “rain” last longer if you have a longer tube. I have also used corrugated tubes and sticks for a homemade guiro. Or egg shakers out of real eggs. Just blow out the egg, wash, dry and fill with rice. I used to be a music teacher before being a SAHM. 🙂

    Reply
    • Jamie says

      September 7, 2010 at 2:47 pm

      Jennifer! That is a great idea! Thank you so much for sharing!
      xoxo Jamie

      Reply
  3. Becky says

    September 7, 2010 at 2:34 pm

    So fun. I just LOVE the ZEBRA paper!

    Reply
  4. Michelle Carter says

    September 13, 2010 at 9:18 am

    My daughter has to make musical instruments and bring them to school this week. Thanks for the inspiration 😉

    Reply
  5. Becky B says

    September 25, 2010 at 3:52 pm

    Just found your website and I love it! For the maracas you could spray paint the beans different colors. Just another idea to add to the fun.

    Reply
  6. Stephanie Su says

    March 9, 2018 at 3:46 pm

    Oh how cute those zebra paper paired with her skirt! I also love these ideas, thanks for sharing, will definitely share this to my friends with little ones.

    Reply
  7. jiffy says

    February 27, 2021 at 4:08 am

    i have made the instrument with water bottles using rice. I add food colouring so the rice has different colour. Now i have to make up a poem or song for the children.
    Help!! undertaking a course in early childhood education

    Reply

Trackbacks

  1. Making Beautiful Music, DIY Style! | MPM School Supplies Blog says:
    June 2, 2011 at 7:09 am

    […] closet or add to the pretend play area? We ran across these adorable recycled instruments over at The Crafting Chicks and thought we had to share Jaime’s awesome designs. They’re simple, but really pop! […]

    Reply
  2. Make a Music Basket to Encourage Rhythm and Movement | TinkerLab --- Creative Experiments for Kids says:
    September 12, 2012 at 2:35 am

    […] the lid shut is suggested if you think your baby could open the lid. The Crafting Chicks made these shakers with beans. So […]

    Reply
  3. “The Temple Restored/Restoring The Temple” Ezra 3:8-13 July 7, 2013 | Word For Life Says . . . says:
    July 6, 2013 at 9:49 am

    […] Bottle Shakers” from Thecraftingchicks.com (Decorate outside any way you wish and fill with beads, beans or whatever.  Very easy project to […]

    Reply
  4. 10 Camp Kid Crafts & Top 5 Reasons to Camp KOA says:
    July 18, 2014 at 2:59 pm

    […] Homemade Musical Instruments @ the Crafting Chicks  (How fun to make music around the campfire) […]

    Reply
  5. “Make a Joyful Noise” Sunday School Lesson, Psalm 95:1-7a, December 14, 2014 | Word For Life Says . . . says:
    December 11, 2014 at 1:55 pm

    […] Bottle Shakers” from Thecraftingchicks.com (Decorate outside any way you wish and fill with beads, beans or whatever.  Very easy project to […]

    Reply

Leave a Reply Cancel reply

Your email address will not be published. Required fields are marked *

This site uses Akismet to reduce spam. Learn how your comment data is processed.

Recent

Paper Plate Chick Craft for Kids

Triple Chocolate Bundt Cake

14 Acts of Kindness Printable

Halloween I Spy

Halloween Nail Gift Tag Printables

Best Homemade Playdough Recipe

Get access to our free crafting guide

We are a participant in the Amazon Services LLC Associates Program, an affiliate advertising program designed to provide a means for us to earn fees by linking to Amazon.com and affiliated sites.

© 2023 The Crafting Chicks. Website by WP Barista. Privacy Policy

1546 shares