Vintage Halloween Square Wreath
We were so excited to participate in eighteen25’s Spooktacular September last month, along with some AMAZINGLY CREATIVE bloggers. It was such a treat! This is the project I shared a few weeks ago and am excited to share it here at our own nest. 🙂
********************************************************************************
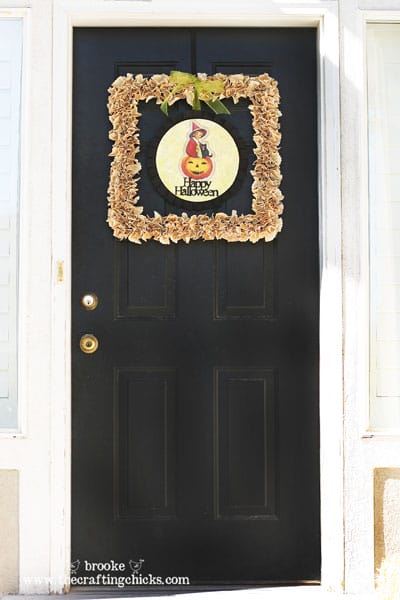
Lately I’ve really enjoyed taking something old/not-so-cute and turning it into something fabulous! And I’ve been needing a new wreath for my home for Halloween. There have been many darling wreaths featured all over blogland, especially Crafting Chicks Kirsten’s awesome wreath, but I decided to do something a little bit different–a SQUARE wreath! And I am sort of giddy with how it turned out. 🙂
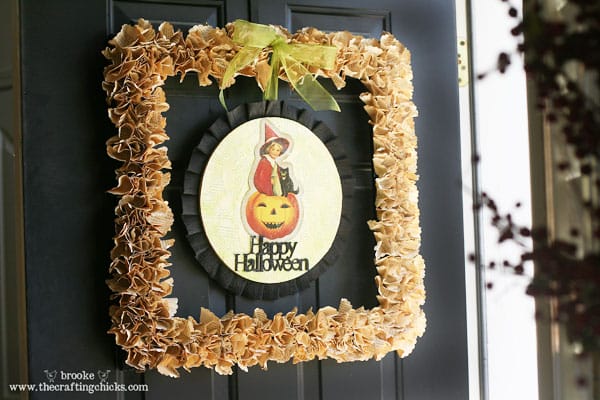
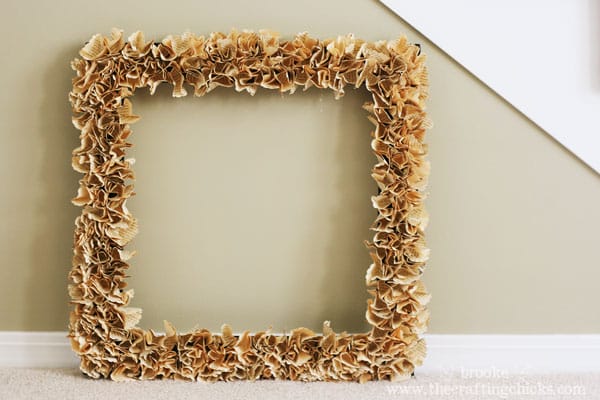
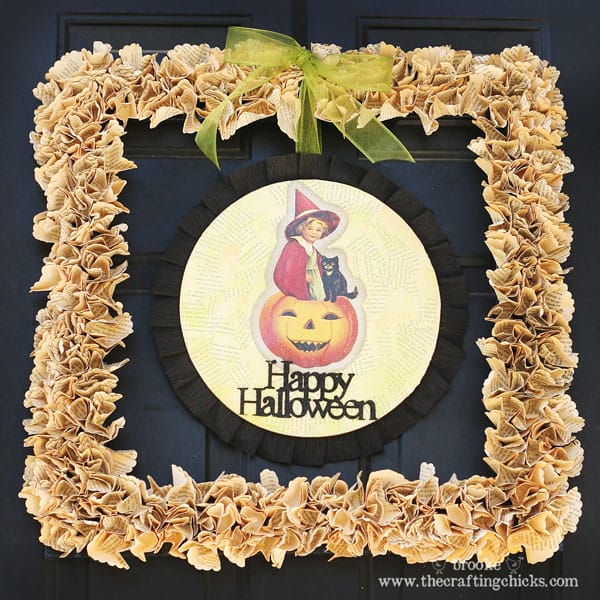
Check it out–my unique Vintage Halloween Square Wreath! Wait until you see the “before.” It was fun to do an extreme craft makeover here! 🙂
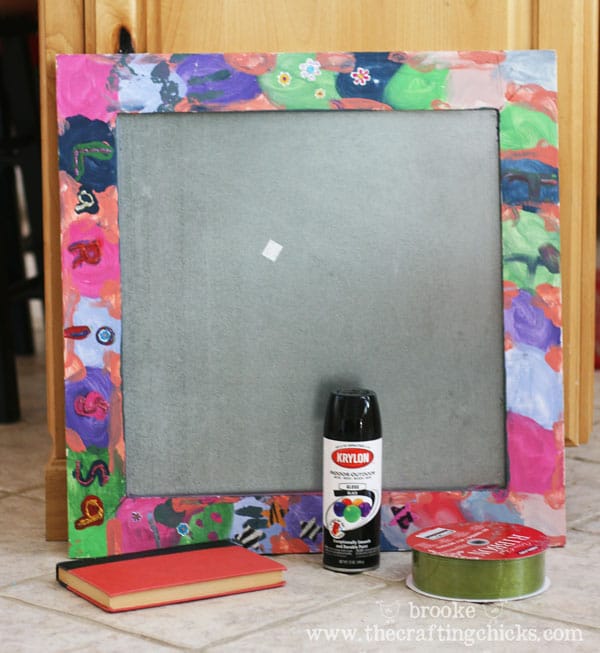
Here is the “before”! 🙂 Oh, baby!
As I was trying to come up with a project for this post, I went to a local thrift store (the D.I.) and found this lovely 23 in.x.23 in. framed magnet board for a few dollars, along with an old book. I already had the black spray paint from other project as well as the shimmery green ribbon. I knew this would be a perfect frame for my square wreath creation, with a little bit of creativity and imagination, and a little bit of work. 🙂
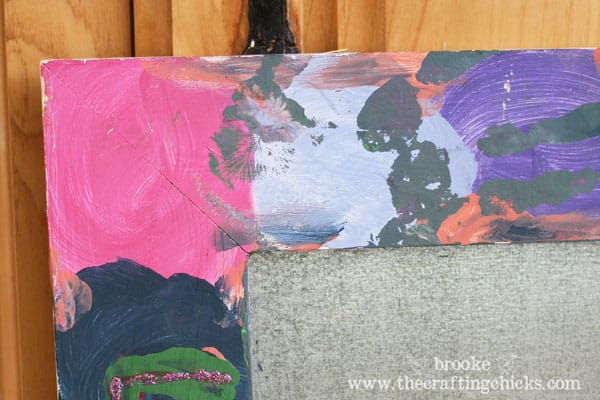
Somebody had lots of fun painting this frame, but unfortunately it did not fit my color scheme. 🙂 I popped out the magnet board (saving it for a future project, of course!) then sanded down the frame a bit, and sprayed the whole thing with black spray paint. Then I let it dry completely. You could use any frame you have laying around or find at the thrift store for cheap.
For the wreath portion of this project, I went back to my childhood crafting days—did you ever do art projects in elementary school using squares of crepe paper wrapped around the end of a pencil and then dipped it in glue and stuck it onto paper in bunches?? Anyone?? Well, I used that same technique for my square wreath, using the frame and paper from an old book. It was fun!
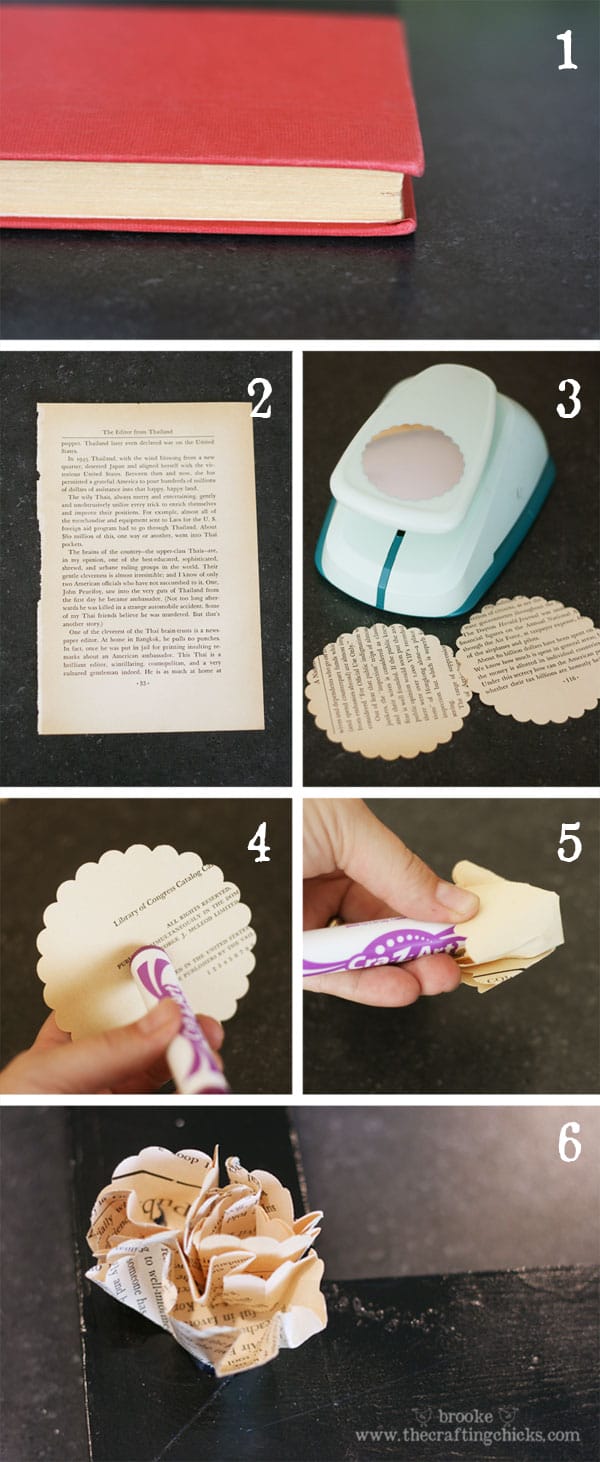
Instructions for creating the square wreath using a frame and some old book paper:
Step 1: Find an old book.
Step 2: Tear out pages of the book.
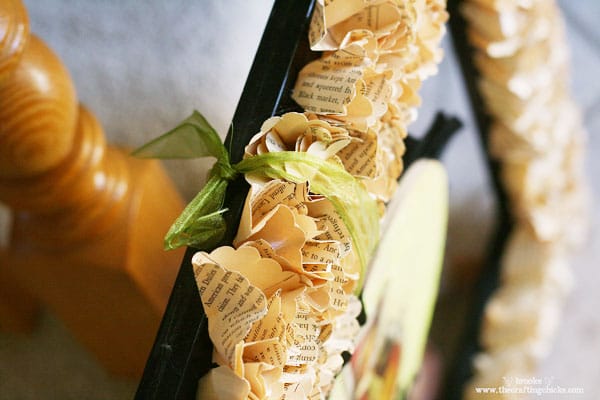
Step 3: I punched out 2 scalloped circles from each page with my punch. It is about 3.5 inches in diameter.
Step 4: Borrow a marker from one of your kids and place it in the middle of the scalloped circle.
Step 5: Carefully wrap the circle around the end of the marker, leaving the bottom flat.
Step 6: Apply hot glue to the flat part of the bunched up paper, and glue it to the frame. Repeat this with each scalloped circle and glue them close to one another to cover the entire frame.
This is how it looked once it was completely covered with the bunches of paper. Already making me happy. But it needed something more. After all, it is a pretty large frame, nearly 2 feet by 2 feet in size. I needed something to go in the middle and I wanted it to fit in with the sort of vintage vibe of the wreath.
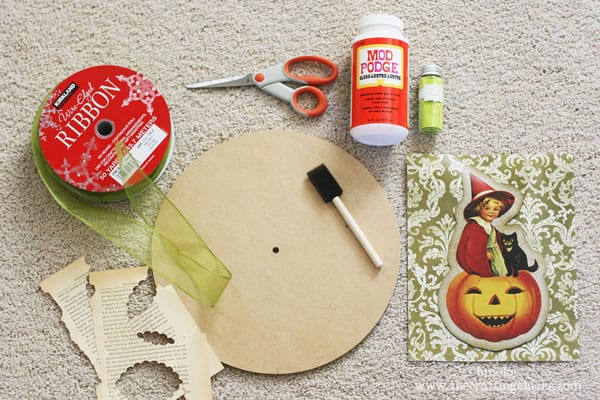
These are the supplies I used to create the hanging center circle portion of the wreath:
- a round piece of wood or cardboard (I had this unfinished clock face from a few years ago just waiting to be made pretty!)
- a vintage Halloween print
- scraps of leftover old book paper (I felt so eco-friendly, using every bit of that old book!)
- Mod Podge
- craft brush
- scissors
- glitter
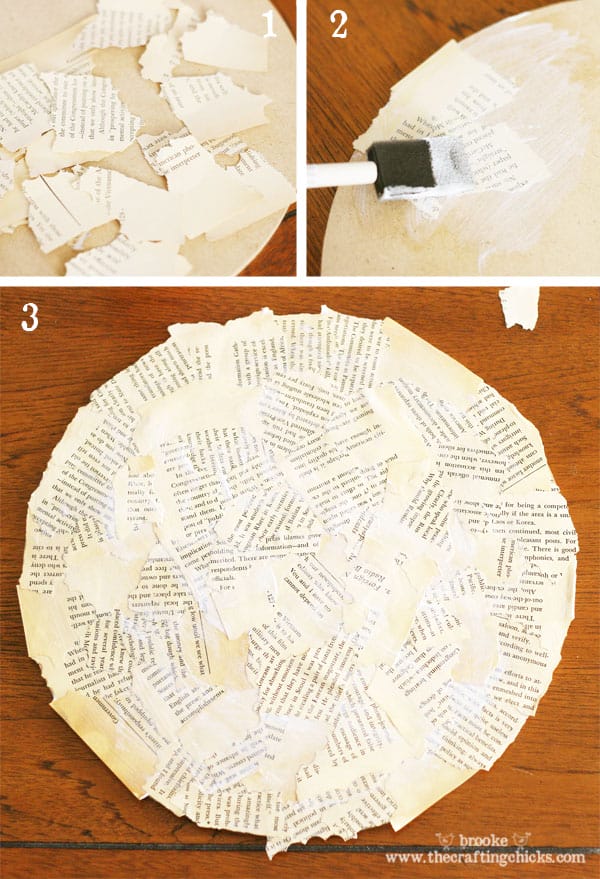
Here is how I created the circle:
Step 1: Tear scraps of old book paper into pieces.
Step 2: Apply a thin layer of Mod Podge to the circle wooden base, then brush another thin layer on top of the pieces of paper to glue them down.
Step 3: Continue Mod Podging paper pieces until the entire circle is covered. It will dry clear. Trim off any overhanging paper scraps with scissors.
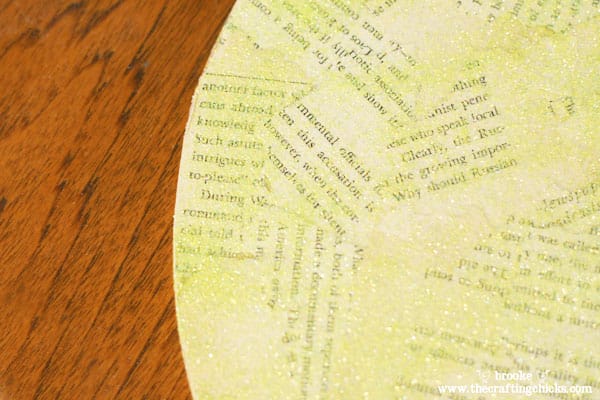
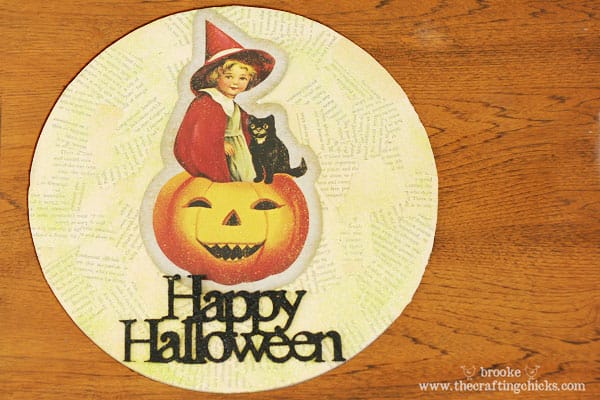
Then I used some spray adhesive on top of the whole circle, and covered it with lime green glitter for an extra special touch. 🙂
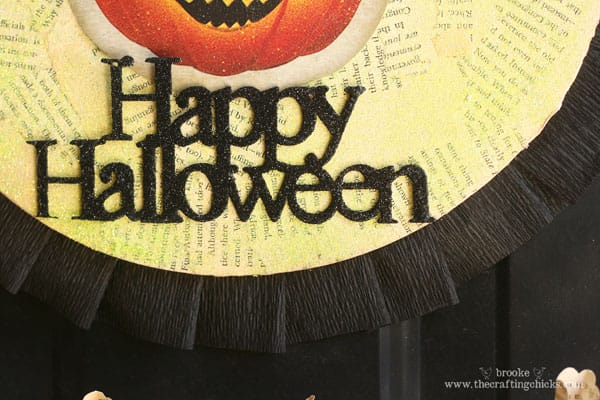
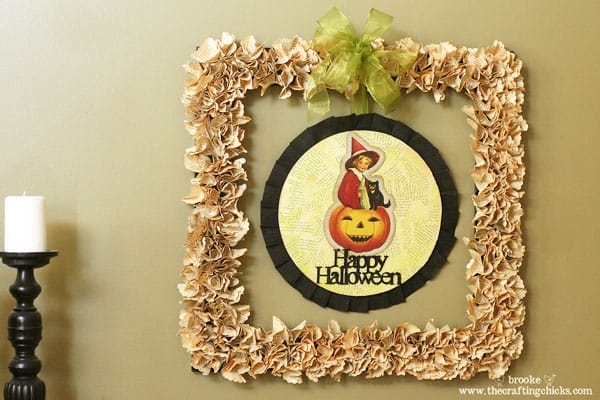
I cut out the little witch and pumpkin picture and used Mod Podge to apply it onto the circle. I also had this glittery little “Happy Halloween” decoration from last year in my Halloween stash and thought it was the perfect touch. I added it with some dabs of hot glue.
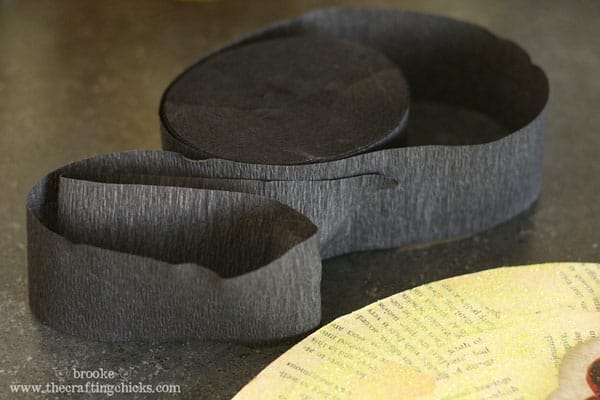
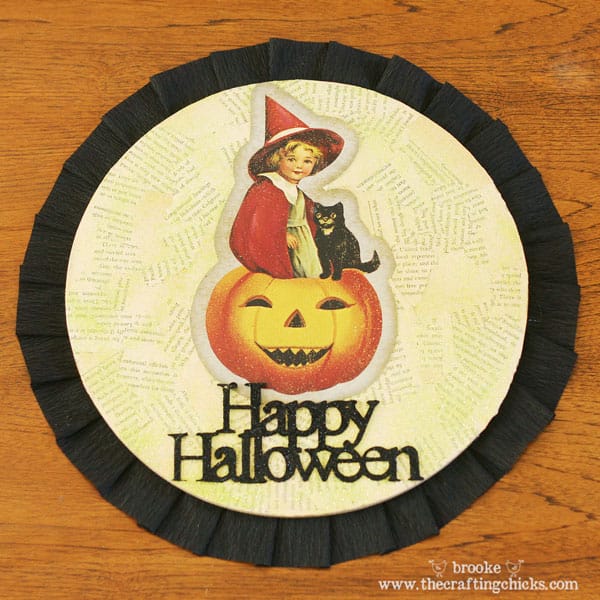
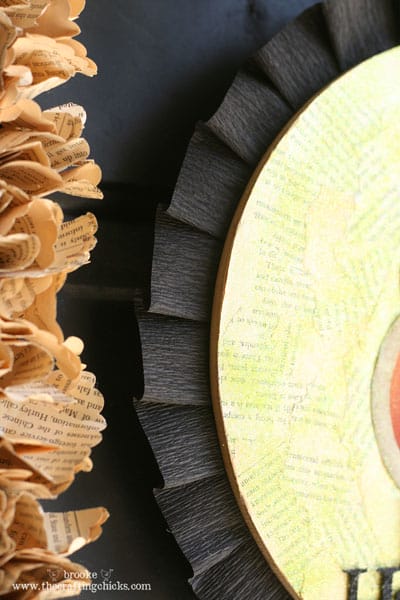
Then I used some black crepe paper (also left over from past Halloweens) to add a cute pleated ruffle around the circle.
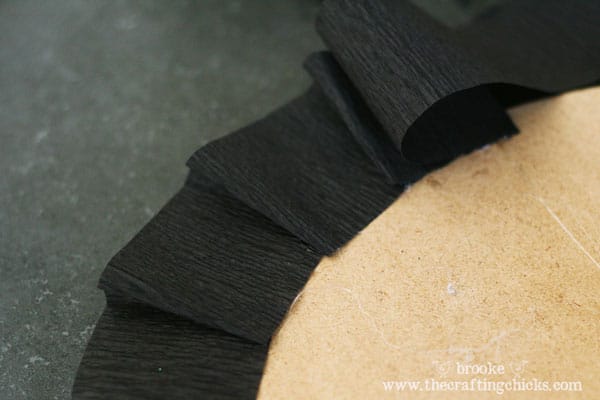
I hot glued the crepe paper to the back of the wooden circle, folding it back every 1.5 inches or so and gluing it down until the circle was done.
Now it was time to attach the circle to the square frame. I attached a photo mount to the back of the wooden circle and used some pretty green ribbon and tied a knot to secure it to the frame. Then I tied a big bow with the green ribbon and hung it on my front door. And then I squealed with excitement! 🙂
Oh, and then I decided it would also look cute hanging on my wall inside my house. So we shall see where it ends up. 🙂 The black crepe paper does show up better on the wall.
**Note: If you want to hang it outside on your front door you might want to spray the whole thing with a sealant, to protect it from rain or wind. **
I’m really happy with how my unique vintage Halloween wreath turned out, and it only ended up costing less than 10 bucks for the entire thing! The fun thing is that now I can change out the inside hanging circle for different holidays. I’m already trying to come up with Thanksgiving and Christmas designs. 🙂




That is absolutely adorable. Once I finish with my Halloween costumes I will make this. I even have a book already to use.
Great job!! So clever!!
I love this! I love a square wreath, and the vintage print and book… and that everything is a reuse/recycle/upcycle. Looks great. I just might try it!
I LOVE LOVE LOVE IT! I am in need to a new wreath too, and you have inspired me. I’m sure Larissa never knew how cute her frame could look!
How do you do these things? Very cool!
I love this! I have seen these square wreaths around blogland, but yours is by far my favorite. I love how you can change out the middle decoration for the holidays. I have to give this a try…. thanks for the inspiration!
I REALLY like this, very creative and budget friendly, way to go! I would actually love to create one for myself and my neighbour. Inspiring, thanks!!!
Love this!! Thanks so much for sharing. I’m featuring it on my blog sometime this month. 🙂
Love, Love, Love this project! You are amazing!!
Kisses from the WhipperChicks
i hope you know how much i love this wreath!!
it was so fun having you over for our spooktacular september!! thanks again!
jen
Jen, thank YOU for inviting us! I was so impressed with all of the other projects. I love your blog!!! 🙂
OMG this is genius!!! I see it being used as a wall hanging using some glitter mist on the flowers and a beautiful vintage rose print in the middle hanging in my girly girl bedroom…….hmmmm thank you so much for the inspirtation!!
This is so fun! So many fun ideas in it… LOVE it!
That is a wonderful piece! I have lots of old books with wonderfully aged pages and I think I might adapt something like this for christmas. I love to punch out shapes and the tags are taking over the house. It must relieve my frustration or something 😉
Seriously, thanks for the great inspiration!
Suz
Okay, I am just slightly OBSESSED with this project!!! I LOVE how it turned out. I featured it on my blog last week and everyone loved it!!!
http://thechicuniquery.blogspot.com/2010/10/trash-to-treasure-thursday-halloween.html
Ahhh, thanks for the feature!!! So sweet. I love the name of your blog too. 🙂
Darling, as always! You rock Brooke!
A HUGE THANKS for all of your sweet comments! I’m totally loving this wreath in my house and I’m glad you all like it too. 🙂 I’m already wanting to make another one. 🙂
xoxoxo
I love this amazing idea.
This is brillant! And I just bought two huge boxes of old books to start altering! lol Now I know what to do with the extra pages I tear out… I love the idea of changing the inside decoration to fit all the seasons and special occasions!!
I just love this wreath! … Just discovered your blog. Can’t wait to go exploring!
I love this wreath. I can already see it in red/green/gold for Christmas, or pink/yellow for Easter! Simply adorable and not hard to do. Looks like you had fun putting it together. Definitely a project that I’m going to do this year. How about a miniature version for scrapbooking and card-making! The imagination is running wild right now.
Loved it over there, and love it here! So so cute!
I’m visiting from Tatertots and Jello and I adore this wreath! It’s on my “to do” list for sure!
I LOVE this! Can’t wait to make one. Thanks for sharing! 🙂
This is so nice 🙂
Simply gorgeous! I love everything about your wreath…I may have to borrow your idea to ‘frame’ some old platters I have hanging on my wall. If I get to it, I’ll link back to your post.
Visiting from Tatertots and Jello.
Cheers!
Theresa
This looks so good. I love the vintage touch you added with the adorable print.
I LOVE this wreath. And this is one of the best tutorials I have ever seen! Thanks so much for sharing. Great job. I want to make one of these so bad!
Great work!! It is so cute.
Jeannette
I shared your wreath on my blog! Thanks for such a cute idea! http://www.thequalefamily.blogspot.com
http://deedeecampbell.blogspot.com/2010/10/vintage-christmas-frame.html
THANK YOU for the idea! I really love your blog, lots of fun here! I’ve posted my own version of the frame on my blog today, please see link above.
Have a love ly day! 🙂