This is a sponsored post for Command™ Brand. All opinions are 100% mine.
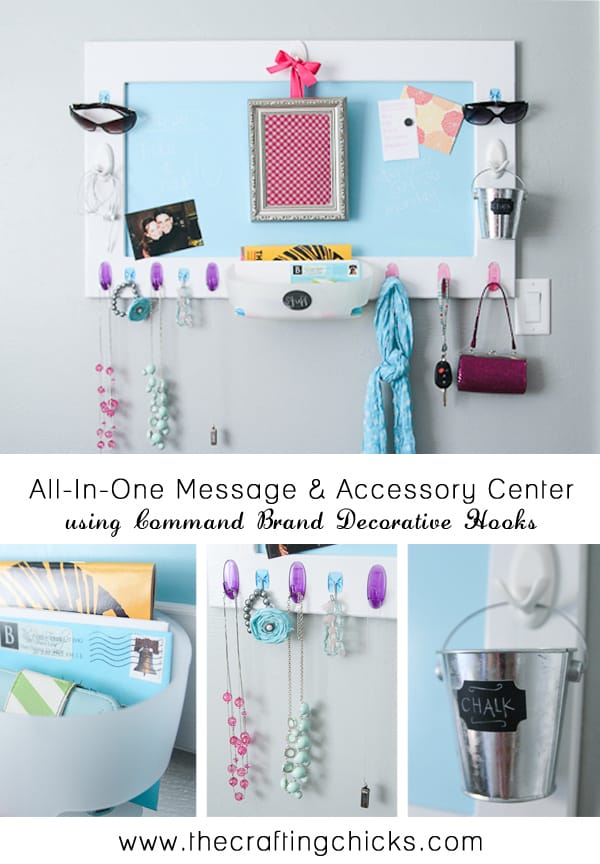
I’m always looking for ways to get more organized at my house–especially with those items I always need to have handy in a hurry like my keys, phone, sunglasses, etc. I love the idea of having a central command center for paper organization, so when the folks at Command™ Brand sent me a box with a variety of their awesome line of decorative hooks I set out to create a different kind of “command center.” (Get it–a command center using Command™ Brand products–so clever!) Thus my All-In-One Message Board & Accessory Center was born! Using an old magnet board I got at the thrift store, I created a colorful magnetic chalkboard and added hooks to organize jewelry, hold mail, or to house my most-used accessories and have it all in one pretty place without taking up a ton of space.

Materials Needed:
Magnet board
Paint in desired colors (spray paint or acrylic/craft paint)
Sanding block
Dry cloth
Bottle of clear chalkboard coating
Foam brush
Chalk
Mirror
Ribbon
Personal accessories/jewelry
Small metal bucket
Small labels
Magnets
Command™ Brand Decorative Hooks—Medium Hooks
Command™ Brand Decorative Hooks—Wire Hooks
Command™ Brand Decorative Hooks—Terrace Hook
Command™ Brand Decorative Hooks—Double Hooks
Command™ Brand Bath Caddy
Note: Follow all Command™ Brand package instructions for proper surface cleaning and prep, adhesive strip placement and recommended weight claims.
How to Make a Magnetic Chalkboard in Any Color
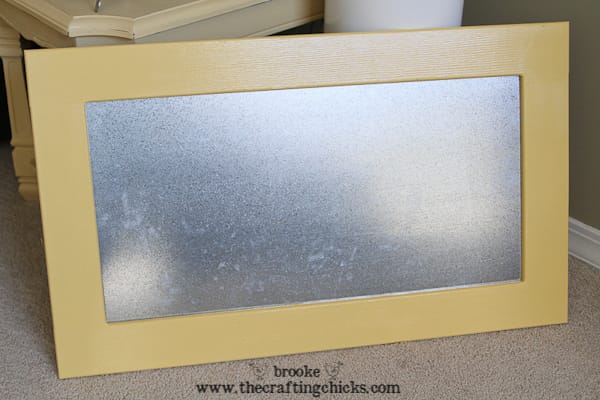
First start off with a magnet board. You can purchase a magnet board from a craft store–I bought mine at a thrift store years ago. It needed a makeover!
If desired, paint the frame of the magnet board.
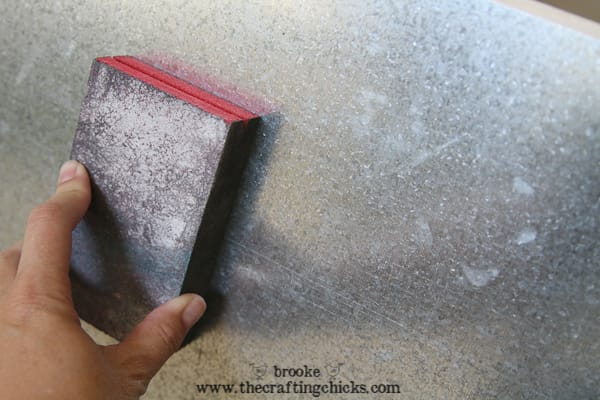
To prepare the magnet board for paint, lightly sand the surface with a sanding block or sandpaper. Wipe clean with cloth.

Paint the magnet board with the desired paint color and let dry. You can use spray paint or craft paint, either will work fine. You might need several coats of paint for full coverage.
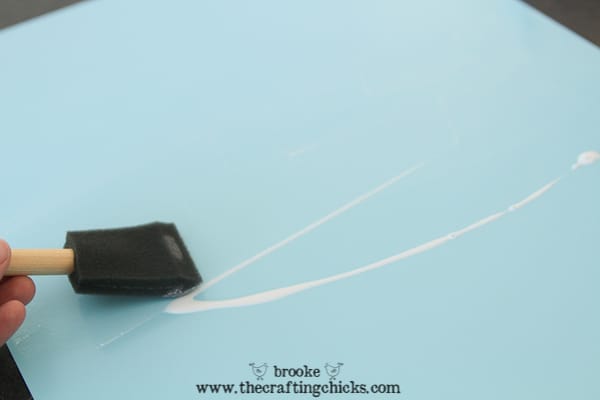
Next, apply the clear chalkboard coating onto the painted magnet board. This is a clear varnish that you paint on any surface to turn it into a chalkboard–it’s the coolest stuff! Bottles can be purchased at craft stores. Apply one coat vertically, wait 1 hour to dry. Then apply one coat horizontally onto surface. Cure for 24 hours.
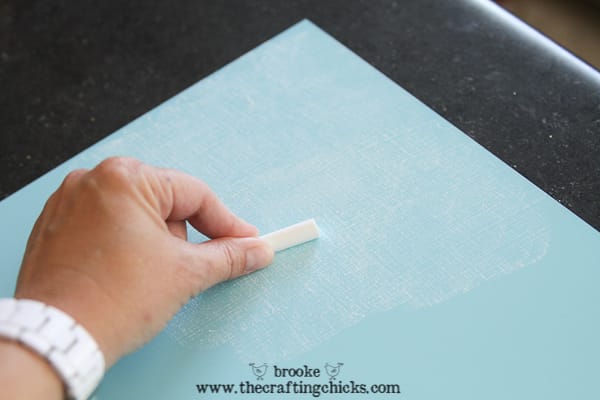
After 24 hours, you must season or condition the surface by lightly rubbing chalk over the entire magnet board. Then it’s ready to write on!
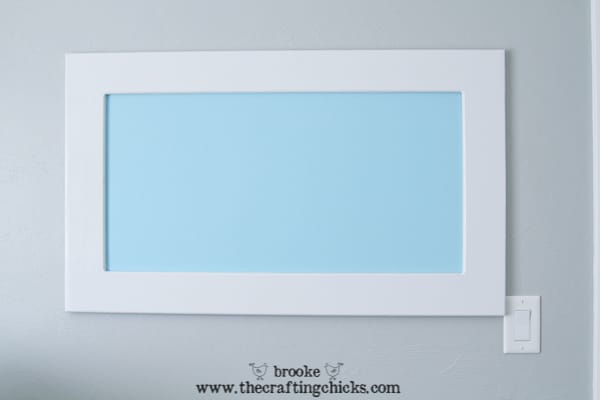
I love how clean and fresh it looks with new paint!
How to Make a Message Board and Accessory Organizer
using Command™ Brand Decorative Hooks
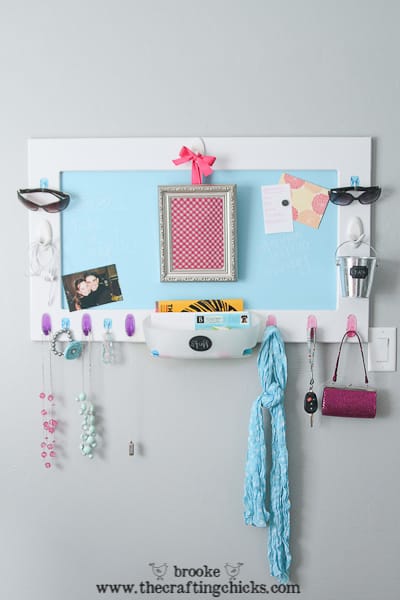
This project is perfect for bedrooms or even an entryway–you can make it any size that works for your space. I can see it being an awesome solution in apartments or any small space. Hang the magnet board in the desired location indoors. Make sure to correctly secure into the wall as needed. Now you can add various Command™ Brand Decorative Hooks around the framed magnet board to organize your accessories and jewelry! (Make sure you prep the surfaces per package instructions.)
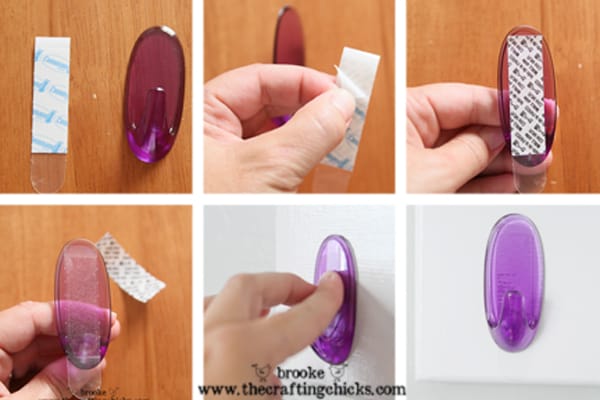
Follow Command™ Brand package instructions for proper adhesive strip placement. It is very simple. Once the hook is placed onto the surface, apply pressure to the hook for 30 seconds, then wait 1 hour before using. I honestly have always loved Command™ Brand hooks because they are super strong yet not permanent and don’t damage your walls! And they come in fun colors and designs!
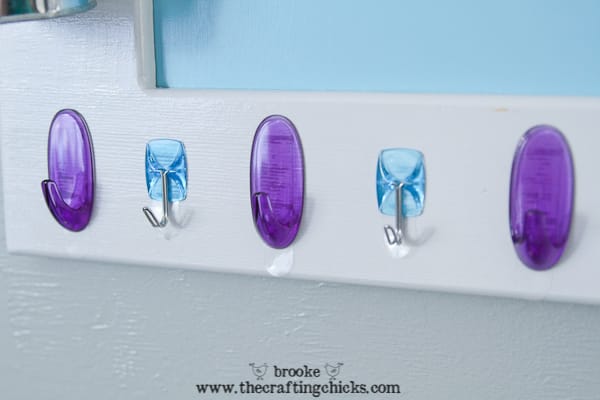
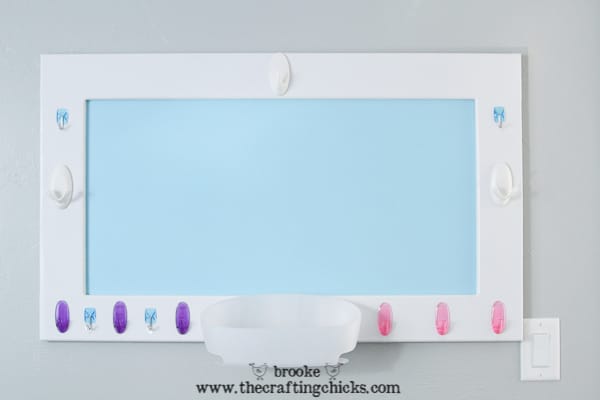
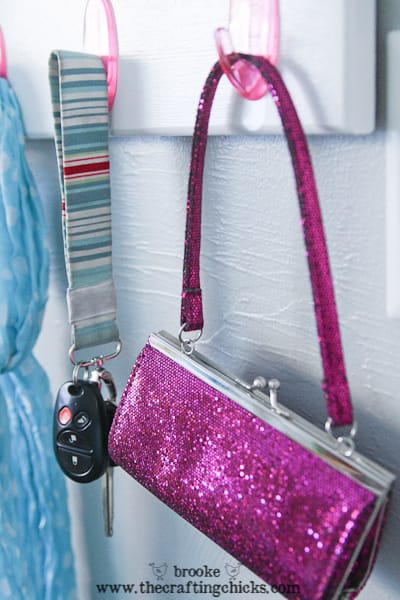
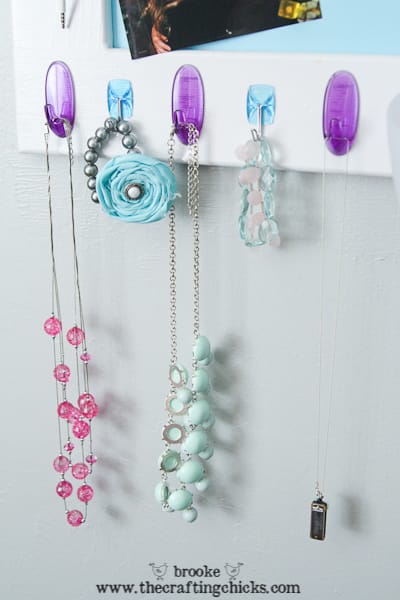
Once all the hooks are where you like them, you can start adding and organizing your jewelry, scarves, keys, purses, etc.
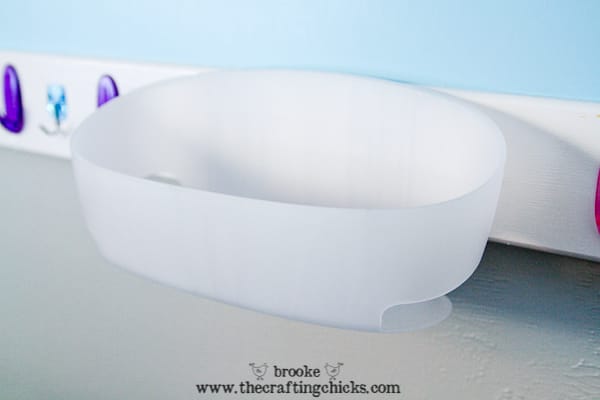
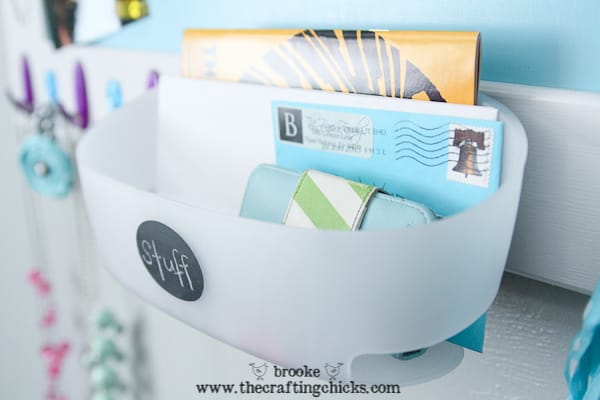
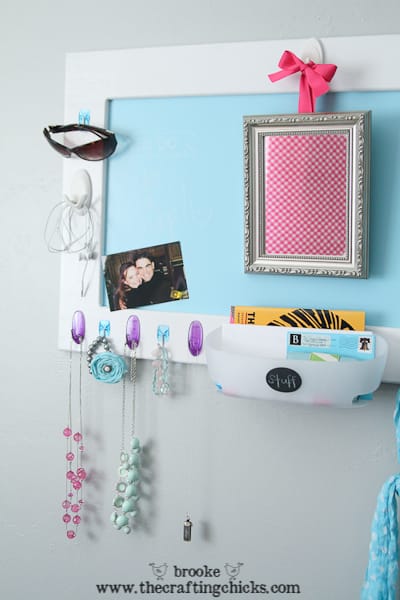
You can think outside of the box too. I used a Command™ Brand Bath Caddy as a place to organize mail, to hold pens and pencils, or even a small wallet or phone. Using some cute chalkboard label stickers I found in the Target Dollar Spot, I made a label for the mail caddy.
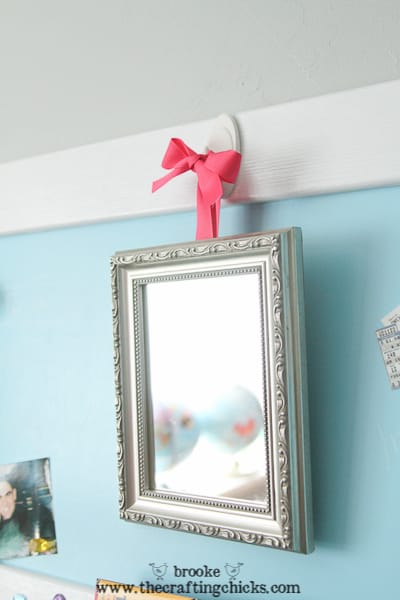
To add a small, lightweight mirror to the Message & Accessory Center, simply thread a ribbon through the back hanger of the mirror and hang from a Command™ Brand Terrace Hook.
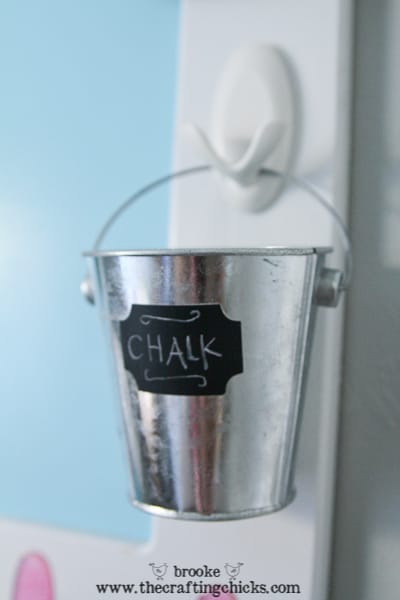
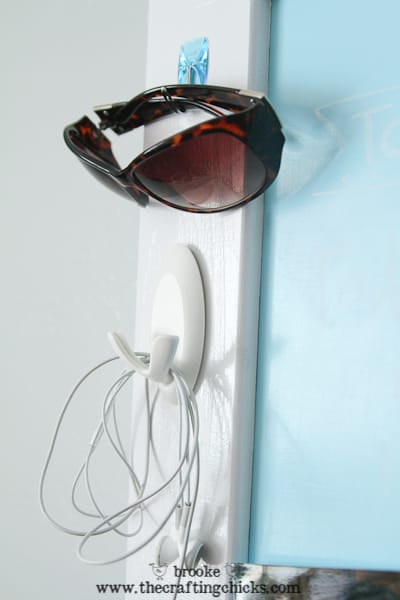
Add desired accessories onto other Command™ Brand hooks, such as sunglasses, earbuds, a small bucket to hold chalk, etc.
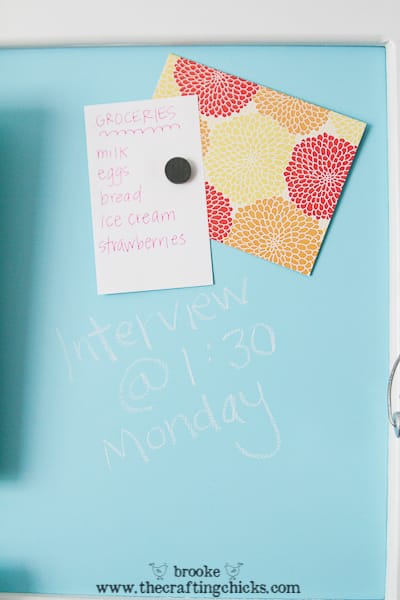
Use magnets to organize items on the magnet board and write messages and reminders with chalk. Enjoy having your important things in one spot, easy to grab on your way out the door!
I absolutely love this magnetic chalkboard turned message board and accessory organizer! 🙂 I love its function and its design! And I’m thrilled with how it all came together with Command™ Brand decorative hooks!

That’s adorable! I love the colorful hanger things (word?) you found!