This post may contain affiliate links.
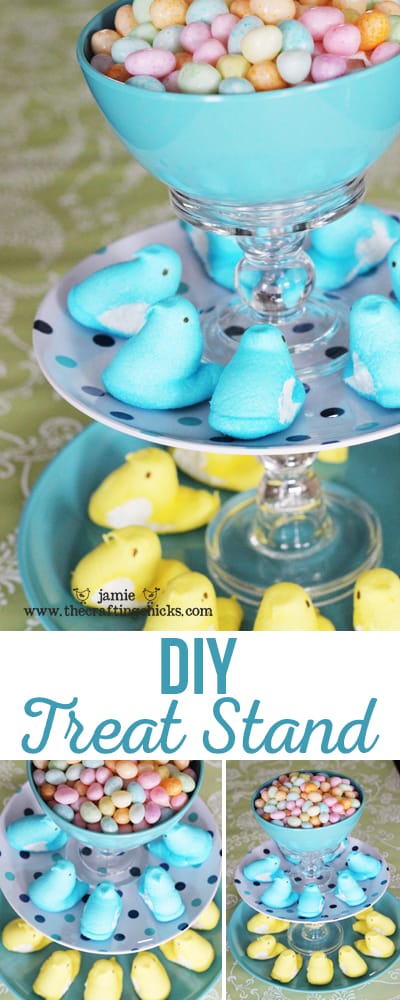
These DIY treat stands are so cheap & EASY to make, but look beautiful & expensive when finished.

You could use plastic or resin plates for a more casual look or go fancy with some pretty ceramic or china ones!
These would be perfect for any party or just to have on your kitchen table or island.

Here’s what you need:
Plates and bowls of your choice (a big one for the bottom, smaller one for the center and a bowl for the top) or you really could mix it up.)
Candlestick holders (I used a larger and smaller one)
Strong Glue like E-6000 or Gorilla Glue

Then you just glue the plates and candlesticks together! I applied a pretty thick layer of E-6000 around the rim of the candlesticks and just placed them on my plates. I kind of just eye-balled it but you could get more exact and try and find the perfect center point. You really can’t mess these up! Let the stand set up and dry for a bit before moving it or adding your treats.
For my treat stands, I found all my plates and candlesticks at Walmart! Who would have thought that on a diaper run, I would discover these little treasures! Their Better Homes and Garden line is quite cute! I know Target also has some adorable resin plates as well.
This blue and white one was perfect for spring and Easter candy.

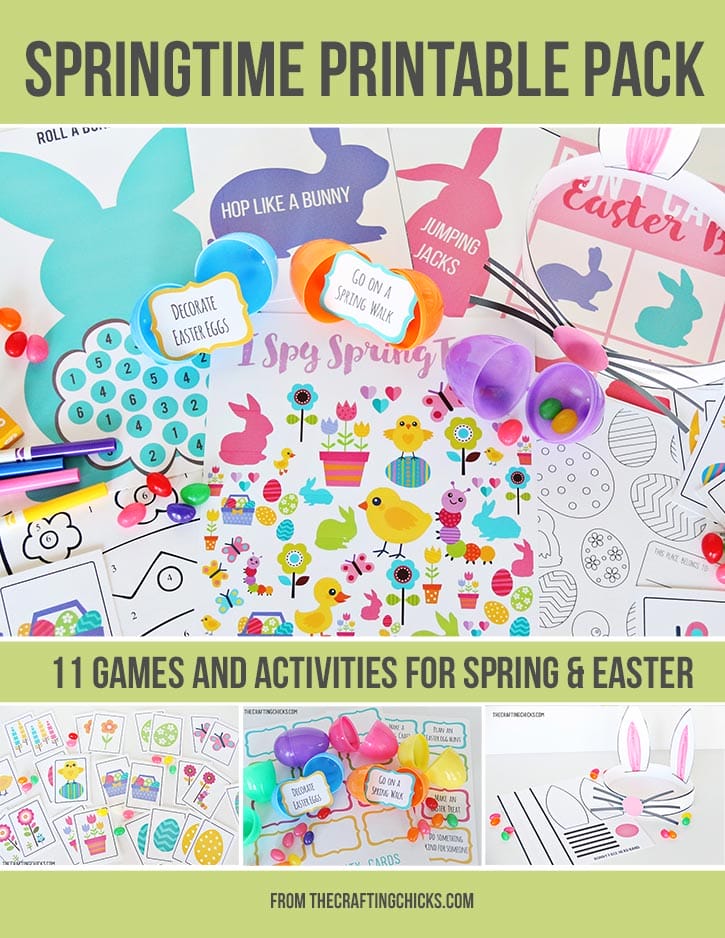
For more springtime inspiration check out our Springtime Printable Pack


These are darling!!!! These stands are everywhere right now! I have been wanting to create a glass one but the price of dishes has suddenly flew thru the roof at all of my local thrift hangouts….Im guessing everyone else has caught onto this as well 🙂 So a trip to dollar tree for me this weekend! I am going to use mine in my scrapping room tho to hold embellishments and stamps!
please use a food-safe glue guys!
http://www.gluehow.com/glues?tag=Food-Safe
these glues are made for food contact. I recommend good old Dap from this list.
Yeah I just cringed when I saw they were suggesting E6000 on the surface where food was being served! E6000 is cancer producing so only use it outside and wear a respirator not just a mask and even gloves, if you are a messy crafter. I would really check the gorilla glue also.
I love this!
Seriously? You found those at Walmart recently? Those are absolutely adorable. I think I will be heading over there this morning. I love your treat stands.
Thanks for sharing.
Mela :0)
I am soooo making these! They are adorable. Walmart huh? That should be interesting..haven’t been there in a while! 🙂
These are just TOO cute! Thanks for the inspiration! I will be featuring this today. Please stop by 🙂
Angie
http://create-it-fab.blogspot.com/
I love that you used the bowls on top…very cute!
I LOVE these…I always see lovely little plates, saucers, tea cups etc. at thrift stores…but usually it is only one and the rest of the set is missing. Sooo…I don’t buy them…now I will. Thanks for sharing this great idea!
These are ADORABLE!!! I have a niece getting married in 2012 and I may just have to make some of these (in her color scheme) for the bridal shower!!! Thank you for such a great and inexpensive idea!!
Love this idea! Where did you end up finding those candle stick holders at??
I will definitely be trying this one! Thanks for sharing!
🙂
Marcy @ Life’s Gristle
Those are so pretty! Great inspiration!
http://runwithglitter.blogspot.com/
What a great idea! I saw something like this on The Nate Show, and thought it was so cute. Those plates from Walmart are really fun- I also really like the candlesticks. This is my first time to your blog, and I’ll definitely be returning soon.
These are so pretty! What a fantastic, but simple, idea.
The bowl on the top is a really fun idea! Thanks so much, I’ll be linking.
Perhaps I’ll choose solid, primary colors for my treat stand to better display my ANGRY BIRD CUPCAKES!!!!
THANK YOU SO MUCH! I’m planning a candy “bar” for my son’s graduation party. (He’s a candy addict) And was just wondering how I was going to display them creatively. Now I know!
Thanks again!
I love this!!! I was ogling at some cupcake stands the other day and wondering how to diy them, you’ve come up with a great idea! Very pretty!
Hey – Love your tray!
I made my own and went in search of others who had too to add more examples/ideas to my post and I came across yours!!
LOVE IT!!
Here is the link to the post I included you in: http://thebrowyblog.blogspot.com/2011/04/diy-party-tray.html
I made one of these for my Aunt Judy in Illinois this weekend as a thank you gift for letting us stay with her for Spring Break! She is a baker and was so excited! Had a hard time finding the plates, etc at our Wal-Mart but went to our Family Dollar!
what type of glue do you use?
I just saw these plates at Wal Mart! I am going to make this. What a cute idea! Thanks so much for sharing.
I just have to say thank you thank you for posting this adorable idea. I do crafts for 30 mom’s and did this one and everyone LOVED it. I found cute candlestick at the Dollar Tree, so it was even cheaper than the walmart ones. Anyways…thank you for sharing fun ideas and your genius talent!!
I just stumbled across your blog and WOW! I had the exact same idea using the exact same brand of plates! Of course by the time I made the decision to by them, the colors I wanted were gone, so I too bought a bowl in the color I wanted to add to the top. I figured if I did not use the bowl for food, Flowers would look really neat sitting above the food in them. I also bought the little flower plates to add more color. I plan on using them at our Annual Fish Fry later this summer with a Tropical/Beachy type of theme. Thanks again! I guess great minds think alike!!!
I love this!! I linked this up on blog today. Come check it out: http://vixenmade.blogspot.com/2011/04/last-minute-easter-ideas.html
The bowl on top is a great idea! I’ve made these with just plates but am going to try it with a bowl this weekend.
Where did you get the candle holders? Thanks for sharing your great ideas!!!
check at the 99 cent stores, OR check at the goodwell stores, really be surprised at what you will find! think outside the box. check at the thrift stores, dollar stores, walmart,,michaels,
JoAnnes,. Try useing small shot glasses as the stand instead of the candlestick holders, or small desert cups. play with it and you can really surprise your self, make your own creation and stand back and pat your self on the back, and smile really big!!!!!!!!
Good luck, take care
Where can I buy E6000 glue.
Buy the glue at walmart, or check some of the hardware stores. check some of the craft stores
Sooo cute and easy to make-you could have some real fun hunting lovely wee plates!
Im so going to “reneck ” this up. way to good, I think Im going to go to the thrift store for my candle stick and bowls/plates. and try some mason jars for a flower holder.
Love this craft. The dollar stores have the candlesticks. Ihad used those to put under canning jars with a jewel in between. GREAT GIFTS!!!!!!!
Where is the best place to get the candle sticks? We’re doing a wedding and need plates in coral, peach, cream — any suggestions on where to get the plates, as well?
I have to tell you that I stumbled upon this cute cute cute idea looking for spring ideas when I just barely started pinterest. This was actually one of my very first pins.
I have been very surprised ever since. This has been re-pinned over 250 times. Of course, the re-pins come from the absolute genius of the idea!!!
Thought I’d stop to share your popularity with you.
Well, this has now been pinned almost 600 times. What a crazy situation. Congrats on the popularity.
This is so cute! How should you care for these?
a simple wipe with a wet cloth. plse dont ruin the craft by putting it in the dish washer, or in the sink full of water. just wipe clean with a wet cloth or something like that. really pretty simple to care for.
This is such a clever idea, and so pretty too. I almost bought Gorilla Glue a few years ago, I can’t remember what I needed it for, but I went with something else instead, now I wish I had gotten that instead, I neve even used the other stuff:(
Great blog!
Sarah
Love! Such a great idea! Totally want to try this out! I would stear clear from the e-6000 though…. It’s pretty potent stuff and shouldn’t be used around food! FYI..it’s banned from sale in a few places. Opt for gorilla glue if you’re putting food on the trays. 🙂
use the E-6000 glue.!!!!!! It dries clear and it will not both the food. plan the food that is used, try useing the small little dolies around the glue area if you are that worried about it, buy those at michaels in the cake decorating area. Ive used this glue for years, over 5yrs, and did weddings and never had a problem. remember!!!!!! there is always a way around it, IF you really want to use it. THINK OUTSIDE THE BOX!!!!!!!! if you want to use it bad enough, you will find a way to make it work, and still have your craft to look nice.
I made a couple of these this past weekend and then looked closely at the E6000 warning afterwards. It says not to use the glue on anything that comes into contact with food, water or animals. So, the question is how safe is it to put food items on the stand after the glue has long cured?
Do you put the candle stick holders upside down?
Beautiful, I’m making one for my baker friend for her birthday!
Question: how do you clean it? Is the glue waterproof?
I tried this, but my glue made the inside of my candlesticks all cloudy – any idea why, or advice on how to fix it for next time? I did use Gorilla Glue’s super glue, not the Gorilla Glue that you have to wet the surface and let sit for hours…. would that make a difference?
I used the gorilla glue also, not the fast drying kind and the glue dried yellow and against my glasses in between the plates looked horrible and I didn’t use that much, just enough to make it stay put, and it ran down the sides a little and I wiped it off but it left a yellow film where I wiped. I never used the E6000 glue but I imagine by your posts, it dries clear? Gorilla glue doesn’t!
I made some cake stands for my daughter’s wedding. The plate was on top of the candlestick, I wish I had a picture to show. I made two but one of the candlesticks was not very even and did not stick to the bottom of the plate completely so it separated when we traveled to the reception place. I wanted different levels so it worked anyway. We had M&Ms too so this would have been a cute ideal too.
where can I buy the E-6000 glue?
walmart or at the craft store
how much are the candle stick holders ?
I made one of these from candlesticks, and plates at the dollar store. The entire thing cost me $5.00. I use it for my dresser for watches and bracelets…etc.
I used the e6000 glue. I am apprehensive about using that glue for anything that comes in contact with food, because it says it is not recommended for food. So, be careful about what the e6000 comes in contact with if your using food products.
use the little dolies from michaels in the cake decorating dpt. to help cover the glue area and enjoy your craft. Think outside the box, if you want to use it, you will find a way to make it work. surprise your self.
FYI. I bought some box lots of dishes at a local auction and got some awesome flat cake plate to which I added some cut glass candy dishes. I found a cake plate top and added it the the first two pieces. It is totally beautiful. I used E-6000 also. If you have a local GoodWill they are fairly cheap.
is there anything that E6000 won’t do? these are so cute to make with the odd dishes! Thank you so much.
E-6000 is not food safe. It says that right on the label. Has anyone found a food safe glue that works?
yes, you can cover the glued area with the small doiles from michaels(cake dept.) and still use the glue. dont push the panic button just because—–it says—–. If you want to make the craft
with that glue, think outside the box and make it work the way you want. there is always a way to make it work. once the glue is dried (over nite) there is no smell, fumes, nothing. If a person didnt know any better, it was bought that way. Ive used this glue for years, used it for the weddings, parties, and no one knew any different, and I wasnt afrid to put food on the dishes.
Useing the E-6000 glue can be fantastic on crafts. I have made 2 mistakes on useing the glue, I soaked it in hot soapy water for a few minutes and it came apart so I could re-glue and make my craft “more centered”. I have bought the glue at walmart, but I have been told you can buy it at
Lowes hardware. Use the glue as more of a craft project. If the dish needs cleaning, wipe it with a
wet cloth or something, dont put it in the dishwasher or the sink full of water and let it set, because it will just come completely apart. I have used it with food——–loose candy(candy corn,
mints etc, and just wipe the dish clean. Think of how to save the craft and show it off!!!!!!
Love the dishes used. Does anyone know if the top and bottom plates are resin and the name of them? I would like to find those exact dishes, but don’t think Walmart still offers them due to them being over 1 year old. Thanks!
I could not find them at Walmart either. 🙁
looking for these exact dishes can be a problem, BUT you can always come up with other ideas
of how to use the dishes and other ideas. Yard sales, thrift stores, estate sales, etc—keep the idea
but look at other places besides the local stores, you an surprise your self of what you can find.
That is what keeps you on your toes for craft ideas and future projects. Using E-6000 glue with food is really NOT a problem. The glue goes on the underneath( glueing the 2 pieces together ) if by chance you use it to put 2 pieces on top of each other———-put a doily or something close to the glued area where you can still put the food items, like cookies, cake etc, and it wont effect the food. I have used it this way for years, just wipe the project with a damp cloth and the project is still in tact. Think of how to preserve the project, not destroy it.
Thanks Peggy!
I absolutely love this idea…thank you! I used thrift store items to make my stand and I’m actually using it to hold jewelry/makeup. I plan on making another one for dessert, though. Feel free to check out my blog post and see pictures of the stand I made. http://castlesineurope.wordpress.com/2013/01/28/crafting-cooking-and-blogging-oh-my/ And again, thanks for the wonderful idea!
What can I use to temporarily attach the components if I want to use my dishes again? Any ideas?
Use a hot glue gun for a temporary fix.
I love this! Trying the idea with baskets but will try this way soon!
Where have you found the candleholders has been a real issue for alot of my crafts ?
michaels, JoAnnes, thrift stores, dollar stores, 99 cent stores. just look around at some of the yard sales.
Our Ladies Ministry recently had a “tea” and one of our board members went to the Dollar Tree and got 2 large plates and 1 small plate (all clear). she also got the candle holders to put btween the plates. Making this a three-teared stand. LOVELY with the doilies (also from D Tree). We placed 2 at the tables and put all the food that the table would need on the stand for that table of 6. We put tea pots and all the “fixins” in the middle. Beautiful with colored table cloths and napkins. We used the syrup bottle from Cracker Barrel, took the label off, put in fresh stem of azaleas at each lady’s seat and voila’ beautiful simple tables.
I LOVE this idea! Super cute! I actually saw it on Pinterest, but someone had stolen your picture! I saw your website on the picture and had to search around your site so I could pin it properly. 🙂
I just started this and made about 15 of them all different nothing is the same i host boutiques at home and get about 7 vendors to join me. so this will be a new project for me. love it so much fun. will get my web site going soon.. Im also doing bird feeders ( tea set) and wine glasses. wish me luck
santa paula ca
Have you ever used waterproof silicone to make your treat trays? Are there reasons my the gorilla glue or the other glue mention are better for this project? I have never used either for a project that would need to be washed. Thx, Frances. Beautiful work!
No need to go and buy new plates. Why not use all the mismatched plates and bowls you have left over from all the dishes you have left over from broken dish sets? Ikea has great candle holders too. Of course I also have plenty of mismatched candle sticks too!
Thanks for sharing. I’ve been gathering plates and other dishes for well over a year with he intent to create pretty serving items, fountains, lawn ornaments, etc. My main problem was that I was having trouble with the glues I was trying to cement the items together. I think I tried everything except E6000 (which I had a tube of in my “glue drawer”)!
This will be just the perfect center peace for my daughter baby shower…Thanks for the idea.. Just love them and i know she will to. BLUE FOR A BOY!!!!!
Reading alot of the comments, answers alot of the questions. Just have fun!!!!! surprise yourself!
Challenge yourself of what you can do.
Have fun
So cute. Thank you!
I made these originally for the holidays to display cookies but I decided to be clever and use it as a relish tray, big mistake! The pickle juice ate the E600 glue 🙁 So avoid anything that has vinegar, lesson learned.
So then just find an adhesive that is not soluble in vinegar or other acids like citrus, grape etc. A trip to the local hardware store should solve the problem
Are the plates in these 2 styles melamine or china? Melamine is much lighter (which is what I’ve been looking for) but can’t find them as cute as these; not at Walmart, Target, Dollar Store, Pier One or online. Lots of stoneware to mix up but melamine is hard to find in the colors I want (anything like the ones in the pictures would be just fine). I also cannot find single glass candle holders of different heights. Can you help? Thanks!
Thank you for the idea – I’m planning an upcoming tea party-themed bridal shower and these will be perfect!! Thank you for noting the glue you used, too. I always think choosing the best glue is the hardest part.
Thanks for the idea! the colors are chosen very beautifully and harmoniously
great job!