Indoor Climbing Wall
 Although neither of our boys asked for a climbing wall for Christmas, Santa surprised them with one Christmas morning!
The idea of an indoor climbing wall came about when I was trying to figure out what to get our soon to be 3 year old for his birthday. The boy loves to climb–chain link fences, retaining walls, kitchen drawers! Unfortunately, the idea came a little late to make a reality for his birthday so we decided to save the project for Christmas. Neither my husband or I are climbers, so I spent some time learning about the parts we’d need, reading how to put it together, and finally ordering the parts the beginning of December. The actual construction of it was left to my husband. And in true fashion he waited until Christmas Eve day to pick up the missing piece (a sheet of 3/4″ plywood) and put it all together.
While I kept the boys out of the house on Christmas Eve, the husband got busy putting it all together. I begged him to take picture of the process so I could share with you, so here they are–compliments of his iPhone.
There are a few options when it comes to the type of wall and holds to use. We decided to go with the bolt on holds because you can rearrange them from the front of the wall, where the screw on type have to be changed from the back. All of our supplies–the holds, t-nuts and bolts were ordered through Atomik Climbing.
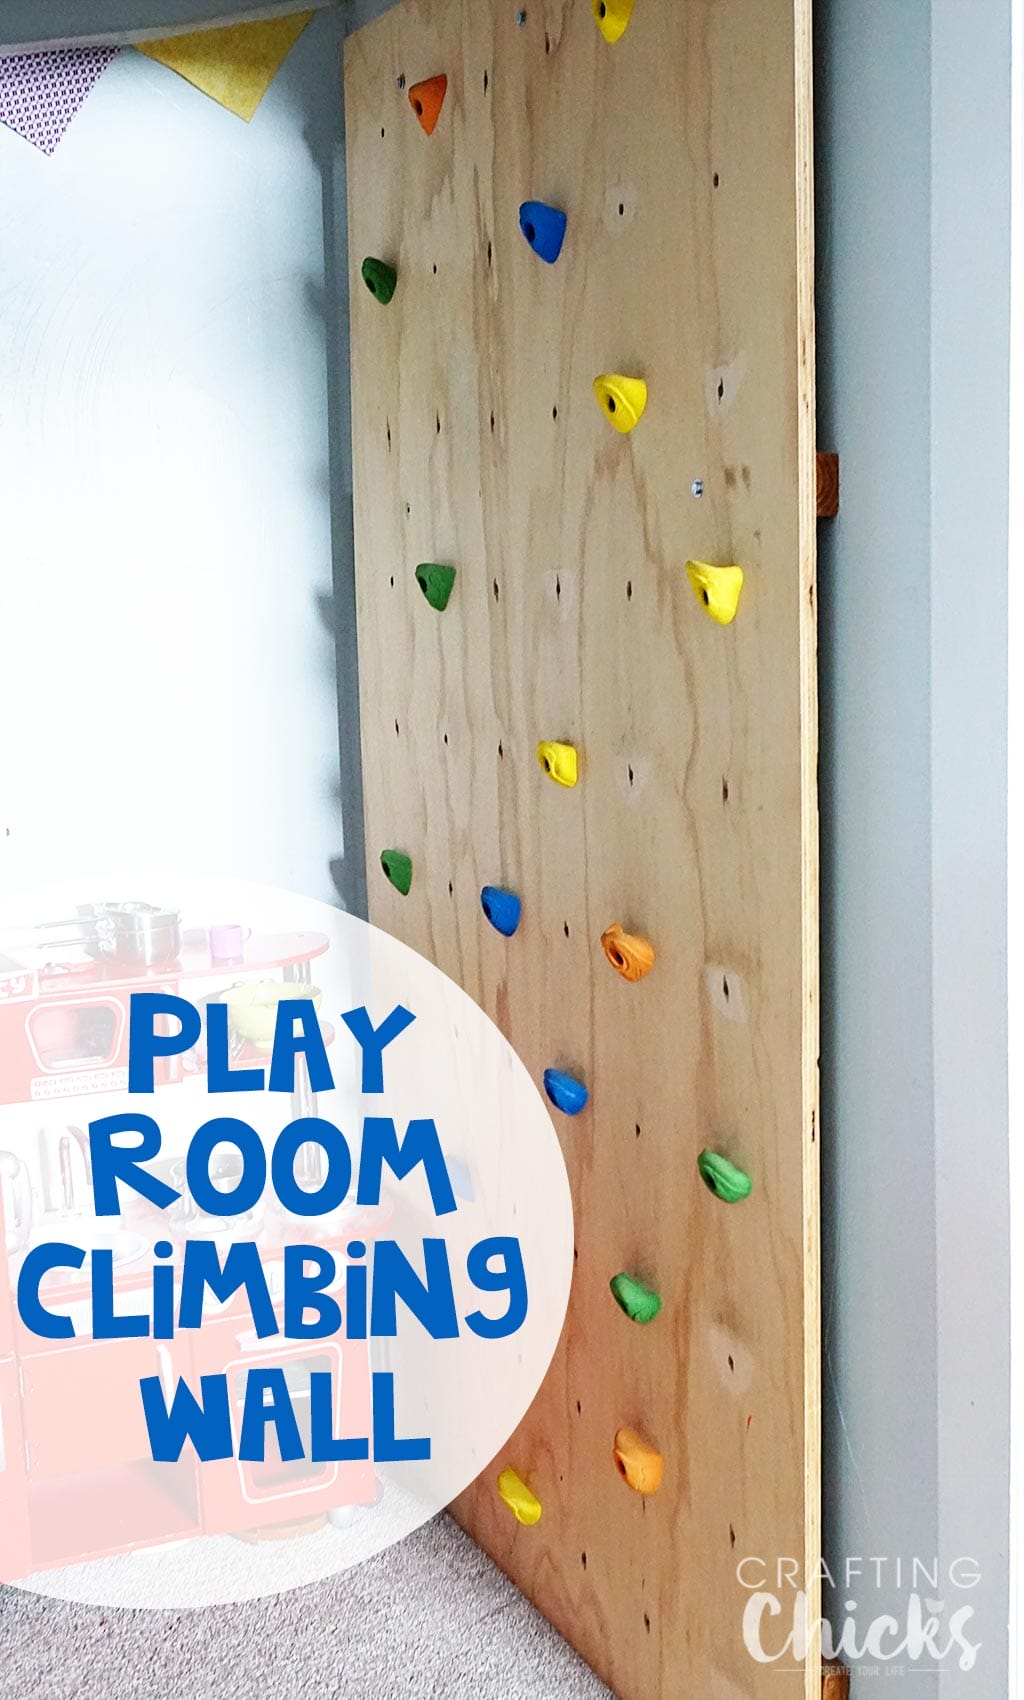
We decided to install the climbing wall in the toy room–which is possibly the worlds smallest room (really I’ve had closets bigger) which I am really excited to finish and reveal later!
Step 1: Cut plywood to size. They come in 4×8′ sheets, but we knew that in order to get it down the stairs and into the room it could only be 7′ tall.
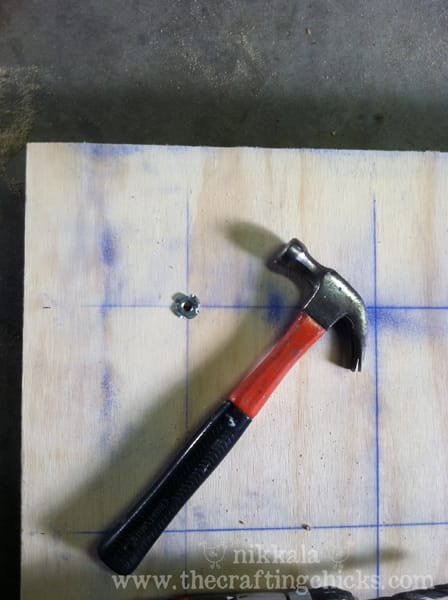
 Step 2: Use a chalk line to mark where to drill the holes. We spaced them 6-8″ apart.
 Step 3: Drill the holes.

Step 4: Hammer a t-nut in each hole. This will be the back of your climbing wall and allow you to bolt the holds on.
 Step 5: Install the wall and bolt on the holds! He added wood spacers behind the climbing wall for added support, and to give enough room for the bolts to poke through on the other side.
We’re already glad we went with the bolt on holds, because our little guys’ reaches were a lot shorter than we thought and we ended up moving all the holds closer together Christmas day.
Our boys have had fun climbing on it, although after a few times up and down they say they get tired–music to this mom’s ears! Here’s a video of my 3 year old climbing it Christmas Day. He’s quite a bit quicker now and ready for the holds to be rearranged and wondering if we can make it taller–what a little mountain goat!


that is SO much fun. I would have loved that as a kiddo!
So how is it connected to the wall? I’m assuming you didn’t just lean a piece of plywood… 😉
There are 7 huge lag bolts running through the climbing wall and into studs to keep it solid and safe. My husband climbs it with no problem!
WELL, how cool are YOU! What a great idea. Only a truly neat mom can not only come up with this, get the hubby to agree and execute, but even just to THINK about having something like this attached to the wall in their home is – wow! You should be feeling pretty selfless and proud about now. Not only that, but when your children become teenagers and give you grief – as all of ours most certainly will – well look what you have to fall back on! You’re the mom (and dad) that installed a rock climbing wall in their toy room. Way to go!
It kinda sounds like a sarcasm, but I may be wrong…
This is GREAT!!! As a fellow Mom of a mountain goat I think I may ask my hubby to make this ASAP;) Thanks so much for the tips!!!
Thanks for sharing, so cool!
Nik, YOU ROCK! This turned out awesome-ly. Way to go Chod, too! What a fun thing to have in your house, we need one too. 🙂
LOVE IT NIK!! Let’s be honest, these boys needs ways to get their energy out!
my boys would love this.
you are one cool mom! awesome!!!
This is great!
In University my housemates and I made a climbing wall to play on in our basement, we used some old mattresses as crash pads. If your son wants more of a challenge you could extend it on the ceiling but that is a hard climb for a little guy, or you could do the wall beside it and he could climb all around the room! So cool you are getting him started early!
Like the idea a lot…I would strongly suggest you add some sort of pad at the floor in case of a fall (or jump)…There are products out there called crash pads that are just for this….they can get pricey but i am certain you can make something up to fit the bill for safety!
(this from the guy who has twekaed both ankles on a 6′ tall climbing wall without a pad on the floor)
if you dont mind my asking what would you estimate the total cost of this climbing wall? I think it wo\uld make the perfect bday present for my soon to be 3 yr old :0)
The hardware (t-nuts and bolts) and holds from Atomik cost about $80 including the shipping. And the plywood was about $50. I’m not sure how much the materials he used to attach it to the wall cost. So I’d say we probably spent $150 on it.
I have been looking into set a climbing wall for my 3-year old daughter. Thank you so much for sharing the information!
What size/type of holds did you use specifically? We want to do this for our boys, but I’m not sure what size hold is best for their hands. The oldest is five years old.
A couple suggestions for anyone out there planning on using this as their template:
1) Do NOT hammer the t-nuts into place. They either wont go in straight and can bend the prongs. This will lead to cross threading the bolts and can easily have the tnut pop out the back. With the installation described above, you dont have easy back access to put them back in. Solution: Use a multi-medium glue (gorilla glue) around the outside barrel of the t-nut and on the prongs. Hold the t-nut with some vice-grips. Using a block of wood, washer and longer bolt, pull the t-nut into the back of the panel from the front. Yes it takes longer, but 24hrs after application, those tnuts will remain in that wood forever!
2) Screw on holds arent attached from the back. They are attached from the front. Drill a whole through the hold, then attach the smaller holds with a few wood screws.
3) Make sure you dont put a hole or tnut where your spacer between the playwood and wall is. You will have wasted a t-nut.
4) Get a mat of some sort for falls. Crashpads are expensive, but used twin matresses or layers of used carpet and carpet pad are great substitutes. The matress can be lifted up and strapped to the climbing wall if you dont want people climbing on it w/o supervision, like when the boys’ friends are over.
Can you please let me know which holds you ordered from Atomik climbing holds, how many, which size, etc…
We did this! We finally completed our wall and it looks super cool and the kids are loving it. Thank you so much for posting this and both inspiring and guiding us. It is probably the best part of our house. Ours is 80″ by 80″ because we had the space for it, so I’m hoping the kids will love it for ages.
How did your husband attach the board to the wall? You said he used a spacer, but could I get more details on what srew size, wood type and size of spacer.
And thank you so much this is a great idea
You guys rock has parents and your son is just to cute for words!
What size rocks did you get? I’m looking for my 5 and 3 year old (but tall boys!) but I don’t know how big small medium and large would be!? Help!!!