I am so excited that one of my best friends, Kristin, is sharing a fun project with you all today. She is one clever lady and a genius when it comes to creativity. I know you all are going to be running to your local thrift store after you read this.

| I’m so excited to FINALLY be sharing a project with the Crafting Chicks readers. Truth be told…I was once or twice or maybe seven times invited to be a “Crafting Chick” (Long before they became “THE” Crafting chicks). Out of pure laziness I never made a single post. I just couldn’t find the motivation to actually write about any of my projects once they were finished. I also never think to take pictures along the way, so this project took a serious conscious effort!
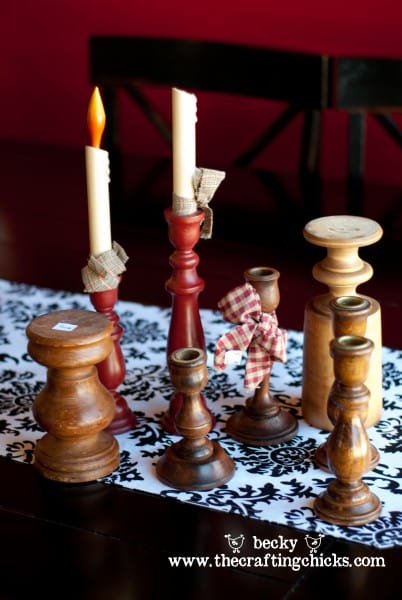
It’s selfish of me really…I sure enjoy reading a plethora of crafty blogs and ideas. I guess this is me giving back to the crafting society. I hope you enjoy!My idea for this project came from an image that I found on Pinterest. I fell in love with the color and uniqueness of this bowl. I decided to hit my local thrift store (Deseret Industries) to see what I could find. It took me a couple of weeks of popping in and out to acquire what I did but I ended up with lots of options. The first thing I looked for was wooden candlesticks. I found plenty that were every shape and size. They ranged in price from about .75 cents to $1.50.
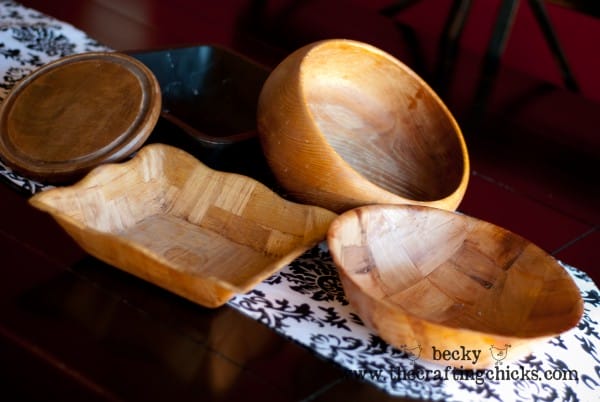
The next item on my list to find was wooden bowls. On my first couple of visits I came up empty handed then on one visit hit the jackpot and scored 4 bowls! The bowls were $2-$3.
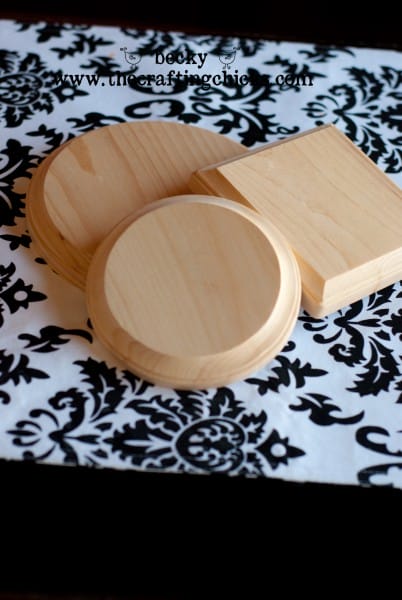
I did find a couple of workable wood bases at the thrift store but had better luck finding these at Hobby Lobby. They were only about $1.00 a piece.
I took a little time to clean up the bowls with a piece of steel wool. I did use a piece of sand paper on a few pieces that needed it.
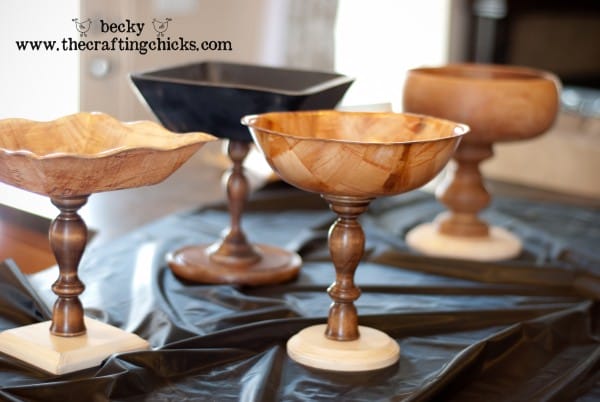
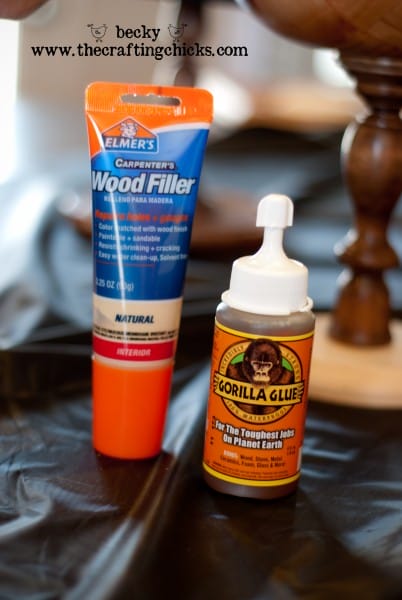
After mix and matching with several different design options I chose what pieces I thought looked the best together and glued them together with Gorilla glue. I also filled a couple little things here and there with wood filler, but for the most part they were left as is. I let them dry for several hours and then sanded off any glue that oozed out.
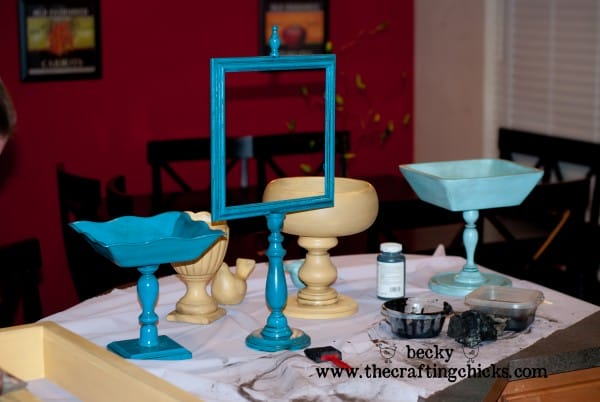
The next step was to prime the bowls. I just used a basic white spray primer. I did a good 2 coats on that and let that dry completely.
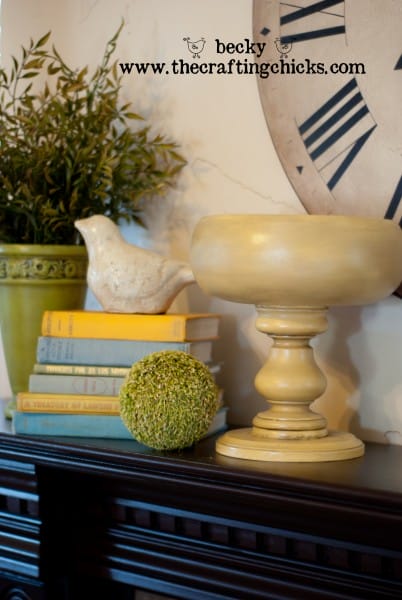
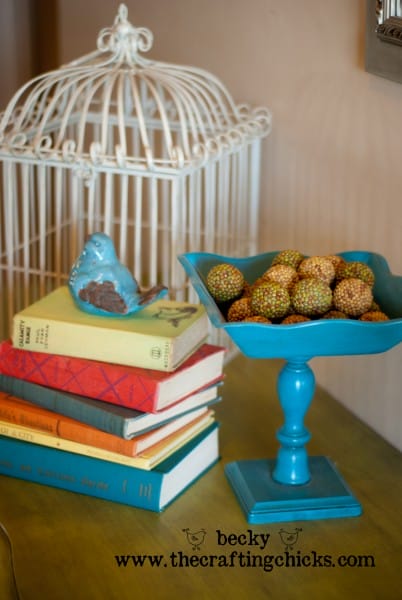
As I mentioned earlier I was loving the turquoise color of the original bowl I saw so I chose a couple of different shades of that and I’m quite adoring mustard recently. After trying several colors by both Krylon and Valspar I was super happy with the color results. I put several coats on each piece in quick succession and then let them dry thoroughly.
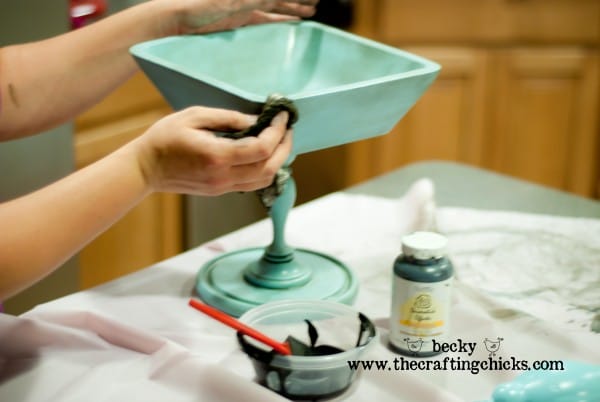
Now we are ready to glaze! I think this step scares a lot of people but rest assured…it’s easy peasy. The glaze I used is made by Valspar that I purchased from Lowes. It is water based which I love working with. I apply my glaze by painting it on with an inexpensive sponge brush. You’ll be scared smearing that DARK stuff over your recently painted masterpiece, but don’t be! After covering your entire piece grab a clean lint free cloth and begin wiping away. I like leaving lots in the cracks and crevices. But you can experiment with how much you leave on or take off. If you are using the water based glaze and you are not liking how it is turning out get a damp rag and wipe it off and start again. This stuff is workable for at least 10 minutes especially if the surface you are using isn’t porous.
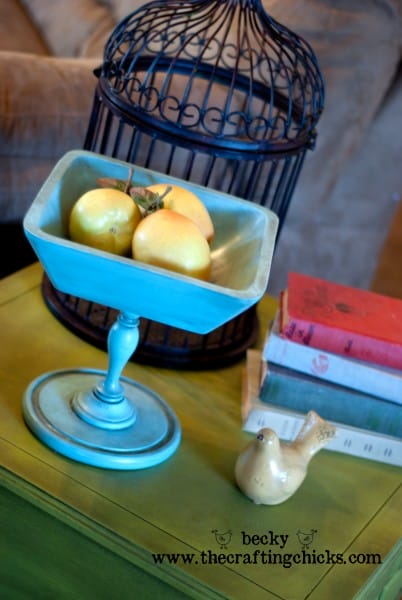
After the glaze was completely dry I used a satin clear spray to seal it. Now here is the finished product!
I LOVE how they all turned out! Such fun shapes, colors, and sizes! Thanks so much for letting me share! I hope you all have fun creating some of your own! |


c’est superbe !!!! j’aime beaucoup avec le cadre !!!! merci !!! bises
I LOVE these Kristin! I’ve passed over those wooden bowls so many times at the DI, now I want to run out and make a bunch of these! I love the colors you chose and the glaze makes all the difference in the world. Thanks for guest posting with us! 🙂
Wonderful project, Kristin! Not only do you have a great eye for spotting items & materials with possibilities, but you have the crafting skills to really make them shine! Thanks for the inspiration. 🙂
Oh my goodness I LOVE these!!!! I actually have a small stash of the wooden sticks tht I have collected to do a project just like this….just haven’t found any wooden bowls 🙁 Amazing….lovin that bright blue one!!!
Hi Tina. I have easily found everything I need for this project at thrift stores.
Kristin, I love these!! You’re AMAZING!
I am so inspired!!! LOVE THEM! Especially the wavy edged bowl and the chunky one. You did such a great job with matching the shapes and the colors are to die for. Bummer I’m home being sick. Now I want to run over to Goodwill! 🙂
Wow, these look amazing, I loved them white too. It looks like I need to start visiting the DI more ofter.
SO SO cute! Love the possibilities!
I absolutely LOVE this idea … thank you for sharing. I will definitely be on the look-out for wooden candlesticks and bowls in my next shopping expedition. These would make great inexpensive christmas presents for family and friends. Very clever idea 🙂
What a fun post! I love the wonderful shapes you put together. At first I was thinking why don’t you just stain the bases and enjoy the beauty of the wood (ok, I admit it, I’m a stained wood fan) but, your end results were lovely. Great idea!
Wow Kristin! I am really amazed. I also have the same thought with Marnie about the appearance of the wood but suddenly as I scroll it down I am starting to see a wonderful result. Very elegant transformation!
Ok…this idea is BRILLIANT! I am sharing a link from my blog to it because I love it so much!!! Thanks for sharing!!!!
marcicoombs.blogspot.com
BEAUTIFUL!! Thanks for the inspiration! 🙂
Thank you for this post! Excellent tutorial! I featured you as my blog fav of the week at http://www.ourlittlegems.com I can’t wait to try to make one of these! Thanks again-they’re beautiful!
What a fun and clever project! I look forward to trying this one myself, maybe it will be a pre-Christmas craft! Thanks for the inspiration!
I was wondering if the blue paint you used is just spray paint or house paint?
Just went and picked me up some wooden candle sticks and bowls and am very excited to give this project a try.
Thanks,
Heidi
Thank you everyone for the nice compliments! The paint I used was all spray paint. The lighter turquoise is called blue ocean breeze (Krylon brand) and was purchased at Walmart. The darker teal is Valspar brand and was purchased at Lowe’s….can’t remember the exact name…but you can’t miss it! Good luck with your crafting!
Oh yes!! I love Kristi’s bowls!! I made my own too!! 🙂 Love yours!!
Can you tell me what color the yellow is? It is beautiful!
Oh. my. gosh. cutest thing ever. I cannot wait to try this!! Love the finished product. I will be heading out this weekend to get the supplies.
holy cow, those are the cutest!!!
Adorable!!! Love this project! Thanks for sharing!
This is a great tutorial! Thank you so much, I love this idea. Sharing on our Facebook wall today. 🙂
Ok, I love ove love this project and have already started collecting materials….however, I am a little confused about what the “glaze” (from the picture it looks like a liquid in the bowl)…..Is it a wood glaze you found at Lowe’s ??? Thanks for the help, Susan
Susan,
The glaze is a liquid paint type product. For this project you want a water based glaze. It can be found with the faux painting products at Lowes. Hope that helps!
I have made a few of these but I love the way you have done it here. They look great. I have a Christmas version of one I’m doing now.
I love the idea of using the wooden bowls. I have been making treat stands with wooden candlesticks and plates for some time, but this would be a great addition to some of my tables. I am really interested on how you accomplished the one with the frame attached. It would look really great with seasonal prints in the frame. Can you explain if you used two frames back to back, or just one? And how on earth did you get it to stay upright? Thank you so much for sharing this!
Great projects! I’m going to keep my eye opened for the stuff to put one of these together… Thanks!
I’m in love with these bowls. Wouldn’t they be perfect on a dresser for jewelry? Love, love, love them. Beautiful colors.
Who is mustard color by? Love it!
It is the yellow from Lowes Valspar spray paint line. Good luck!
Love – LOVE – LOVE this!! We are moving soon and I can’t wait to make a few of these for the new home decor. I would LOVE to know how to make the stand with the frame. These would make such wonderful displays for all the kids’ pictures.
Thanks for the inspiration
Can these be used for food using the paint products you have discussed?
This project went from fun to really beautiful! I’m so impressed. Thanks for the pin.
Questions: after using paint and sealer, are these beauties food safe?
GREAT LOOKING FINISHED PRODUCT!!
However, I do have a question. I am concerned about serving food items from these painted surfaces — is there any possibility of toxin contamination?
Thanks so much for answering my question!!!
The pictures no longer work!
The pictures aren’t working!
I’m having the same problem! I’m finally ready to try this project and the pictures are no longer showing up. Help!!
Wow! What beautiful ideas! So happy to have found you 👌😃!!
We’re so happy to have you join us.