DIY Felt Valentine Envelopes {Pottery Barn Kids style}
We are thrilled because this week The Crafting Chicks are making their TV debut! Jen, Jamie and Brooke are going to be on TV this afternoon! If you live in Utah, we’d love for you to check out our segment TODAY on a local show called Fresh Living, on KUTV Channel 2 at 1:00 pm. Then tomorrow, January 18, Kirsten will be on Studio 5, another local show on Channel 5 at 11:00 am. We hope you’ll tune in!
****************
I love Valentine’s Day! It is like a bright spot between Christmas and Easter, something fun to look forward to in the sometimes dreary winter of the New Year. While it’s great to think of Valentine’s Day as a romantic holiday to spend with your spouse, we also like to have fun as a whole family. In the past we’ve done some fun things with our kids, such as Valentine Bingo, a pink and red dinner, Valentine treats, etc. I’m always on the lookout for ideas to make Valentine’s Day special for my family. I love the sweet cupcakes and toppers Jen shared this weekend, what a cute treat.
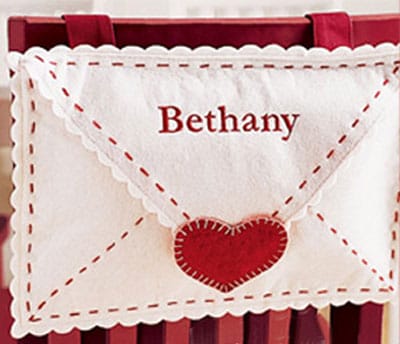
Recently I saw a picture of an adorable oversized felt Valentine envelope from Pottery Barn Kids. I thought it would be awesome for each of my kids to have one that we could use each year for little surprises and love notes, so I decided that I would figure out how to make it for much cheaper! 🙂 (I think it’s discontinued anyway, even if I wanted to spend the big bucks on one!) So here is the inspiration from Pottery Barn Kids:
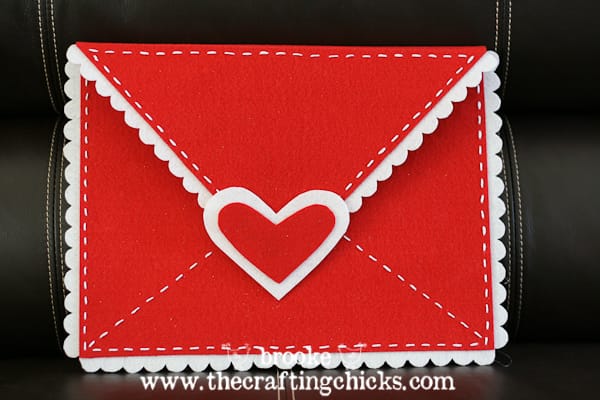
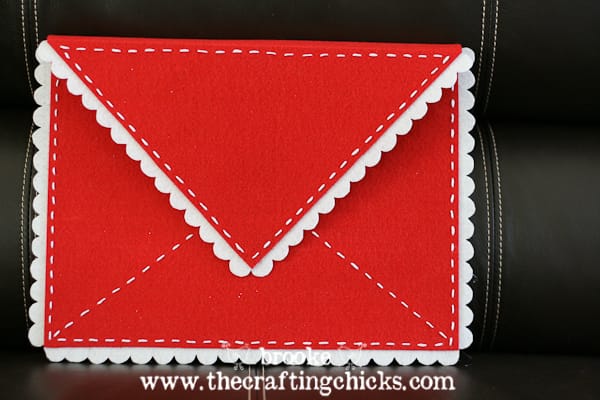
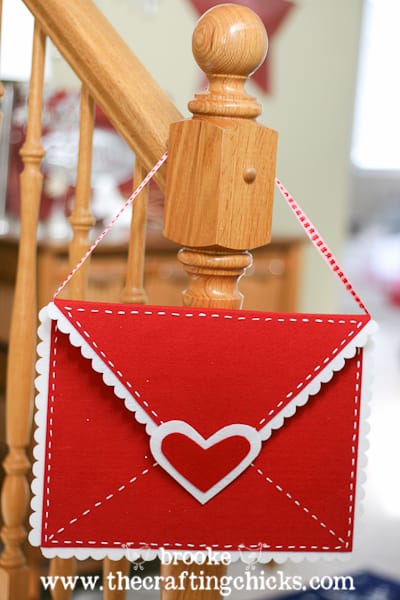
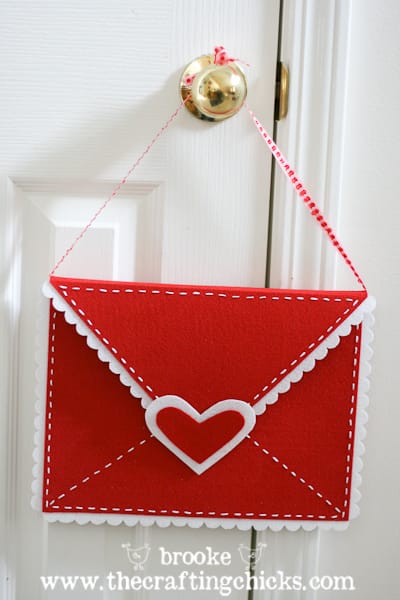
And here is how mine turned out!
I LOVE IT! It came together easily and inexpensively—I’m talking under $5 for sure! You could even make these with your kids’ help (especially if you use regular glue instead of hot glue).
I’ll tell you how I made my felt Valentine envelope without the Pottery Barn Kids pricetag. 🙂 Peeps, this is a no sew project! If you can cut with scissors, use a glue gun and a ruler then you are set. It really is very simple with an adorable outcome!
Supplies to make felt Valentine envelopes:
- felt in the colors of your choice–I used red, white and pink (you can use stiff sheets of felt from any craft store or soft felt off a bolt)
- Hot glue gun and hot glue sticks–or fabric glue, felt glue, tacky glue (or you can sew the edges together if you are good at that)
- Scissors and/or pinking shears
- pencil for tracing and a ruler for measuring
- Decorative trim (such as ric-rac, ribbon, ruffles, lace, etc.)
- Embroidery floss and a needle (optional)
- Velcro
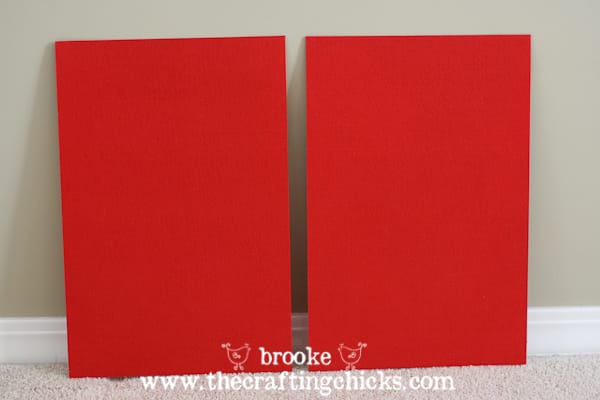
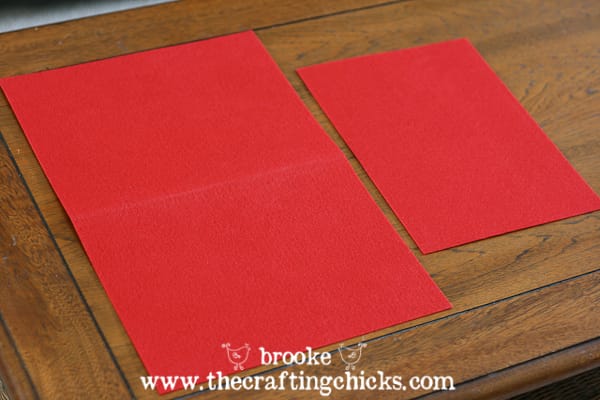
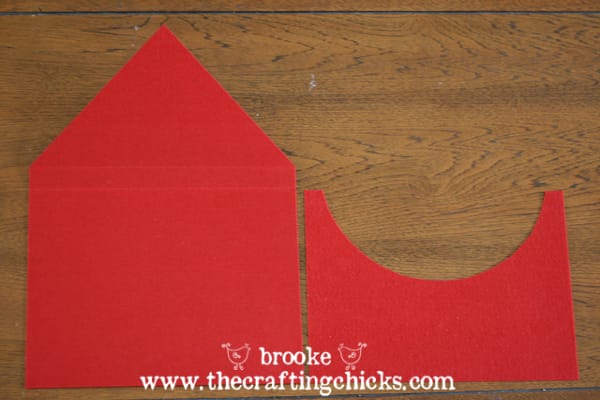
To start this project I grabbed 2 sheets of 12×18 inch red stiff felt from Hobby Lobby for only 79 cents each! I cut one of the sheets of felt in half to make a piece that is 9 x 12 inches in size. This will be the front of the envelope.
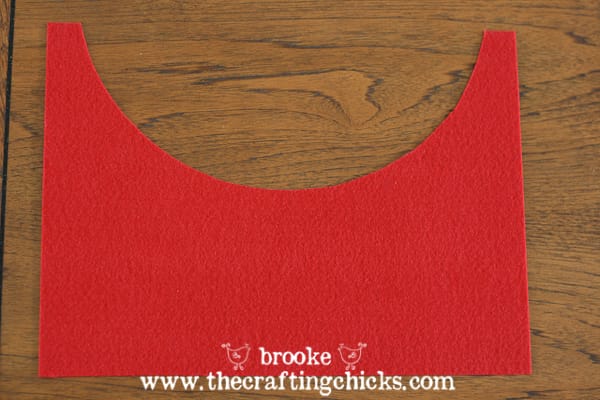
Next I cut a half circle out of this 9×12 inch front sheet to make it easier for the kids to grab their goodies from inside. I used a very scientific method to do this: tracing a dinner plate! 🙂 I did mine about 4.5 inches from the bottom of the sheet but you can just eyeball it. You can set this piece aside for a little bit later.
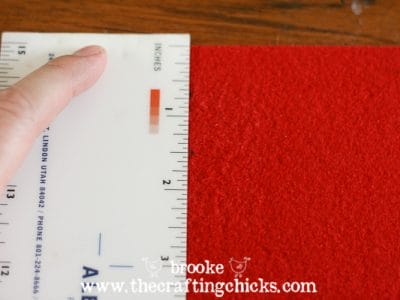
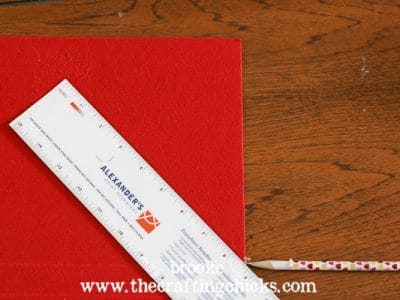
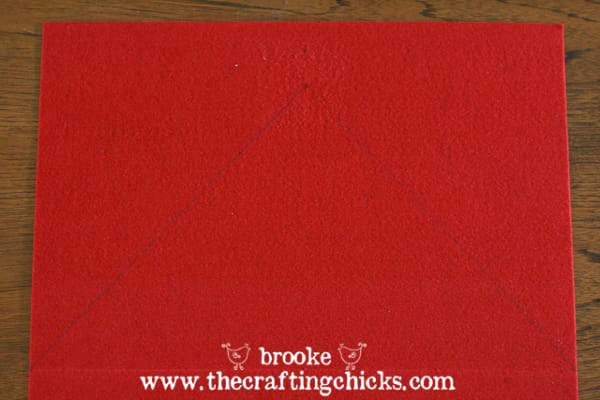
The larger 12×18 piece will be the back of the envelope and the triangular flap. I folded the sheet in half (it is easier to fold it if you score it first) and then opened it up again. You can just estimate the angles to make the envelope flap or you can do some measuring. I marked about 1/2 inch up from the middle fold (giving the flap some extra room to fold over). At the top of the sheet I marked the middle point–at the 6 inch mark. Then I measured about 1.5 inches down and made an angle with my ruler to meet up with the marks by the middle fold. This will create your triangular shape for the flap. Cut along the line with your scissors.
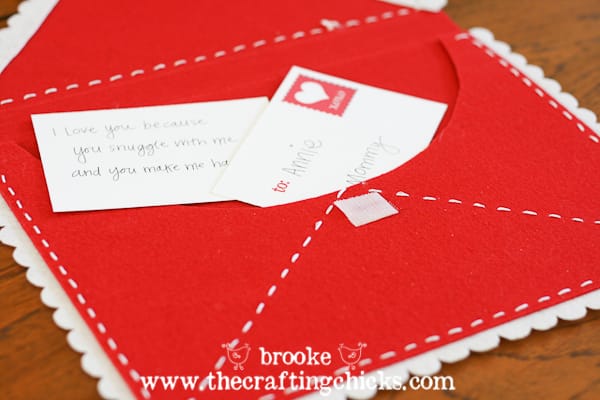
So here are the two pieces that make up the envelope: the back piece with the envelope flap, and the front piece with the half-circle.
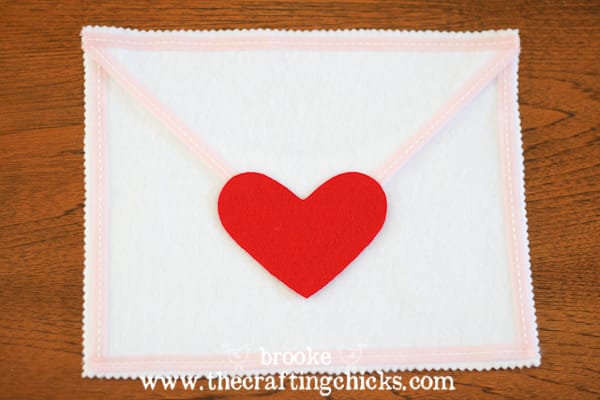
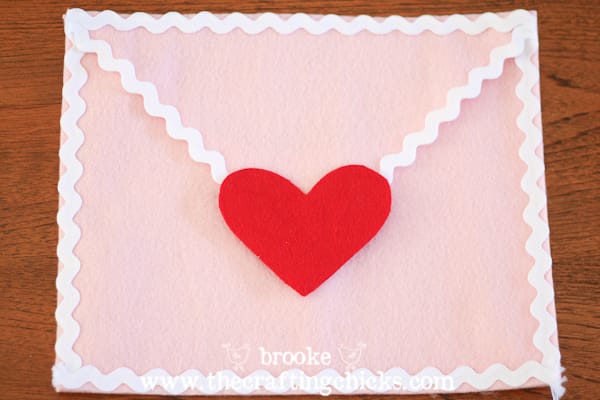
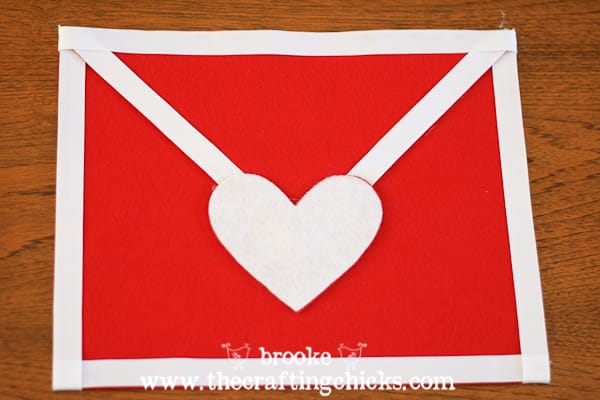
***Now at this point you could simply glue the front and back pieces together and add some embellishments on the front. Just hot glue (or sew) ric-rac, ribbon, lace or any trim you like along the edges of the envelope, and add hearts cut from scrap pieces of felt. That is what I did for these 3 envelopes! These were done in no time, I kept them very simple and sweet!***
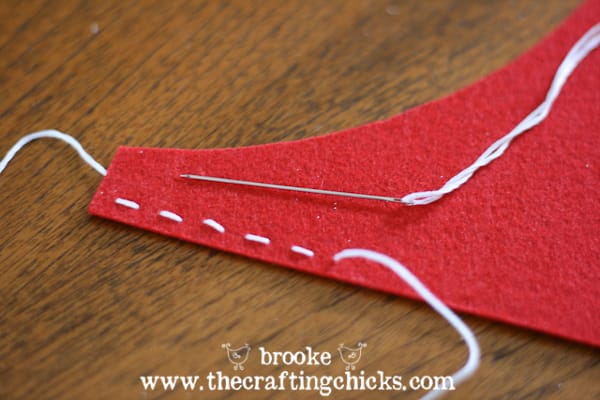
But I decided to make this particular envelope very similar to the PBK one, so before I put the pieces together I used the embroidery floss (white) and a needle to make a simple decorative stitch around the edges of the front piece and the flap as well. I’ll admit, this was a bit time consuming! But I love the way it turned out.
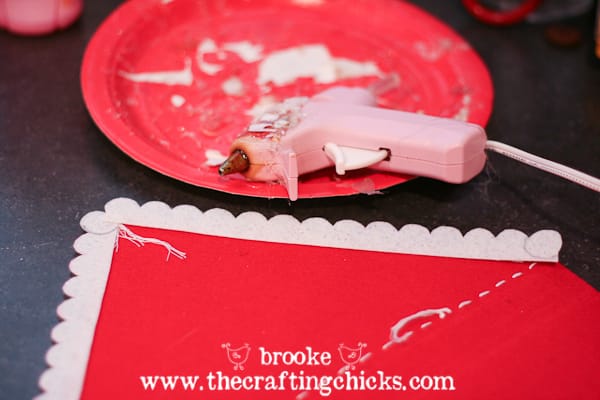
I also cut out some scalloped edges out of white stiff felt, and used hot glue to attach it on the backside of the front piece and along the flap. (You guys, I need a new glue gun! It is looking mighty shabby I must say!)
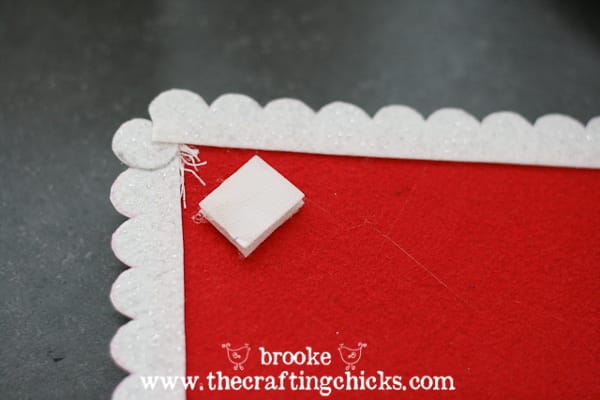
I also hot glued a square of velcro on the flap and the front piece to keep it closed.
Then to put it all together I simply glued the front piece to the back piece with the hot glue! Easy as pie!
To finish it off I used the scrap pieces of felt (red and white) to make hearts and hot glued them at the tip of the flap. It looks so cute if you use ribbon to hang the envelope from anywhere you want.
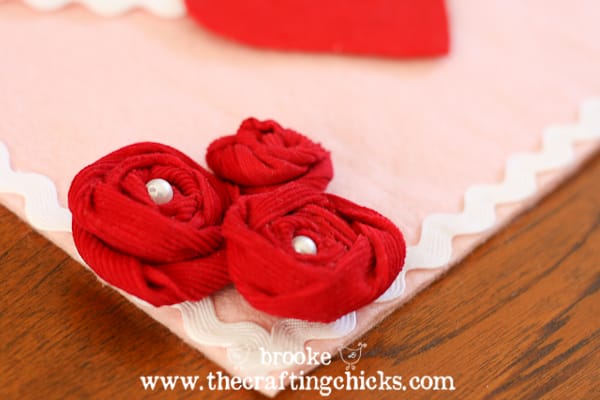
It would be fun to let your kids decorate their own envelopes, or you could add fabric rosettes, monograms, or even your child’s name with embroidery or heat transfer paper. Oh the possibilities! I think later on I will add my kids’ initials or names to personalize their envelopes.
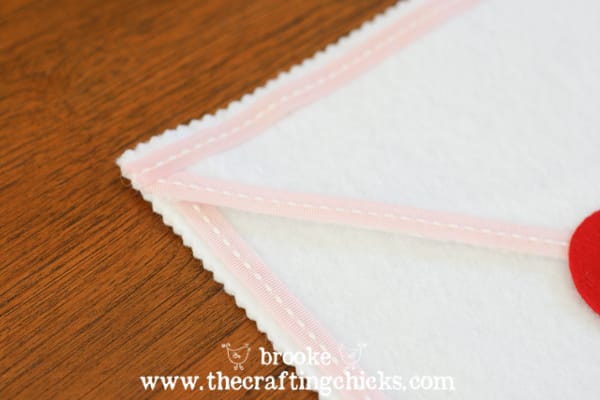
Here is a closeup of the one I cut out with pinking shears, to create a fun decorative edge.
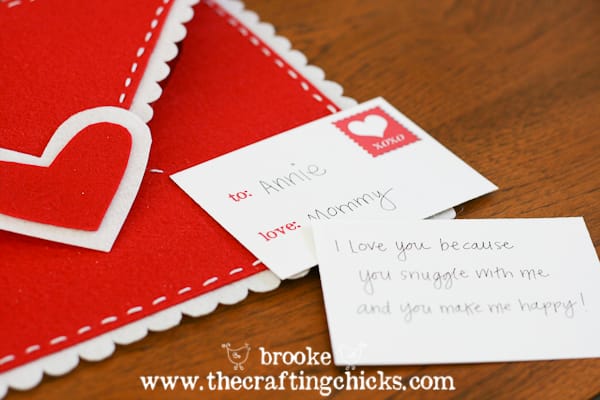
I decided to make some simple “love mail” cards for us to write little love notes to our kids and tuck them in their envelopes. This is something we can do in the days or weeks leading up to Valentine’s Day and to help them feel special and loved.
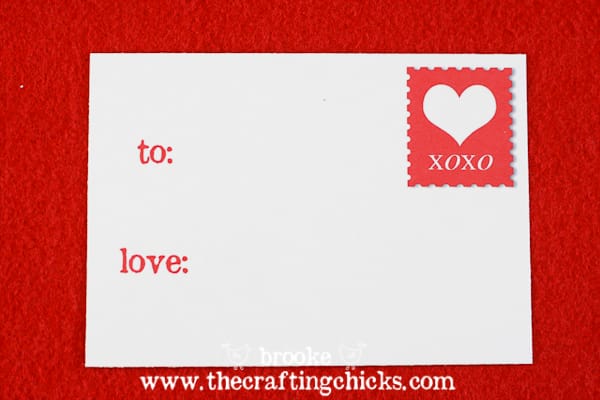
{“Love Mail” cards: 3.5 x 5 inches}
I’ve made some ready for you to use! Four “love mail” cards per sheet. Feel free to double click on the image to make it larger, then right-click and save to your computer to print for your own loved ones. I printed mine on regular 8.5 x 11 inch white cardstock and trimmed along the gray lines to create the 3.5 x 5 inch cards. I wrote the names on the front and the love note on the back. 🙂
So there you have it! An adorable DIY felt Valentine envelope that most definitely won’t break the bank.


Totally love these! Been making some for my boys, hope they turn out this good!
Love these! Thanks for the tutorial and printables 🙂
I LOVE these! Wow, super cute! Thank you for the tutorial and printables! This is def going on my “to do” list! 🙂
This is perfect! I always like to get my kids a little something for V-day, and this would be a great little holder for each little one. Thanks for sharing your tutorial, it turned out so cute! Lucky for me, I just bought lots of red felt! 🙂
I absolutely LOVE this….thanks for sharing , my daughter is so excited to make these!
I love this! So cute. Thanks for the tutorial!
I love these I think I might do these with my little sister! She is always into crafty things and would love something like this to make for the parents on vday and I can make one for the boyfriend just for fun. Thanks for the tutorial!
Oh…these are sooo cute! My daughter’s are not here this year, so this will make the perfect gift for them! They love handmade crafts and I can’t wait to make some! I better get on the ball…I have 4 to make!
Those are adorable, just like everything else you do! How fun to be on Fresh Living, I’ll totally watch! I’m actually going to be on the show Thursday…crossing my fingers that I don’t sound like a big dufus. Good luck!
Mariel
http://www.oneshetwoshe.com
This is adorable! I sure would like to feature this on my blog. Would it be okay to copy and paste the pic of the finished product, and put your link to this post on my blog?
Kathy
Sure, Kathy! That would be so nice of you! 🙂
very cute! just might have to find time to make these!
Fabulous! I think even I could make this 😀
Love this!! And it seems SO easy!!! 🙂
WOW cute!!
Melissa frances from Naches, WA
Love these…so so cute..Cant wait to make these for my boys!!
Brooke, Brooke, Brooke! I love this. And do you know how many times I’ve picked up that stiff felt stuff and wondered what I could make with it? I loved the polka dot kind you showed on the show today. I might have to try that one! You lil cuties were so great on the show! I loved the plate. Those funny little tricks that you do at home….I loved that you did it on there too! So great. And you all looked stunning.
My only complaint is that you said you were going to be dorky. And I was left with no dorkiness. No laughs. What the heck? Next time be dorkier. Yes?
Congrats!!
You must not have seen the very end of the show. Dancing a leprechaun jig? I was definitely DORKY!
I love these! I am thininking of making a Star Wars themed one that I can put on my son’s door. OR wouldn’t these make an nice temporary wall hanging arrangement where people could leave notes for each other up to Valentines day?? Or where you could store school papers near the door that your child needs! The uses are many! Thanks a million!
Great ideas! You can totally change it up for any occasion!
Very cute idea…plan to start these this weekend…I would like to know if you bought or made the little fabric roses with the pearl in the middle. If you made them PLEASE tell me how…too cute!
Melanie, I actually did make those fabric rosettes….they are so easy! I don’t think we’ve ever done a tutorial on how to make them but there are LOTS of tutorials on various blogs, a Google search should bring up a whole bunch of good ones. Mine are no-sew and I use hot glue to keep it together. 🙂
I think yours is much cuter! Love it! Featured it on my blog, come by and grab a button if you would like!
Thank you! And thanks for the feature! 🙂
I think yours are actually cuter than the Pottery Barn version! Love these… great job!
Mary
Oh my heck these are so stinkin’ cute! {And I agree better than the PB version!} I’ll definitely be making these with my kids and I love your printable postcards! What a great idea! Just featured this!
Ah, thank you so much!!
This is a delightful! I love the pink “You’ve Got Mail” felt bundle set. How fun for Valentine’s Day! Thanks for sharing!!!
I will enjoy making these rather than buying things. Thank you so much for sharing this great idea!
These are adorable – thanks for sharing.
How very pretty. Just what i needed for our grandchildren. Thank you for the idea. Love never fails.
I cannot wait to try this! Best tutorial yet for this Valentines. Very creative.
Wow, thank you so much!!
i LOVE THESE BUNDLES ESPECIALLY THE RED & WHITE ONE. THANKS FOR YOU R TUTORIAL, CUTE IDEA!
lOVE the felt valentine envelopes! thanks for the tutorial!
Thank you so much for the cute Valentine Idea using the wool felt bundles from Prairie Point Junction! The tutorial as well as the easy directions will be a great help!! Cute idea for teachers to use in their classroom or parents to use with their children to give as Valentines in their classroom as well! In this day of mass production, what a great way to spend quality time with your child as well as providing something unique to a classroom!
Thank you so much for the really great idea. I am a teacher and it would be a great fine motor skill for the children to use. I am very excited to teach them. Thanks again!!!!
Cutest Valentine I have seen in a very long time. Thank you for the great instructions. Enjoyed your website.
This is such a cute project! Love It! Thanks for sharing!
I love this cute felt Valentine envelope! Can’t wait to make some for my grandkids. Thanks for this cute project!
MoGo LOVES these envelopes. What a cute inexpensive project! Thanks for share it with us!
How did you do the scalloped edge?
I made a little template and traced the shape and cut it out with scissors from the white stiff felt. You could just free-hand cut out the scallops as well.
So dang cute! I LOVE them!
I love this! I just finished one for my son! Thank you! Everything I found in the stores was too girlie, and besides, I am a psycho DIY craft girl at heart so I loved doing this!! Thank you, thank you!!
These are so cute!! Amazing what you can do with some felt and glue sticks.
Brooke, these are so, so cute! Would you mind if I include this idea on my annual valentines post of crafts around blogland? It will feature a photo and a link back to your blog. Just love this idea!!
Lovely idea.
I will post you tomorrow in my blog:
http://licenciaparacoser.blogspot.com
Thanks for creating such a nice tutorial.
Ana
Wow, this is some nice tutorial. I love felt crafts and step by step tutorial that you made make this easy to be followed. Thank’s for this good tutorial
HI!
What a great tutorial! Can I grab some photos (with your links) and share it with my readers?
Thanks,
Fara
Thanks for the great tutorial!
I’ve been wanting to make these for all major holidays! Thank you so much for the great tutorial. I thought I’d make them for my sons first Valentine’s Day party at school (he’s almost 2) and after making the first one, I realized I probably should’ve looked into it further before agreeing. LOL But I hope the other kids will love them and keep them from year to year like we plan too.
Thanks again,
Dominique
How did you scallop your felt? With a tool or by hand?
This is fabulous! Thank you so much for sharing! I am definitely going to give this a try tomorrow! Thanks again!