Easy Grilling Apron
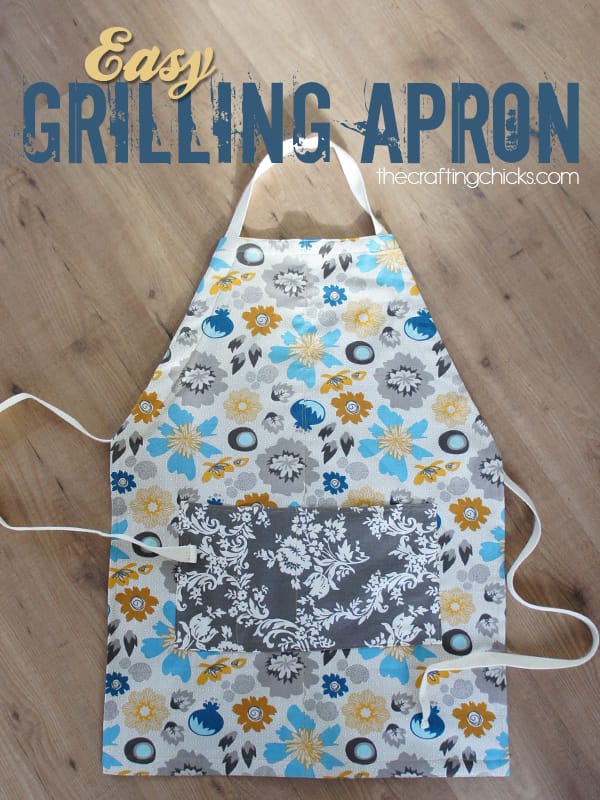
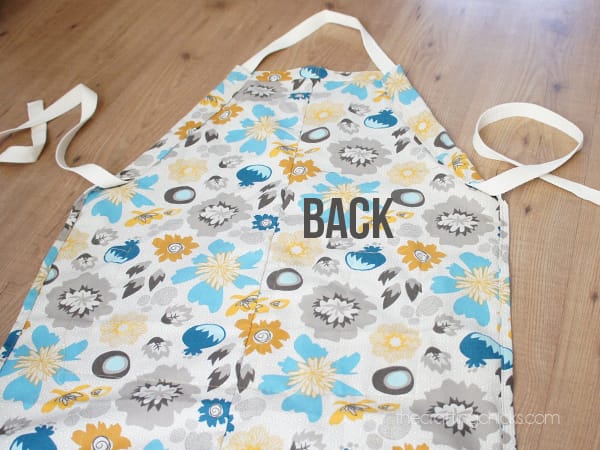
Summer is here and just thought of turning on the oven in the summer makes me hot. So most of our cooking is done on the grill. We’re big fans of grilled pizza at our house! Anyone else anti cooking during the summer? I have ruffley aprons, but they look a little out of place with the grill. Riley Blake’s cotton duck home decor fabric is a little heavier and tougher so I knew it would work great for a grilling apron.
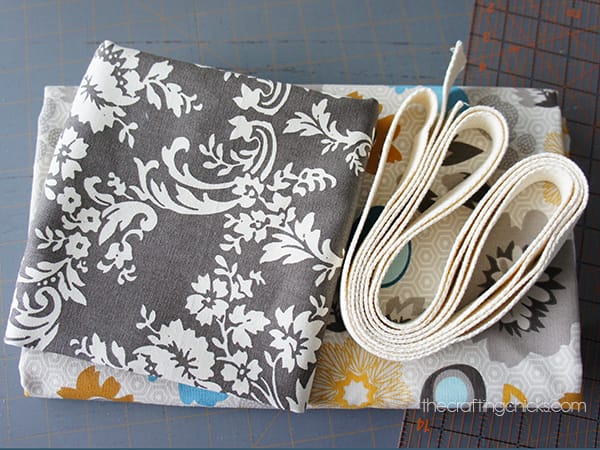
I chose Aqua Found Label and Gray Found Damask from the Lost and Found line by My Mind’s Eye.
You’ll need 1 yd of the main fabric and .5 yd for the pocket, as well has 3 yds cotton webbing for the ties.
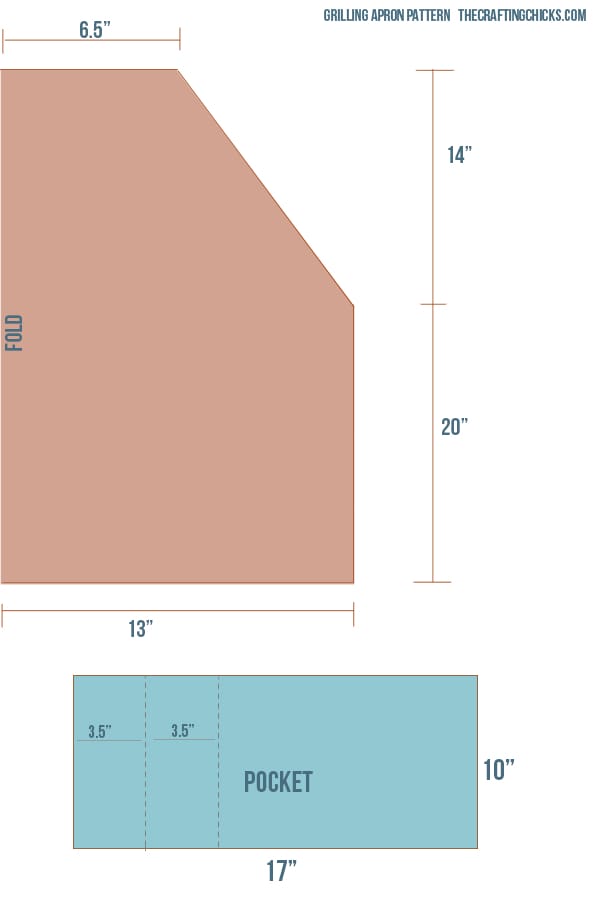
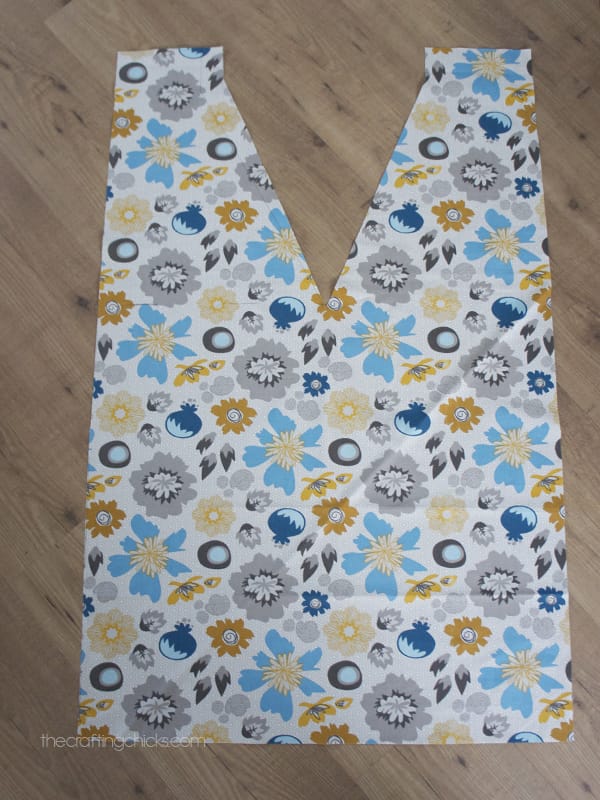
Fold the fabric in half (we’ll get a front and a back to the apron) and measure out 13″. Using a pencil or chalk, make a line at 13″ and up 20″
From the bottom measure up 34″ and make a line that is 6.5″ long. Connect the edge of this line to the top of the line that is 20″ tall, making an angle.
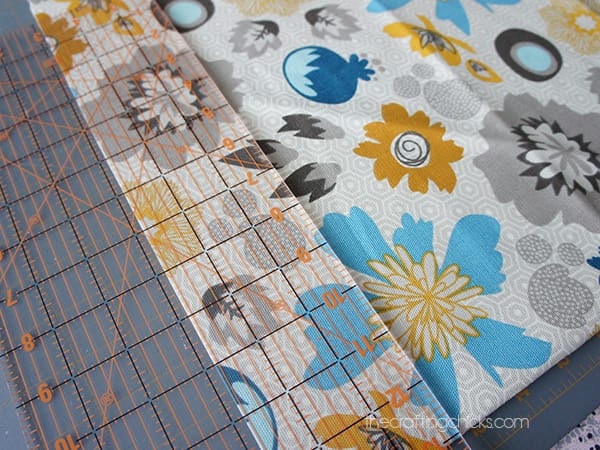
Using a rotary cutter and ruler, cut along the lines. Be sure your fold is on the opposite side of where you are cutting. Because if you’re in a hurry it is very possible that when you open up your fabric, you’ll be faced with this:
Which is not what you want! It’s okay, go ahead and swear a little all is not lost. Then cut the pieces in half and sew them together and pretend like that is how you intended it to be.
 I even added contrasting stitching on either side of the seam to make it seem more intentional. I actually really like the look of it now, but at the time I was really mad at myself.
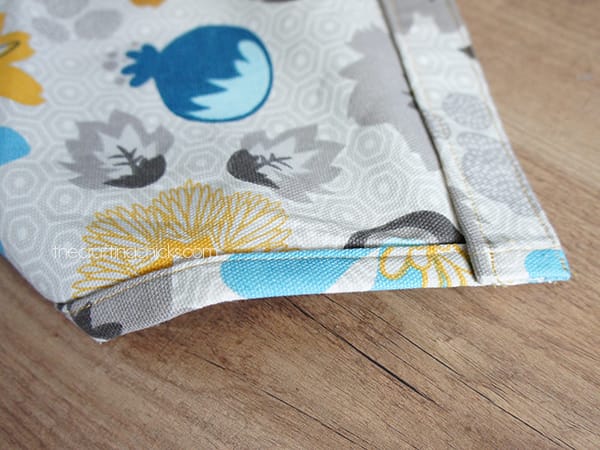
Place the 2 pieces together, right sides out. Pin together and zig zag or serge the edge together. Then hem the top, bottom and straight sides. Save the angled sides for last as that will be where we send the ties through. I used a larger hem for the top and bottom.
Alternative: place apron pieces right sides together, sew around the edges leaving an opening, and turn. Then top stitch around the edges.
Make the hems on the angled sides wide enough for your webbing. There’s about an inch opening here.
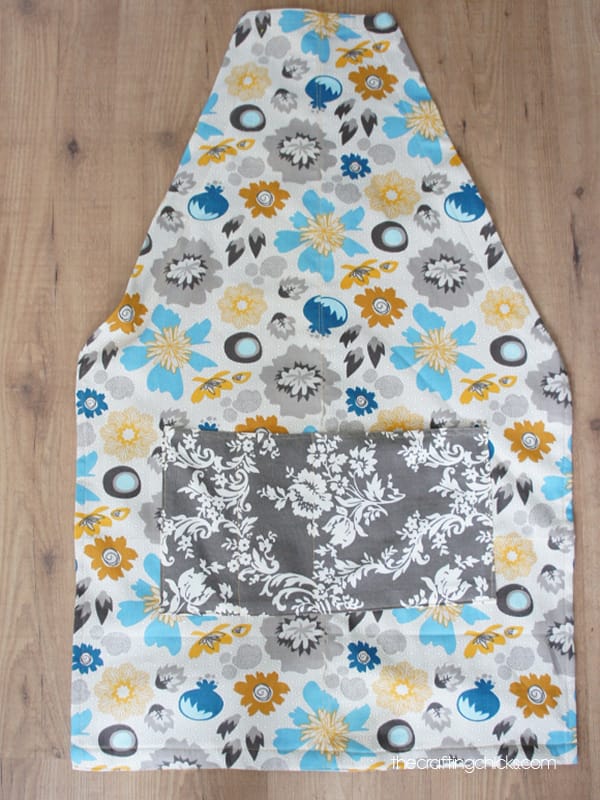
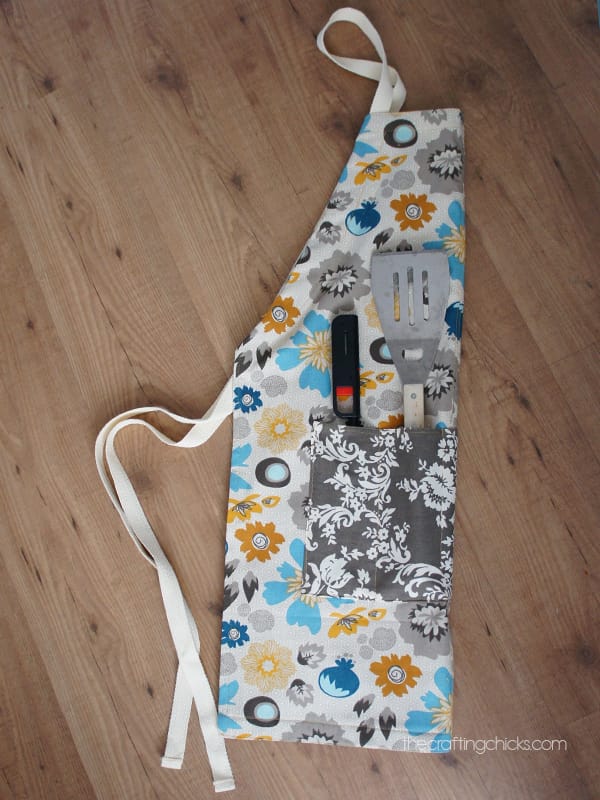
For the pocket, zig zag or serge the edges. Then hem the top as you did the apron. Fold the edges in .5″ and press. Pin to apron and sew the sides and bottom. To make smaller pockets inside the larger pocket, mark over 3.5″ and sew and then go over another 3.5″ from that seam and sew another line down.
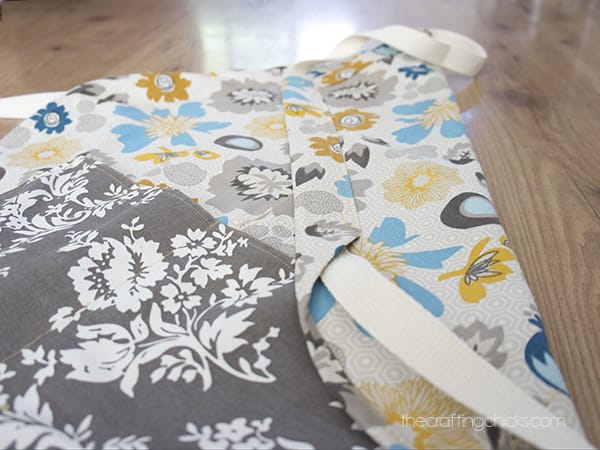
Thread the webbing through the sides, leaving a loop at the top to go around the neck. These aprons are great because they are adjustable, meaning it will fit my husband and myself. Whoever is manning the grill gets the apron.
 Fire up the grill!
This post was first shared on Riley Blake Design’s blog.


Do you mean: from the bottom measure up 34″ (not 24″) and make a line that is 6.5″ long?
Very cute!
Oh gosh, yes! Just fixed it. Thanks!
How do you get two pieces to sew together right sides out if you only have one yard of fabric? If the piece is cut as you state in the instructions, unfolded it will be 26″ X 34.” That’s almost the whole yard and not enough to get a 2nd piece as most yards are 42″ W X 36″. Am I missing something?
You don’t need to cut 2 pieces. I messed up. If you cut it with the fold where it should be you’ll end up with 1 piece for the entire front.
I think she is referring to the “front” and “back” of the apron. I’m running into the same issue.
Where do you place the pocket from the bottom hem and side hems?
Cool beans. I wanted something simple and doable without having to put to much thought in the apron itself. I have plans for a special fabric I’ve designed for the pockets. Thank you so much.
Do you have measurements for a child size apron? Thank you
I made this apron yesterday and cut two fabrics to make it reversible. Still working on pockets but thinking I will just do a pocket on one side?? I also added two inch’s to the chest and width for a larger male
That’s great. I love the idea of having it be reversible!
I also want to make the apron reversible for a larger man.
When you say add 2″ to the chest are you meaning instead of 6 .5″ you measured 8 .5″ ?
I am new to seeing could you please explain how you made they opening for the tie? Thank you in advance.