Product Photography: The 2 Biggest Mistakes

Let’s talk product photography, shall we?
If you’re a crafter/creater then you also kind of need to be a photographer. Especially if your want to sell your creations!
Having the ability to create beautiful photographs of carefully designed products is almost as important as creating the product itself! If you’re anything like me I find that I’m slightly turned off by a product that is being represented with poor quality photos and typically don’t end up purchasing the product.
So with that said it’s understandable how important it is to know how to take stunning photos of your products and creations! If you don’t know anything about photography, no need to worry! You just need some basic (yet vital) information. That’s where I come in. Let’s dive in and learn the 2 biggest mistakes in product photography…
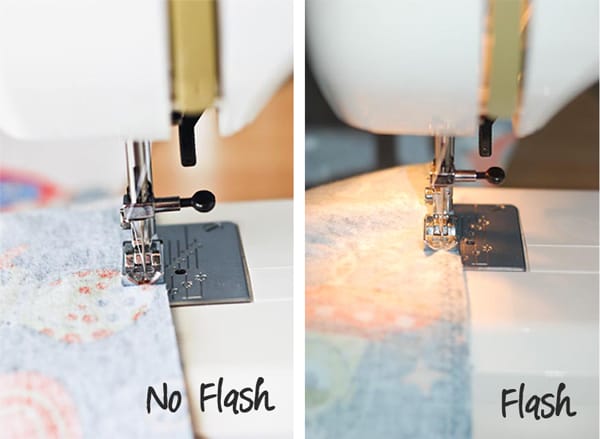
Mistake #1: Not using NATURAL light.
First and foremost…use natural light. I really can’t stress this enough. Taking a picture using a flash or using overhead lights tends to produce cold and uninviting photos. Check out the contrast in the two images below. The one on the left was taken only using natural light from a nearby window. The one of the left was taken using a flash and the light of the sewing machine.
See how much more inviting the photo on the left is as it is taken with only natural light?
I open up all the curtains and blinds in the room and sometimes I even bring my product close to the window in order to get as much light as possible. The other trick to only using natural light is to use a lens that has a very WIDE open aperture. The perfect and inexpensive lens for this is the 50mm f/1.8 lens. It’s available for Nikon and Canon and only costs about $100!
Now I know some of you are thinking…but I only have time to take my photos at night once my children are in bed! And to you I can only say this…Nap time. There really is no substitute for natural light.
Mistake #2: Too much clutter in your background
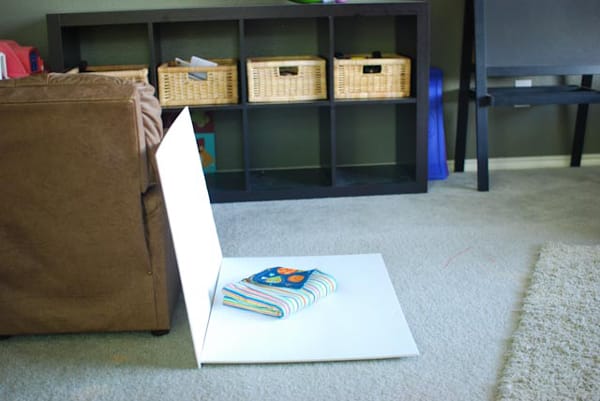
When it comes to displaying your final piece to either sell or to show off here are a few keys to remember. First is to DECLUTTER your background. So many times I see a really cool project but the picture is detracting from the actual project due to the clutter in the background. A good tip is to use a couple of white foam boards to display your projects. And as a bonus, besides giving you a simple clean place to take your photos, using white will help draw more light thus giving you a faster shutter speed which will in turn give your sharper images!
Here is an example of a set up using 2 pieces of white foam board:
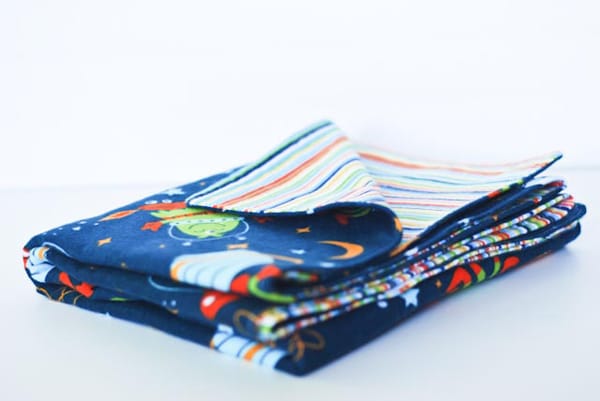
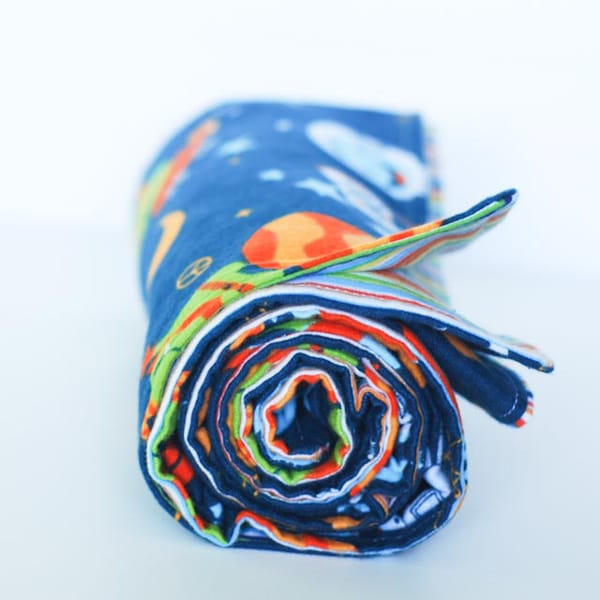
And here are the shots using the foam board:
You can also use wrapping paper and foam board to help simply your photos:
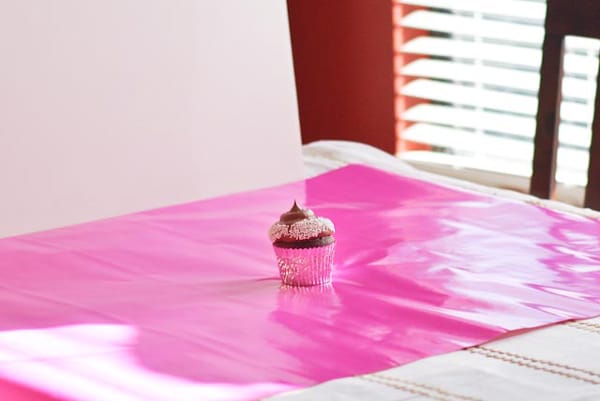
And the shot using wrapping paper and foam board:

Try using cool scrapbook paper and fabric:
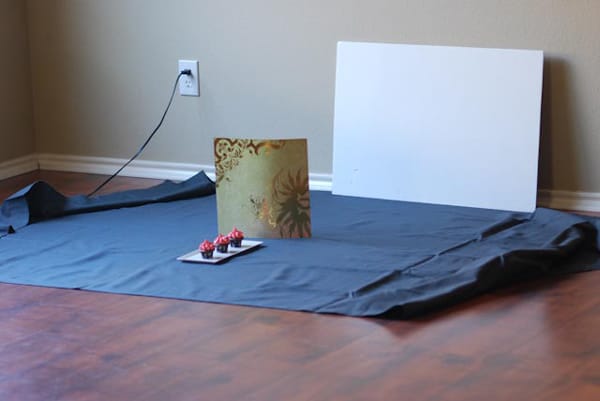
The shot using scrapbook paper and fabric:

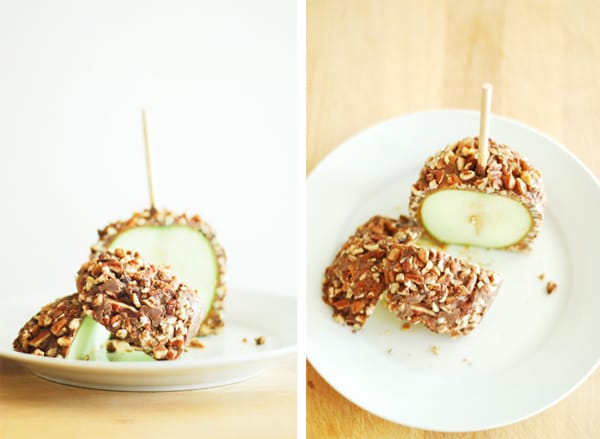
And one more idea…You can even use a black wall for a nice simplified background:
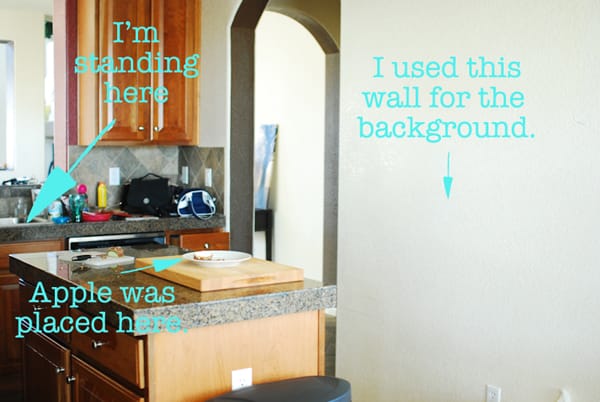
The shot using a wall (and the cutting board!):
Easy Peasy, right?! As always, please let me know if there is anything I can do to help you take better photos!
Warmly,
~Katie
Grab my freebie…The Key to Natural Posing {KIDS} ebook! Click here: http://keytopictures.com/free/

Great advice, especially on the lens – 50mm lenses take such wonderful buttery-smooth shots.
I think I need some cupcakes now!
Great tips! I’m assuming you meant a blank wall, not black right? I’ve tried black before and haven’t mastered it yet.
Haha! Yes, I did mean blank wall. Black if tough just because it sucks so much light out of the shot. It makes it hard to get a fast shutter speed.
Love this!!! Thank you so much, I have just opened an etsy shop and I really struggle getting good picture!
You are so welcome! Please let me know if there is anything else I can so to help you out with your photography.
Thanks for this! So many great ideas! I always take my pictures early in the morning when kids are asleep (assuming the sun is up!) Pinning this!