Valentine’s Day “LOVE” Tree Centerpiece
I am excited to share my “LOVE” tree centerpiece with you today! It has been quite the hit at our house. My little ones have loved seeing their photo hanging from our “tree” and hearing me read the love notes on back. So if you are looking for a special table centerpiece for this Valentine’s day, look no further! Here goes!

For the vase, I used a glass square vase filled with rocks. I then wrapped some black and white damask paper around the middle and secured with adhesive. I added a thick red satin bow, fancy and pretty! I purchased some green flower branches from a craft store and snipped off the bottoms as needed. I arranged them to stick out quite a bit-to make room for my ornaments. This will also be great for a Spring centerpiece after Valentine’s Day.
Photo Ornaments:
supplies needed:
-rectangle wood pieces (found at any craft store in the wood section) mine were 2 1/2 by 3 inches
-Valentine scrapbook paper (I found mine at Roberts Arts and Crafts-My Mind’s Eye Lush Line)
-Fun elements such as fancy brads and ribbon
-small photos of your kids or family or any loved one
-typed or written love notes for the back
-mod podge
-a drill to drill a hole through the top of the wood rectagle
-adhesive
-ribbon
-scissors
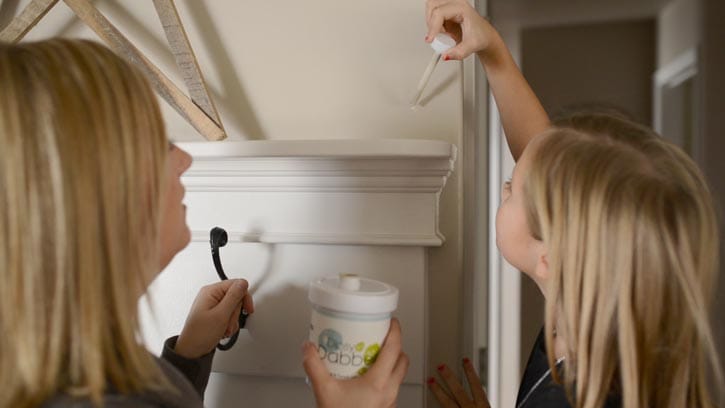
First, I painted the edges of the wood rectangles with black paint. No need to paint the center, you will be covering it with paper and photos.
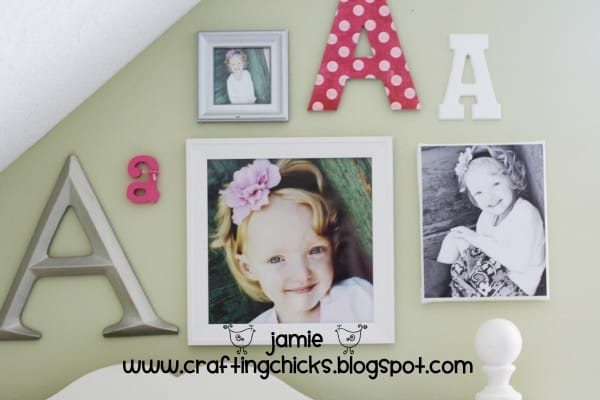
Then I printed small photos of my kids and little love notes for the back. For my love notes, I used Crystal Wilkerson’s Artisan Labels-LOVE them!
I cut out the photos and love notes as well as some paper. I layed out each wood piece and played with the paper and positioning of the photos until I liked what I saw. I then glued these layers down with adhesive.
I added some cute brads and ribbon to make them a bit more fancy and then I had my husband drill a small hole in the top so I could hang them with ribbon. I also added a thin coat of matte ModPodge to the top for a finished look.


Heart Paper Ornaments:
supplies needed:
-sturdy cute paper
-scissors
-mini hole punch
-ribbon
-heart stencil (I used a few different sizes from 1 1/2 inch to 2 1/5 inches)
First, you will take your stencil and trace two hearts. Cut these out.
Next, take your scissors and cut one heart from the top down to the middle and from the bottom up to the middle.
You can then slide the hearts together until they both reach the center. Very easy.
I then used a mini hole punch to punch small holes to run ribbon through. Tie at the top and they are ready to hang!

Now you have some very cute, classy ornaments for your LOVE tree!


What are some of your favorite decorations for Valentine’s Day? We would love to see your ideas!
HAPPY “LOVE” Crafting!!
XoXoXo Jamie
For more fun Valentine’s Day ideas check out our Valentine’s Day Printable Pack

Very cute and such fine details!
So adorable! I cant wait to make this. Thanks for the brillant ideas! xoxox Rebecca
Really cute! You kids will cherish these when they get older- so stash away after the holiday.
Your pictures of your children are adorable. Love the idea and also the Hearts your created as ornaments…neat…I have a grapevine tree I decorate for whatever special season it is and these all would be great ideas. Thanks for the inspiration.
LOVE IT!
Those are both so darn cute!…and elegant!.. and your kids are just beautiful. thanks for sharing. will have to give it a try!…
I think this is SO cute! And such a great way to make kids feel special! But I gotta give a LOUD shout out to those hearts! HOLLA!!! I big fat heart those little suckers! Whew!
I adore all your decorations with photos! No kiddoes yet so I use my friends and family. For Valentine’s Day I used old wedding pics of my parents, my hub’s parents and my grandma. So fun to check out all the styles in each generation together.
http://www.marthahasminions.blogspot.com
Just the sweetest thing ever for Valentine’s Day! I bet your children will love those little wood frames when they are grown adults with children of their own! What a sweet keepsake, especially the little descriptions on the back! – Karen
Craft minds think alike!!!!!!! I made my own Valentine’s tree last week. Love love love yours!!!!!!!!!!
This is just so wonderful! Not only a super-pretty decor piece, but one clearly made with loads of love. Love all your details–the scrapbooking paper, the loving words for each child, and those amazing 3D hearts (can’t believe how simple they are to make). Thanks for a most inspiring post!
LOVE it!
This is so cute!!
Very cute!
These photo ornaments are absolutely stunning! And the photos are just gorgeous!! Lovely tutorial, I think I’ll make these for my family for Valentine’s Day! 🙂 Thank you!!
That is just the sweetest thing! Thanks for sharing.
Hi, Just wanted to let you know I featured your tree on my blog today with suggestions on how to use the idea in a wedding. Nice job!
phyllis
Love the photo ornaments! Did you use photoshop for the photos and journaling on the back of each ornament? If so, what Photoshop version did you use? Thanks!