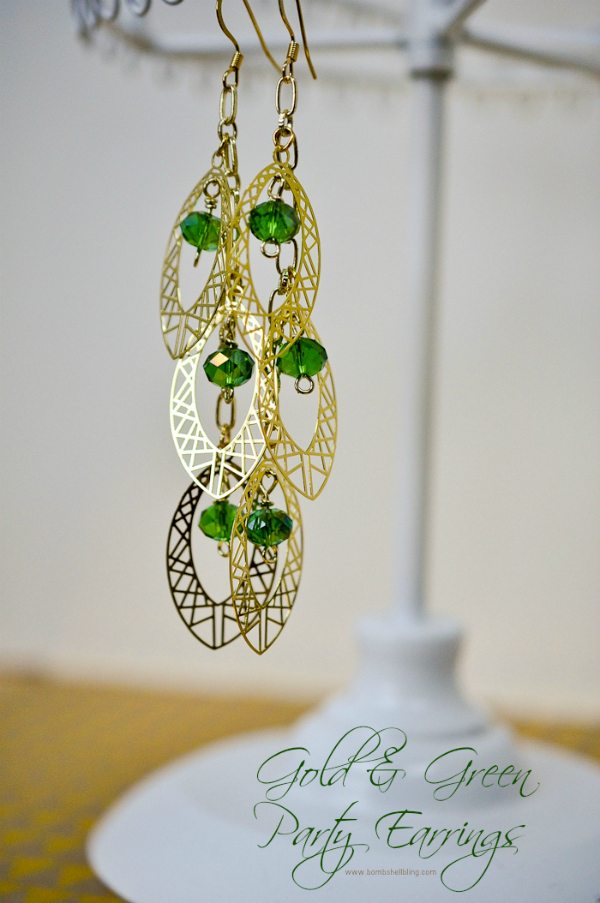
Gold & Green Party Earrings::Bloggers Best 12 Days of Christmas

Hello, Crafting Chicks readers! I am beyond thrilled to be guest posting here today. My name is Sarah Westover McKenna, and I blog at Bombshell Bling. I am also the jewelry designer behind the Etsy shop Bombshell Bling Jewelry. When I found out that I was posting on the First Day of Christmas for this series, a.k.a. the Partridge in a Pear Tree day, I immediately had gold and green dancing in my head. I love the Christmas holiday season. It just feels GLITTERY to me. (Isn’t it just SHOCKING that a woman who named her businesses Bombshell BLING would see glitter everywhere in the air?!) I love wearing sequins and red lipstick and flashy jewelry to holiday parties. I wish I could find a place to dress like that all year long!
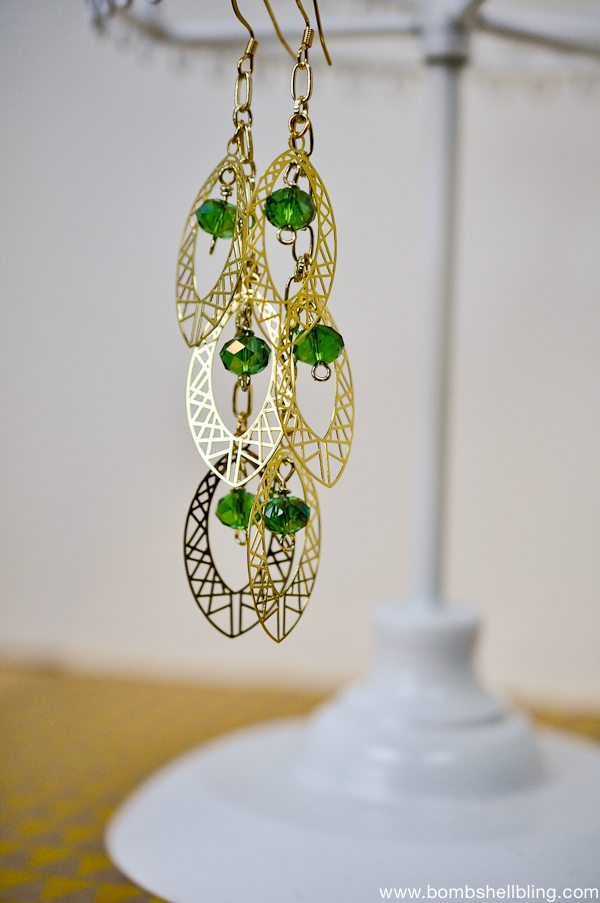
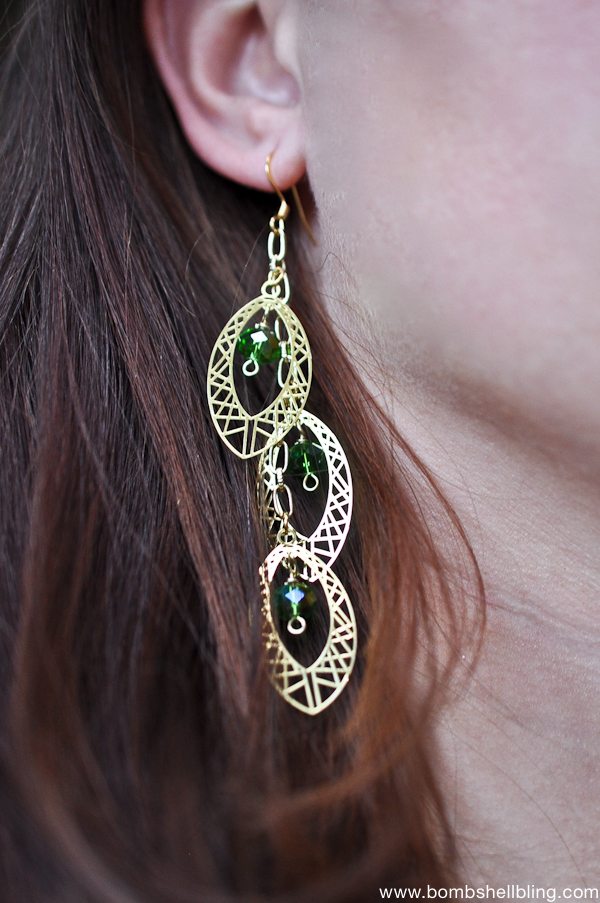
With holiday parties and glittering gold and green dancing about in my head, I decided to make a pair of fabulously flashy party earrings. As long as you have the right tools, they are very simple to make. Because the metal pieces of the earrings are incredibly thin, they are also extremely light, so they won’t start to hurt after you wear them for awhile. I planned to list them in my Etsy shop when I was finished with them, but I love them too much, so I am keeping them instead! Happy holidays to me!! Now let’s get down to business so I can share these Gold & Green Party Earrings, shall we?
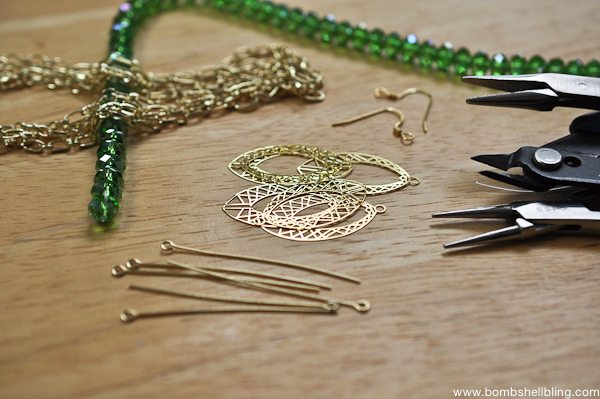
In order to make these earrings you will need the following supplies:
* 6 green Chinese crystals (or other small crystal or bead, about 6mm in diameter)
* two gold colored earring prongs
* a small amount of gold colored chain
* 6 gold colored eyepins
* 6 gold colored jump rings
* 6 gold colored open marquise pieces (FOUND HERE)
* round-nosed pliers
* wire snips/cutters
* flat-nosed pliers
(You can find all of those basic tools in a kit at any large craft store.)
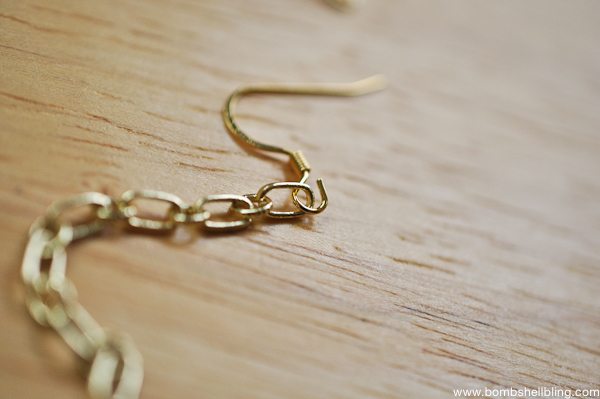
Prepare your chain. I used very small chain and cut two pieces of chain that were about two inches long. Begin by using your flat-nosed pliers to gently pull open the loop on your earring prong. Thread it through a chain link, as shown, and then use your flat-nosed pliers to gently reposition the loop on your earring prong to be closed once more. Repeat with the second earring prong.

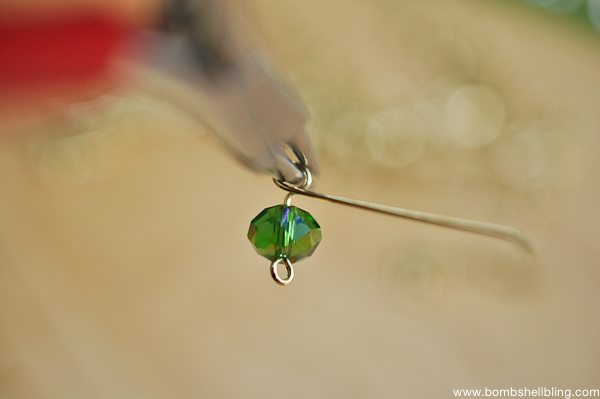
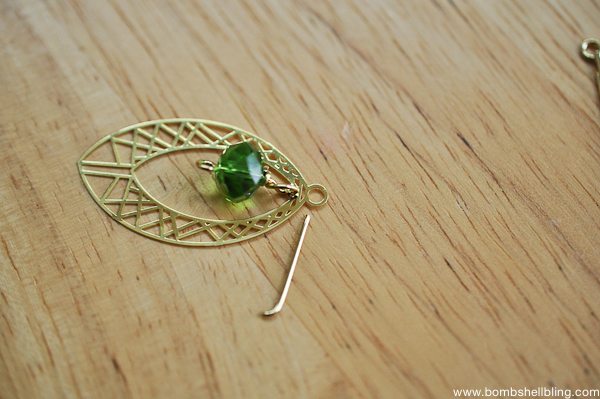
Prepare your crystals by putting one onto each eyepin.

Use your round nosed pliers to gently bend the eyepin to the side near the base of the bead, as shown below.
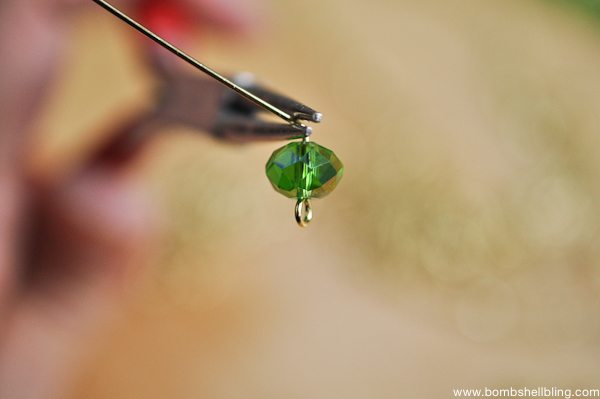
Now wrap the eyepin wire back around the round-nosed pliers until it has created a full loop. Leave it open—do not twist it shut yet!
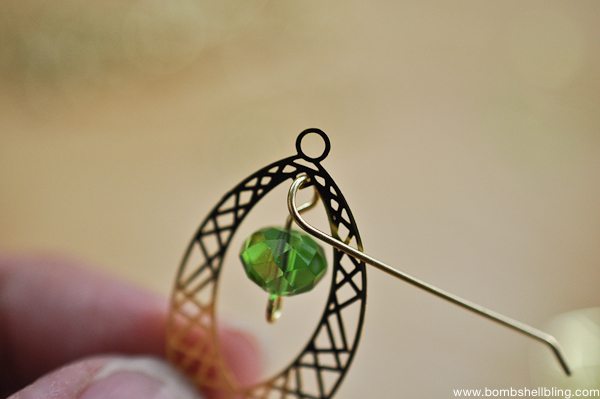
Thread the eyepin through the tiny opening on the top inside section of the marquise shape, as shown below.
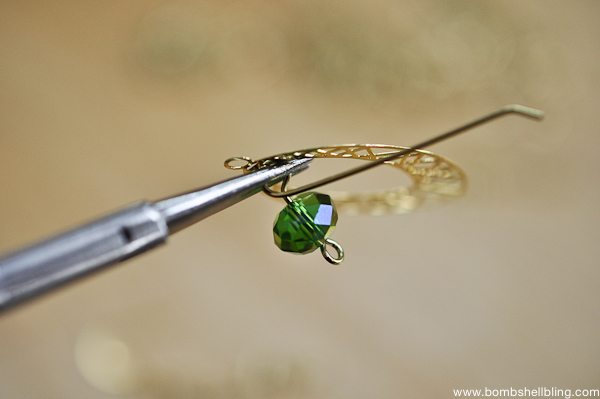
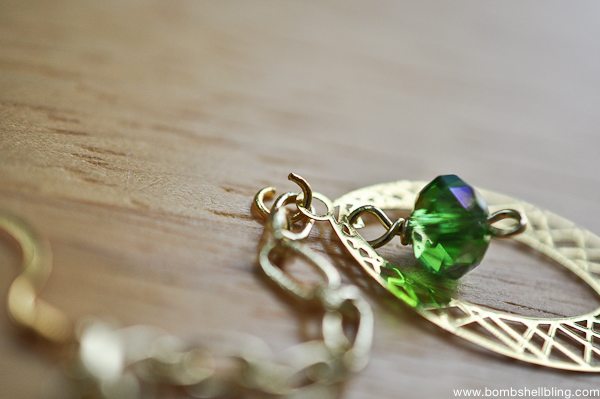
Next I usually use my round-nosed pliers to gently grip the loop in place, as shown above, and with my other hand I use the flat-nosed pliers to grip the end of the eyepin wire and twist it around the base of the eyepin wire a couple of times, therefore locking in the bead, as shown below.
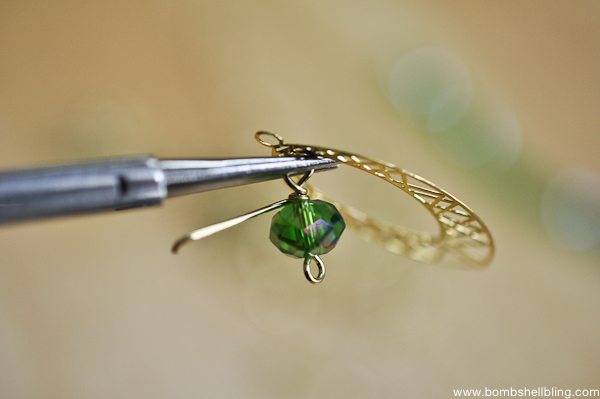
Now snip off the excess wire end.
Repeat this process with each of the six marquise shapes.
Time to attach the glittering marquise shapes to your chain. Use your flat nosed pliers to gently open a jump ring. Thread it through the loop on the top of the marquise shape and then through the bottom link of your chain. Use the pliers to close it again.
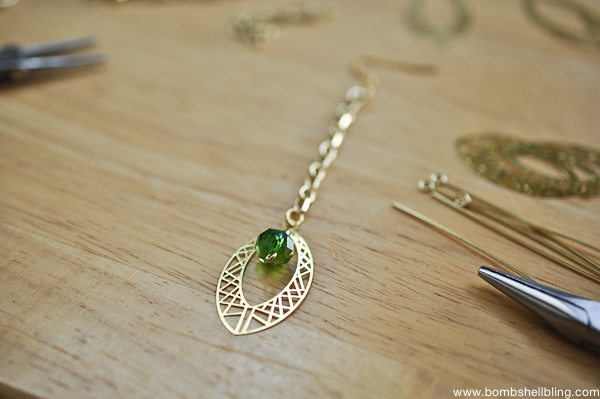
Repeat this process on the top chain link and the chain link in the center. Do this on both earrings.
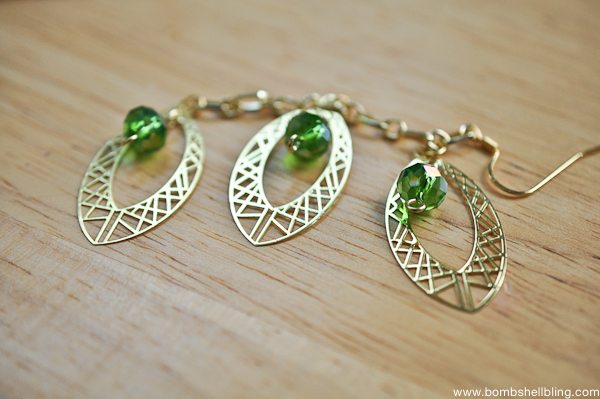
You are finished!
All that you have left to do now is to try them on and plan the perfect person to give them to as a gift . . . or be like me and plan the perfect outfit to wear them with instead!
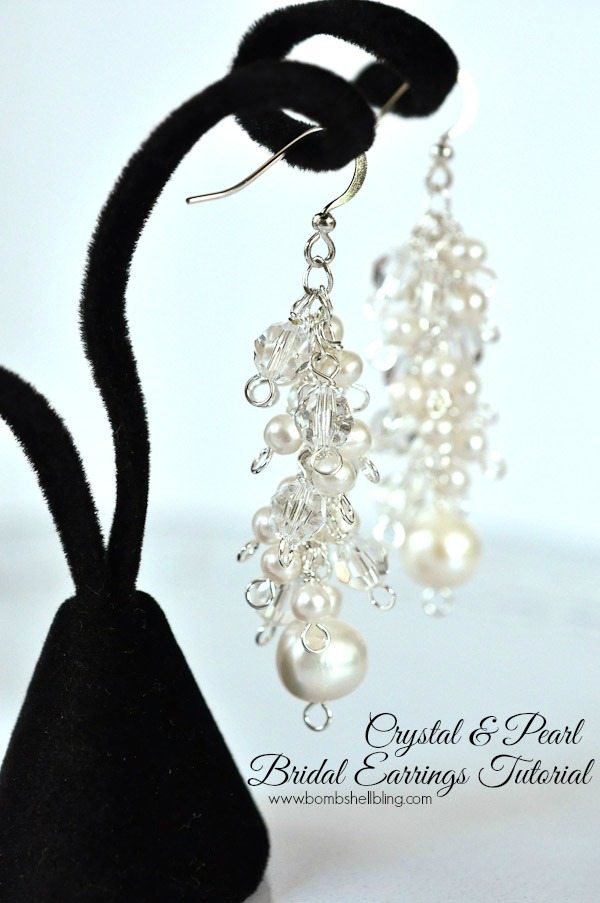
If you liked this tutorial for Gold & Green Party Earrings then you may also enjoy my Crystal & Pearl Bridal Earring Tutorial, which I have made variations of for a couple of different brides.
I hope that you come visit me at Bombshell Bling, and that you have a lovely day!


These are darling! I’ve never made jewelry before but with the tutorial I think I could give it a go! You’re awesome and so talented, Sarah! It is such a treat to see your work linked to this blog. You make me want to go buy some red lipstick and an outfit to go with this all! Thanks for sharing!