Tie Dye Rosette Shirt
I’m excited to share this project with you, made with the TUPLIP TIE DYE KIT. So I think the last time I did tie dye was when I was in 4th grade and made shirts for field day. i think mine was green and white, and why I remember that, who knows. This was so fun because tie dye seems to be gaining some momentum in the craft realm and my kids were SOOOOO excited to try it out. We are looking forward to making summer t-shirts for each of the kids, I can’t wait to see what colors and design they come up with.
Here are some great techniques you can use with the Tulip Tie Dye kit. I had no idea, before I used this kit, that you could do things like ombre designs, stripes, or even spirals with a kit. The instructions in this kit give you great detail as to how you go about doing these fun techniques.
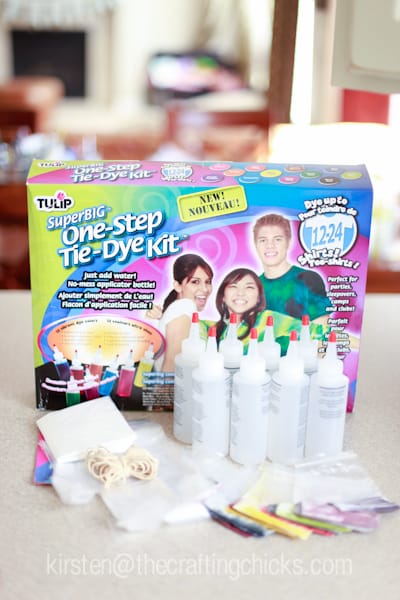
Supplies in the kit:
rubber bands
bottles enough for 12 colors
12 different bright colors
plastic gloves
plastic tray
plastic tablecloth (drop cloth)
great instructions
TUTORIAL: 1. Choose & mix the colors that you are going to use and put each individual color into a plastic squeeze bottle and just add water, super simple.
2. Choose your fabric, if it’s not 100% cotton it won’t work as well. I chose to use some old t-shirts. I wanted to have a couple different shades of yellow, orange, red and pink so I just cut up pieces of fabric and dyed them different colors.
3. Wet the cloth you are using and wring it out well.
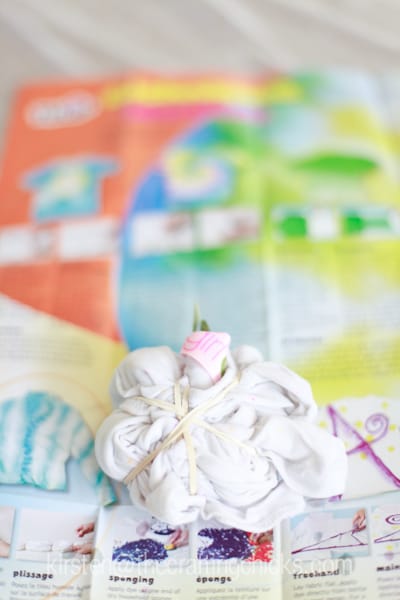
4. Choose which design & apply rubber bands. Choose which one you are using by looking at the instructions booklet and fold up your cloth accordingly. For mine, I used the spiral design and the regular stripe design. I just pinched in the center of the fabric and twisted the fabric (it kind of looked like a tornado), then I applied the rubber bands like so:
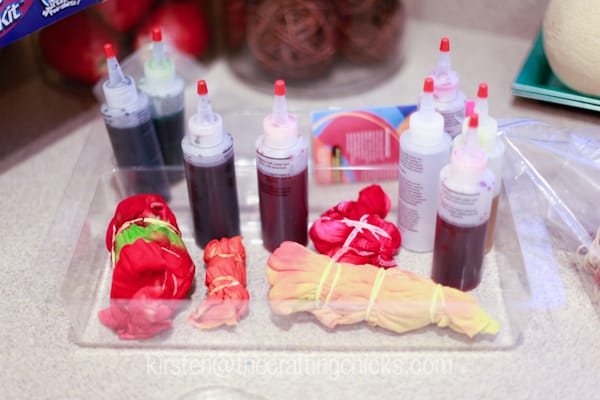
I chose to use these colors: pink, red, orange, yellow & green.
5. Apply the Dye to the fabric. Make sure at this point that you get it into the center of your little bundle and well-saturate the fabric.
6. Let the dye sit for 6-8 hours. and after that period of time, wash the fabric in hot water with the rubber bands off.
7. Take the fabric and cut a 12′ CIRCLE & cut into a spiral shape. Cut one 12″ circle for each of the rosettes. Start cutting 1.5″ wide spiral until you get to the center of the fabric.
8. Start in the center of your fabric and wind the fabric around the center to make the rosette shape. For this part, it’s really important that you trust your creative juices and manipulate the fabric until you love your rosette shape. Some are more loose and some are tighter, it’s all a matter of preference. Mine was a little loose.
9. Hand stitch the rosette to the shirt & clip edges. I laid each of the rosettes onto the shirt until I loved the placement, then hand-stitched each of them on.
10. Machine sew of hand-stitch lace rosette stems. I chose some dainty pieces of lace and machine-sewed them into the shirts as the stems.
DONE!!!! STAND BACK AND ADMIRE YOUR WORK!
Check out other fun projects on the I LOVE TO CREATE Social Media pages: Twitter: http://twitter.com/
Tulip Tie Dye Kits are available at Walmart, Walmart Canada, Michaels, JoAnn, A.C. Moore, Hobby Lobby, Hancock Fabrics, Meijer. Tie dye kit contents and colors may vary by store.I wrote this post as part of a paid campaign with iLoveToCreate.com and Blueprint Social. The opinions in this post are my own.



Adorable!! 🙂
Very pretty! Thanks for sharing this wonderful idea!
Having the tie-dying just on the rosettes is such a sweet idea!
This is UBER cute!!
Love this! Could you add a close up of just the flowers?
Oh dear, these are darling! I would love to make some of those for a bag!
Tie dye rosettes is such a beautiful idea!
Beautiful Rosette Shirt idea!
What a cute project! I love it so much that I decided to feature it in our roundup of upcycled t-shirt crafts! Check it out here: http://www.favecraftsblog.com/upcycled-t-shirt-crafts/
Have a great day!