How to Paint a Chevron Wall
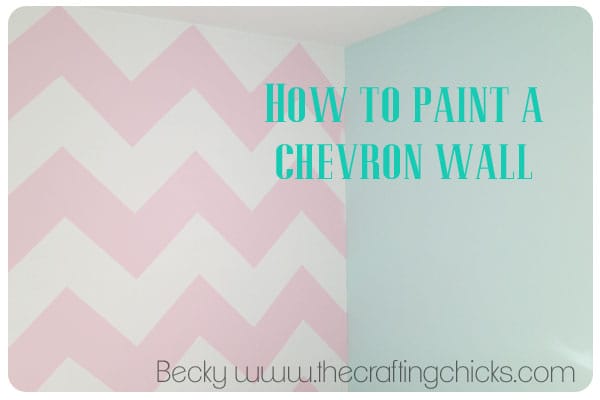
If you follow me on Instagram you know that I have been painting a new room for my girl’s. I wanted to do something that was fun, different and something they could grow up with. Enter a chevron wall!
I searched all over for a great tutorial on how to chevron a wall without losing my mind. I even tried a stencil, but couldn’t get it to lay flat. What’s a girl to do?
Well, let me tell you so you don’t have the same issue I had. First things first. I’ll start at the beginning and then we will get to my revelation.
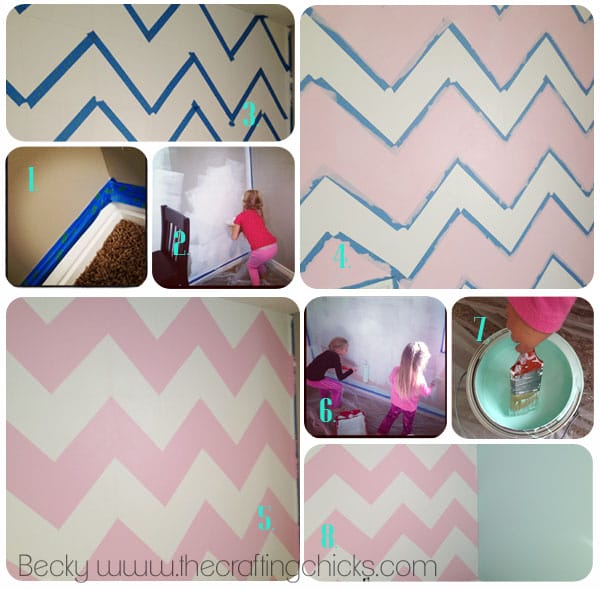
- Make sure you have everything you will need. I wanted my chevron colors to be white and pink. I also knew that I wanted my chevron wall to be a statement wall. I needed to paint my lovely Tinderbox painted wall white and tape everything off. I used my trusted ScotchBlue Painter’s Tape to help seal everything in nicely.
- We (isn’t my little helper cute?) began to paint the wall white. I just used a bright white with no added white.
- Now here comes the chevron. I broke into my scrapbook paper and got a 12×12 piece and used that as my guide/template. I drew a grid on my wall with that paper.
- I started in the top left hand corner since that is what you would see first when you walk into the room.
- I traced around the paper with a pencil and then moved my paper down and across the wall until there were pencil drawn boxes on my wall.
- I know it sounds intense and crazy, but honestly it took me about 30 mins. start to finish. It was way less time to draw that then it was for me to do anything else.
- Once I got all my boxes for my grid on the wall, I took my Scotch Blue Tape again and began to tape a diagonal line from one corner to the next. I was careful to make sure my points were sharp. I also made sure that my tape lines were crisp on the pink painted areas and overlapped into the areas that were going to remain white.
- The fun part. Paint away! Yippee!
- Remove the tape. Okay, maybe the tape removal is my favorite part. I can’t wait to take that stuff off. I get all giddy! Make sure you don’t leave your tape on too long because it will pull up your paint.
- Now I didn’t just stop with the chevron. Like I said before, I wanted a fun room they could grow up with. I painted the rest of the room this beautiful color called Sea Lily. LOvE it!
Now I just want to take a moment to mention that we take preparation and safety seriously. It is just nerve racking when you get into the middle of a project and have to stop because you don’t have what you need. It is also very dangerous to make or create things without the proper safety gear.
And speaking of DIY safety gear, if you head over to 3MDIY.com you can enter to win all sorts of safety products to start building your supply.
Now get out there and paint something!
This post is a collaboration with 3M DIY. To enter to win free samples for your next DIY project, visit 3MDIY.com





Ohhhhh how fun!
How was I not already following you on IG??!!
Oh I love it!!!! Sure love those helper girls!!! Madi with a roller would scare me to death! Nice work. I feel inspired. Madi wants purple walls…hmmmmmm……
Zig Zags…
Wahoo! It turned out awesome!
That looks awesome!!!
Would you mind sharing what color of pink paint you used? I’ve been considering something similar for my baby girl’s room and love the color you picked!
It’s called Sweet Taffy and its from the Pottery Barn Kids color line. Love this color.
Love Love this!! The stencils are not as easy as they look! Can you provide a little more description or a picture of how you traced the 12×12 paper? I’m having a hard time figuring out how you got the rows even in space and which angle you traced… Thanks!!
Erin,
Here is a link to me showing how to do it on a tv show here in Utah. Hopefully this helps. Let me know if you have any other questions.
http://www.kutv.com/news/features/fresh-living/home-improvement/stories/vid_84.shtml
Thanks!
Becky
I like this way better than using chalk lines. Everyone has said how hard the chalk is to come off. It looks fantastic!!
I am loving your instructions super easy to follow and I am in the process of duplicating your chevron cuteness in my laundry room right now. Just curious what you did with the pencil lines?
I just used an eraser. I thought I might have to touch up after wards but you can’t tell at all. Good luck!!
Thanks for the comment!
Did the pencil come off of the wall easily?
Yes. It came off really easy.
Hi! I am currently in the process of painting my room and one of my accents wall will be chevron and I have attempted your method. The flaw I found was that when I outlined my scrapbook paper the pencil marking would not come off the wall and I had to paint over it. So what should do now?
Yikes! My pencil came off super easy. I just used an eraser that my girls had laying around. Some erasers are not that great. So sorry it caused you problems!
Becky
Well, I painted back over it and restarted this time using chalk so I can just wipe it off and it is going wonderfully! Thank you so much for steps though!
Hi could you email me a quick drawing of how you drew the grid on the wall please ?
Jamielee–There is a link in one of the above comments where I posted a video that I did that will show you how to do it. Let me know if you have any other questions. 🙂
The’ how to’ link won’t work for me 🙂
I’m not understanding how you made a grid with the scrapbook paper either. I noticed other people above had the same questions. And I watched the video but you only showed you drawing one square. Are you able to post a photo showing the grid?
You start by drawing one square in the top corner. Then you will move your paper so the edges touch the lines you have just drawn, and will draw another square. Keep moving the paper across your wall until you are done. Then go below and do the same thing, matching up the top of the paper to the line that you drew in the beginning. This will give you a pencil line grid on your wall.
Does that make more sense? Let me know if not and I can see if I can get a pic.
Thank you! Thank you!! Thank you!!! I have had this plan to do an accent chevron wall in my nursery for a few months now but I was terrified to try it. The plan is to start painting next week and after reading your post I am totally excited about it instead of scared out of my mind. Thank you!!!!!! I’ll let you know how it goes :0)
I know this is an old post but I love your teal color. Do you remember what color and brand it is? Thanks!!
Katie,
I believe I have it in the post listed as Sea Lily from Lowes.
After you taped your diagonal lines in each square. Is that when you erased your pencil lines? or did you erase them once you were finished painting? I have been wanting to do a chevron wall for a while now but haven’t found a good easy tutorial. I was contemplating getting a stencil but then read reviews that it wasn’t as easy as it sounded. So I’m going to attempt your tutorial. Thanks.