This post may contain affiliate links.
Lately I’ve been having fun making some DIY Personalized Photo Jewelry. I love personalized stuff! There are so many great tutorials out there and awesome supplies for the DIY-ers. While this isn’t really a super detailed step-by-step tutorial, I thought I’d share a few cute things I’ve made recently with some simple instructions. 🙂
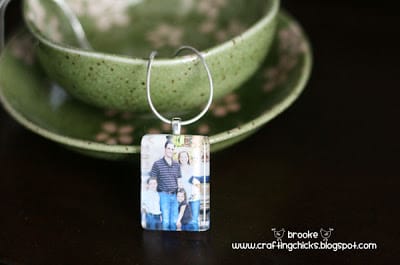
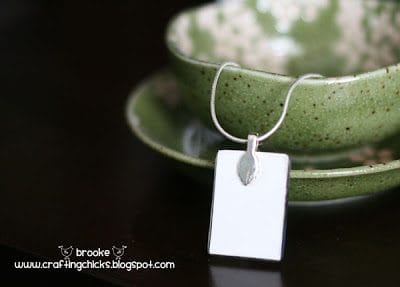
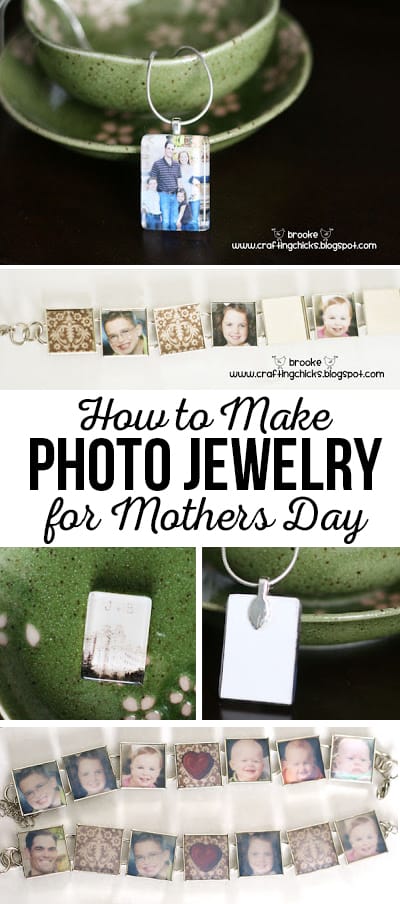
A glass tile family photo pendant
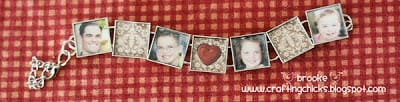
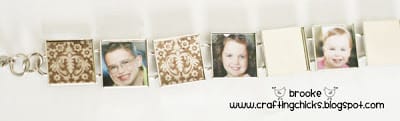
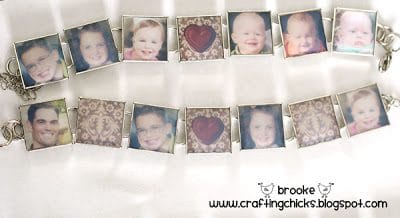
A bracelet with faces of my loves. 🙂
DIY Personalized Photo Jewelry
I love using photos for different projects. I made the bracelets for my mom and mother-in-law (and myself!) for Mother’s Day, with photos of their grandchildren. 🙂 They were a big hit!
Supplies needed:
**
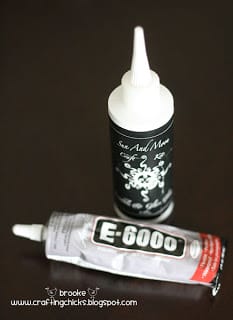
E-6000 or other super strong adhesive
**
silver bails (silver “hooks” to allow you to put your pendant on a chain–also available in craft stores or in abundance on Etsy!!)
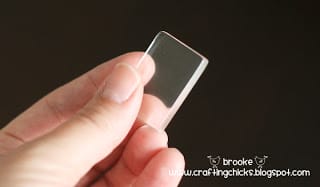
Step 1
Decide what photo you want to put on your glass tile. I measured my glass tile and in Photoshop cropped my photo to the correct size. I printed on luster photo paper at Costco. If you print from your home printer, make sure you spray your photo with some sort of sealant so that the color won’t bleed when you put the adhesive on it.
Step 2
Spread a thin, even layer of the DIAMOND GLAZE on the glass tile, then place your photo “face down” onto the glaze. Position it where you want it and smooth it out, making sure to get rid of any air bubbles. Then spread another thin layer of glass glaze on the back of the photo.
Step 3
When dry, put a small amount of E-6000 on the silver bail, then attach to the back of the photo tile. Let dry for 24 hours. Then you can put it on a chain and it’s done!!
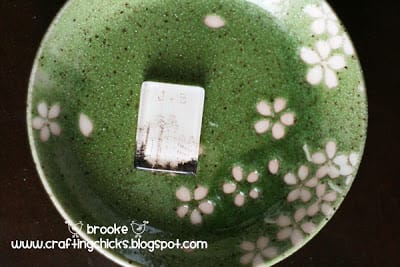
I’ve made lots of these pendants, with different photos, cute scrapbook paper, initials, you name it. One of my favorite necklaces I’ve made is of the Salt Lake Temple, with me and my husband’s initials. 🙂 These make awesome gifts too.
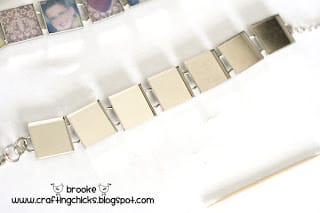
Photo Bracelet
For the photo bracelet, I got an
“empty” bracelet at Hobby Lobby (we just got a brand new store close to my home and it’s glorious!).
I measured the little squares (they were like .625 inches) and cropped my little photos in Photoshop. Printed them at Costco again. Then I put a thin layer of the GLASS GLAZE (used on the pendants) on the back of the little photos and place them into the bracelet.
Once placed in the squares on the bracelet, I squeezed the glass glaze to completely cover each photo, being careful to get rid of any air bubbles. I used a toothpick to pop any that showed up. The glaze will be cloudy until it dries completely. Make sure your bracelet is on a flat surface to ensure even distribution of the glaze. (apologies for not-so-great photos)
Let it dry for 24 hours before wearing. And there you have it!
I wore mine to church on Mother’s Day and got lots of compliments on it! I had to chuckle when they asked if my husband got it for me for Mother’s Day–I said I made it for myself as a gift. 🙂 I love it!
Linked at these parties:


Thanks! I have often wondered how to do this!
Oh Brooke-these are sooo cute! I’ll have to try it!
Thanks so much for pointing me where to find that liquid glass stuff. I had no idea.
And I just had a Hobby Lobby open up right up the street from me. It is now lovingly referred to as the “Devil’s House” around here. My poor bank account! An isle of Pom Poms? Really? Delightful.
So fun Brooke. I want to try these for sure!
I found your blog through my sister, Brooke’s– (All Things Thrifty, Brooke!) You have the cutest ideas!!! Thanks for being so willing to share them! I have always wanted to know how to make these. They are DARLING! ;D
this might be a weird question but how do you print the cropped pictures at costco? do you put them all on one picture or something else. I feel like I’ve had them stretch photos before. I hope my question makes sense
Everyone, thanks for your sweet comments!
Ellie G, you crack me up! Hobby Lobby= Devil’s House? LOL! And probably true. 🙂 I have to force myself to stay away from that place.
Adrian, how fun that you’re Brooke’s sister! I love Brooke. She married one of my best friends, Dan. She’s amazing! 🙂
Marissa–I drag all of the little cropped photos onto another “print size” photo–for the little bracelet photos I fit like 25 little pictures onto one 4×6 and had room to spare. That way, the photos won’t get stretched to fit the standard photo print sizes. Hope that answered your question! It was a great question.
gorgeous projects!
Oh I love it! Thanks for the instructions.
These are great! Thanks fro the instructions! I think we’re going to try to make them for next Christmas. (Because it’s never too early to start thinking about great gift ideas!) My family will love them.
http://www.makingmemorieswithyourkids.blogspot.com
Love the bracelet!!!
I love this idea. I’ve done this before but I’m looking for a better glaze. What type (brand) of glass glaze did you use?
Oh my goodness… snowing in May? I feel for you. 🙂 Your jewelry is adorable. Would make great gifts for moms and grandmoms.
great posting … I’ve been looking for some jewellery suppliers and so happy that you shared your etsy connection. I’ve ordered a bunch of stuff and can’t wait to make these myself!
I’m so excited, thanks for the photo explanation reply I just ordered my supplies
Brooke, I massed produced these necklaces today as birthday gifts for the R.S. to give the sisters in our ward. So easy! So cute!
I love your ideas. I tired to go to Esty and find the Sun and Moon Crafts but nothing came up. Do you have a direct link that I could use?
Tori, here is a link to the Etsy shop:
http://www.etsy.com/shop/SunAndMoonCraftKits?ref=pr_shop_more
Hope that helps! 🙂
Is it possible to use mod podge on the pictures to adhere them to the tiles? It dries clear, so do you think it would work?
Shannon, that would probably work as well, it just wouldn’t have the 3-D “glass bubble” effect that the glaze has. Although, you could use the Dimensional Mod Podge, that would create a similar effect.
These are beautiful! And something I would actually make! Thank You!
I LOVE this tutorial! I’ve been on etsy purchasing my supplies. I have one question…how do you apply the glaze? With a brush? With your fingers??
For the first project (glass tiles) I think I just put a small dot of the glaze onto the surface and used my fingers to cover the surface. I have also used a small foam brush and that has worked too. For the bracelet I just carefully squeezed the glaze into the jewelry “container” and shook it carefully to distribute it. Good luck and have fun making your jewelry! 🙂
Ok…so I’m trying to prepare my photos to print. I have photoshop and would like to drag all of them onto a print size sheet like you told someone in an earlier post. I just can’t figure out how to do it! I’m fairly new to photoshop. I understand how to crop down to the size I need. I just need help putting it on a print sheet. Could you explain how to do that or tell me where to go that would explain it? Thanks again!
I so want to make a bracelet but we don’t have hobby lobby in the uk. Do these bracelets have a particular name to try and search for them under so that I can google them to find out where to get them from?
When I initially commented I appear to have clicked on the -Notify me when new comments are added- checkbox and from now
on every time a comment is added I recieve four emails with the exact same comment.
Perhaps there is a way you can remove me
from that service? Thank you!
Help! I bought my supplies, but now I too and having problems with the printing. I was able to edit my pictures to the size you suggested, but how do you get them all on one sheet so they aren’t printed as a 4×6?? I was trying to make this for a friends birthday who is this Thursday. Please help 🙂
Brooke, I am trying to do something similar with a different product (Craft Fantastic). Since I’ve been having problems with the photos fogging after I put them under the glass, I decided that printing them somewhere different (other than home), would help. I was interested in hearing your Costco solution. But I just tried to bring them in and do what you described and was told they don’t do that. Could you please elaborate on how you loaded your cropped photos onto a 4x 6 photo size? Thanks
Awesome DIY for Jewellery. I loved it and will try to make my own jewelry like these beautiful ones.
Thanks for sharing this DIY.