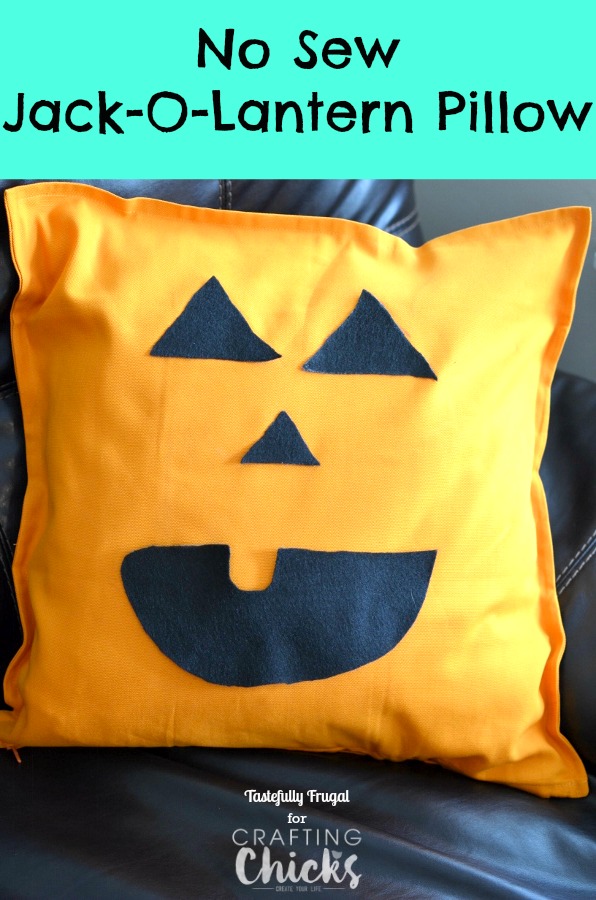
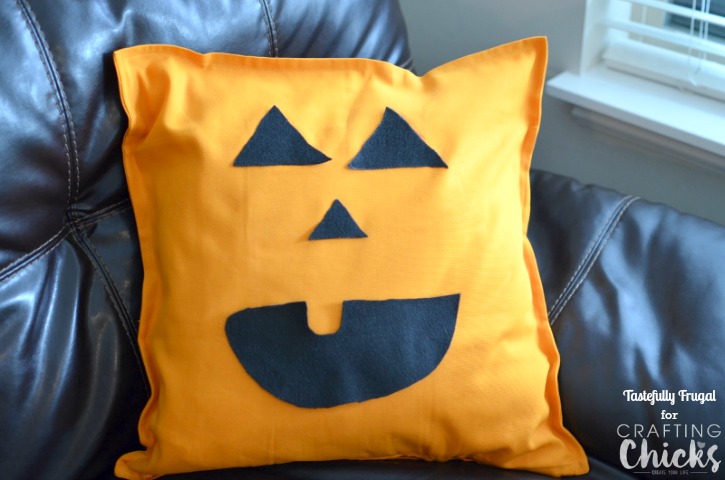
No Sew Jack-O-Lantern Pillow
This cute Halloween pillow takes less than 10 minutes and costs less than $8 to make.
Hey there crafty readers! It’s Sydney from Tastefully Frugal here and I’m so excited to be here with you today sharing a super easy decor idea for my favorite holiday, Halloween. Halloween hasn’t always been my favorite holiday. In fact, until I had kids Halloween always ranked pretty low on my list of favorite holidays; but my boys have quickly changed that. They have been begging me since the beginning of September (when we went to Costco and they saw the costumes and decorations) to decorate the house and I finally caved last week.
Knowing very well that my two toddlers and their friends would have just as much fun destroying playing with the decorations as I would putting them up, I didn’t want to spend a lot of money on things that probably wouldn’t make it until Halloween. We got all the decorations for our porch and kitchen from the dollar store, which has some really awesome decor ideas by the way, and as I was going through our Christmas decorations looking for some lights that I could put little pumpkins on I found our Mummy Pillow from last year. And that got me thinking of what other no sew pillows could I make?!

That’s where the idea for this cute little guy came in. So we went to my favorite store in the whole wide world, Ikea, and picked up a pillow and cover and headed home to make my jack-o-lantern. The hardest part was keeping my boys from stealing his eyes and mouth as I was ironing them on. Since I am a little sewing challenged I used the next best thing, Heat’n’Bond. It’s so easy to use; you just cut the amount you need place it between two fabrics you want to “sew” together and iron it on high for 15-20 seconds. Seriously this stuff is the best thing since sliced bread! But enough of my Heat’n’Bond love; let’s talk about how to make this cutie!
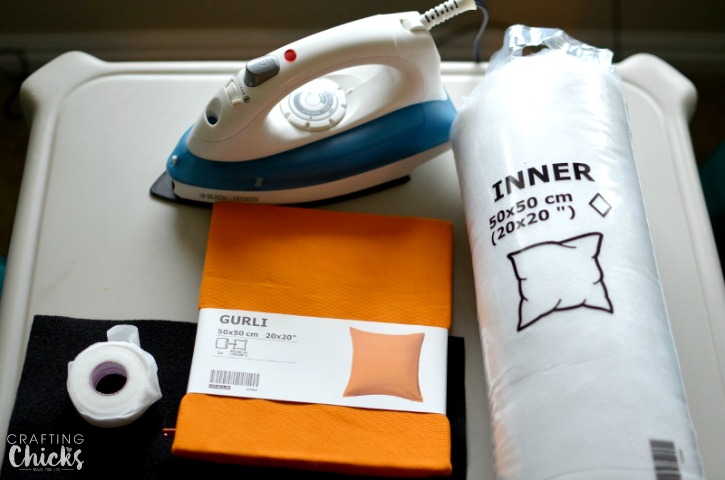
Supplies:
Felt
Iron, scissors and silver or white marker (to draw your face on the black felt)
Directions:
Take your cushion cover out of the package and iron all the wrinkles out.
Trace the shape you want for your jack-o-lantern on the black felt and cut out.
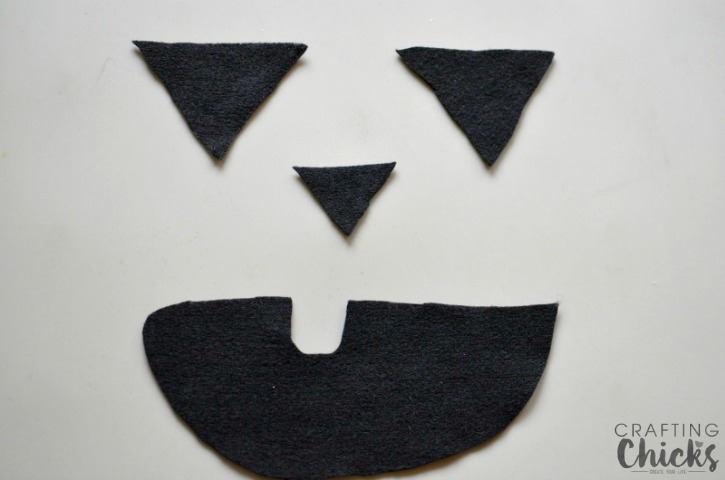
Position the shape on your pillow where you want it.
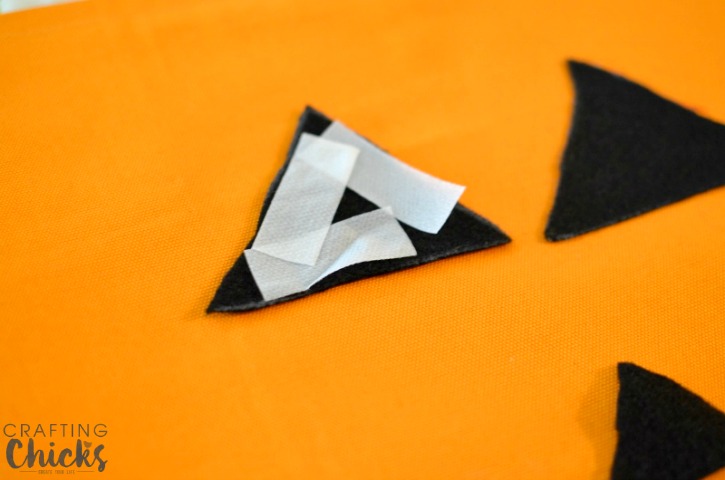
Turn over first piece of felt and cut Heat’n’Bond to fit piece.
Carefully flip piece of felt over so that Heat’n’Bond is in between felt and cover.
Run iron (on high) over felt for 15-20 seconds and check to make sure felt is attached to cushion.
Repeat with remaining pieces of jack-o-lantern.
Put inner cushion in cover and cuddle up with your new pillow.
These no sew pillows are quickly becoming my favorite way to decorate for the holidays. What are your favorite decor items? Want more fun and frugal Halloween ideas? Check out The 13 Frighfully Fun Days of Halloween over on Tastefully Frugal.