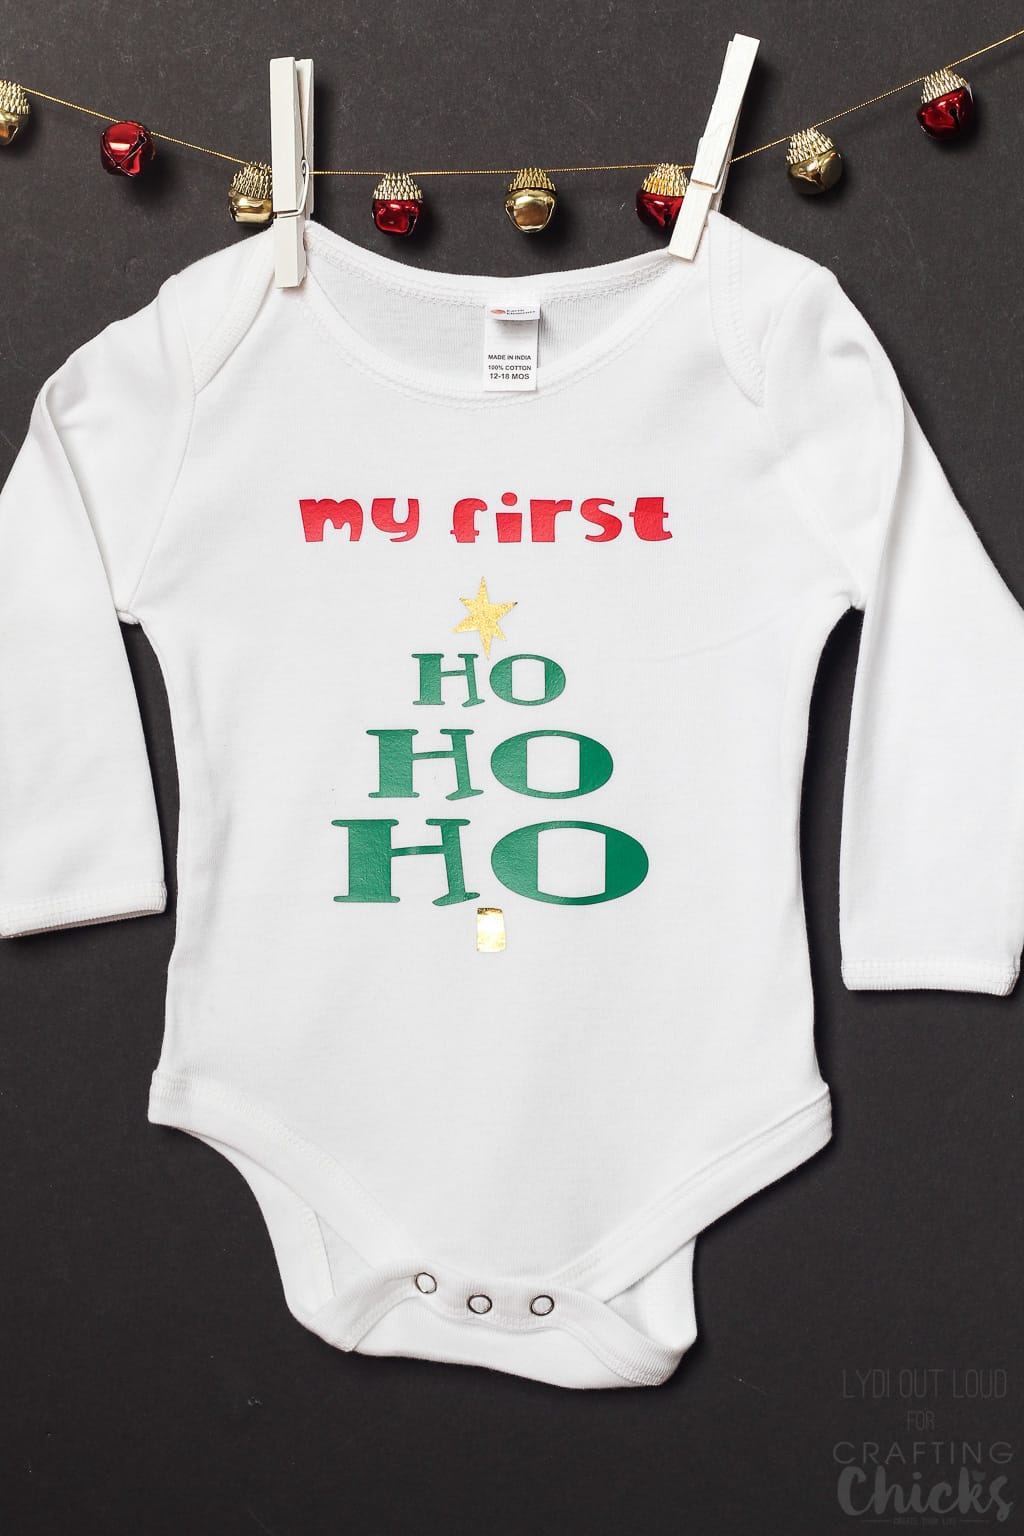
Hi Chicks friends! I’m so excited to be working on all things Christmas-y this time of year! Have you started any Christmas crafting or gift making yet? I had the idea for this iron-on onesie for my godson and it was just too cute not to share with you!
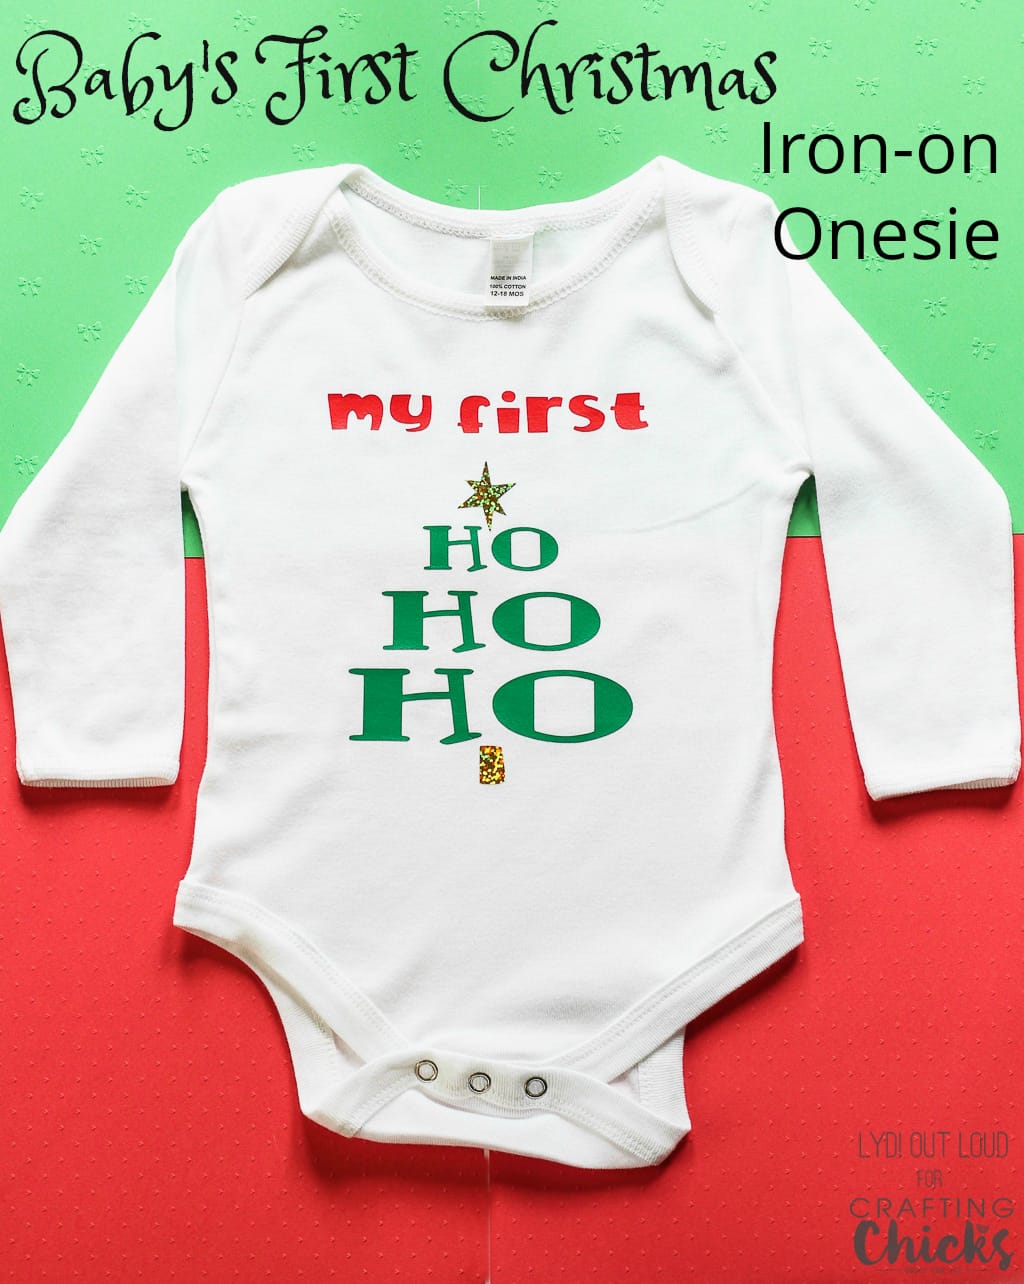
My First Ho Ho Ho: Baby’s First Christmas Iron-on Onesie
Supplies
- Baby onesie
- Cricut or other cutting machine
- My First Ho Ho Ho: Baby’s First Christmas Iron-on Onesie cut file
- Gold, red and green iron-on vinyl
- Cricut EasyPress or iron
- Parchment paper or press cloth.
Directions
Open the My First Ho Ho Ho: Baby’s First Christmas Iron-on Onesie cut file in Design Space and adjust the size to your needs based on the size of the onesie you are making.
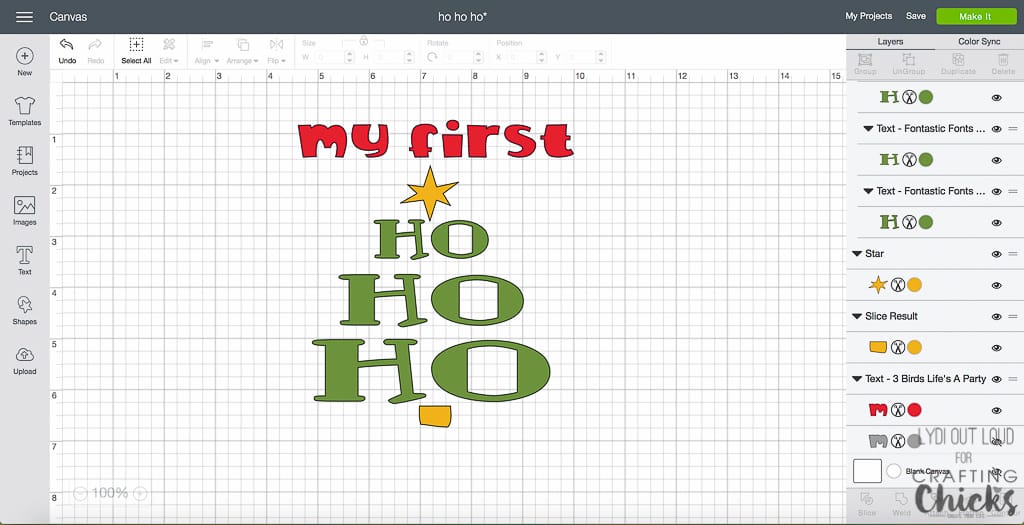
Cut the iron-on vinyl in the colors of your choice. I used Holographic Gold Glitter, and standard red and green iron-on vinyl. Remember to select the mirror option so that you don’t end up with backward lettering. Weed away the negative space around the designs. Position the designs on the onesie to get an idea of where you would like the placement to be.
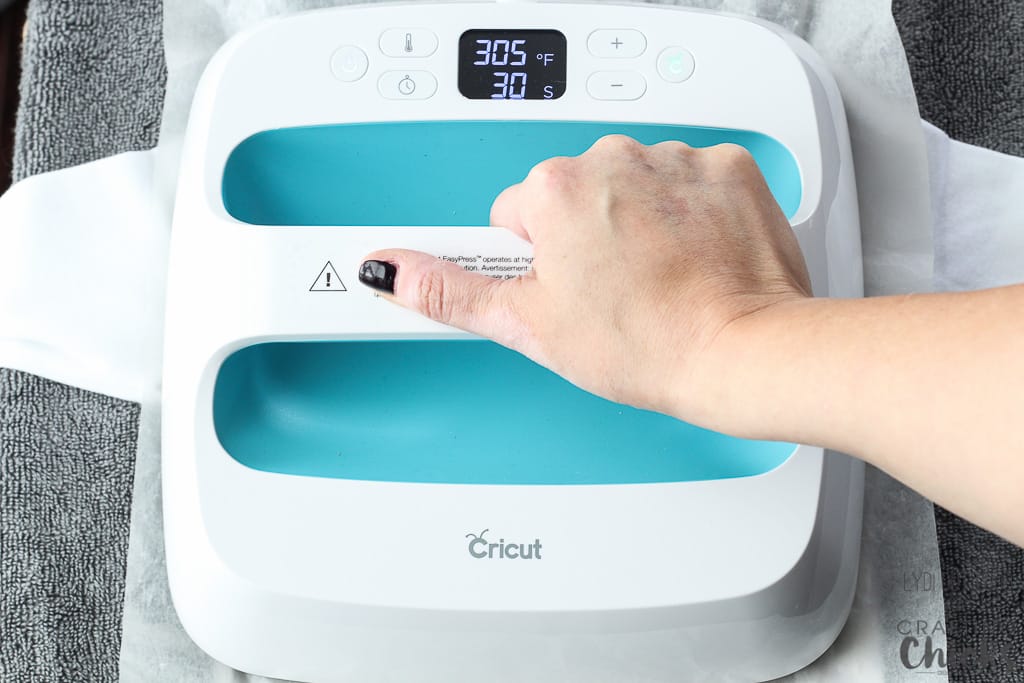
Heat EasyPress to 315 degrees (or medium-high on an iron). Press onesie to ensure it is free of wrinkles and to preheat it to prepare for iron-on.
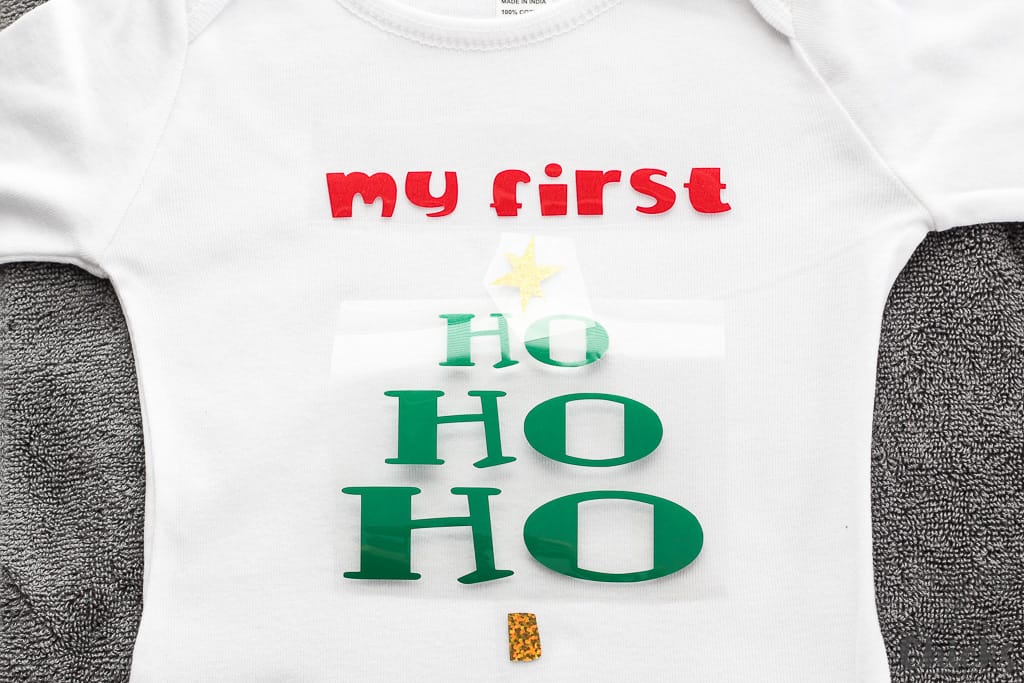
Position the designs on the onesie; make sure that no lining is overlapping with lining on neighboring designs. Place the press cloth or parchment over the design. Place the EasyPress or iron over the design and apply firm pressure for 30 seconds. Allow to cool for a minute and then gently peel back the lining. If any part of the design starts to peel off of the onesie, leave the lining on and press again for another 5 – 10 seconds until the lining is removed leaving the design on the onesie.
I can’t wait to see photos of my precious Godson wearing his Baby’s First Christmas iron-on onesie!
I hope you all have a wonderful, safe and healthy Thanksgiving, I’ll see you next month!
SaveSave
SaveSave

[…] for Christmas this year to create gifts for my little Godson. I can hardly wait to see him in the Baby’s First Ho Ho Ho onesie I made for him! I’ve been loving wood slice coasters for crafting lately so I decided to make […]