DIY Be Thou An Example Blocks
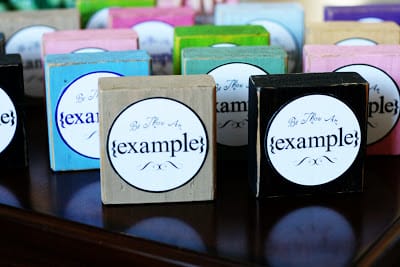
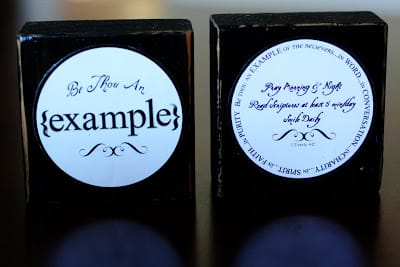
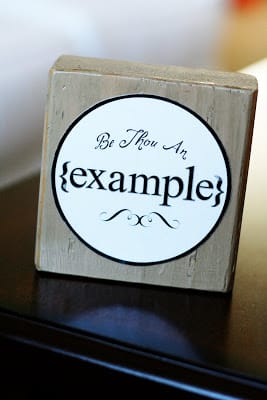
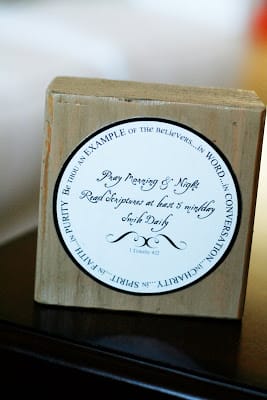
My friend Kirsten and I made these for the Young Women in our ward. We will be giving these to them at New Beginnings. The theme “Be thou and Example” is on front and the scripture and reminder of 3 things to do everyday are on the back. We decided to make these DIY Be Thou An Example Blocks.
We used 2×4’s and cut them into 4 inch squares. We let the girls paint them a color to match their room (but wanted to surprise them with the theme). I printed out the circles on photo paper, cut them out and mod podged them on the front and back.
My friend Kirsten and I made these for the Young Women in our ward. We will be giving these to them at New Beginnings. The theme “Be thou and Example” is on front and the scripture and reminder of 3 things to do everyday are on the back.
We used 2×4’s and cut them into 4 inch squares. We let the girls paint them a color to match their room (but wanted to surprise them with the theme). I printed out the circles on photo paper, cut them out and mod podged them on the front and back.
They turned out great. If you would like to download the circles for the front and back, just click on the two bottom photos.
Jamie, these are SO cute, what an easy idea too!My neighborhood is doing those “100 Things” chipboard books for our husbands for Valentine’s, and I just have a couple questions-1) Did you paint the chipboard first?2)We’ll just be scrapbooking them the old fashioned way, would you recommend using modpodge to adhere it, and to finish, or tape to stick it and modpodge to finish?And any other advice would be greatly appreciated! Man I wish I had your talent, you are amazing!
Those turned out great Jamie! So cute, you crafty little thing!!!
I won, I won, Thank you. I’ve emailed you my address. AND…I’ve downloaded “Be Thou An Example”. HOW CUTE! I’m going to make them for our YW and go visit them from the Relief Society. I’ll probably make them for R.S. also (small ward). Thanks for sharing all of your ideas. Sandra
These are GREAT! I love how simple they are and classy. 🙂
I love these! You always have such great ideas!
I just love these blocks. What a wonderful idea – and how gracious of you to share.
Those are fabulous and inspiring, thanks for sharing.
such a great idea! love these.
Thank you so much for creating these (and investing in the young women) and sharing them. I’ve never modpodged before, but will print them on circle labels, and attach them front to back on a pretty ribbon, to keep as a book mark. Hopefully some day I’ll be able to make them onto cute blocks as well!
Hi! What a fun idea. What size did you print the circles? Could I print them as a 4×6 picture at a lab and then cut them out from there, or would I need to print them as a certain size off of a computer? Thanks for sharing.
Thank you for posting this. I am teaching M1/L21 tomorrow and making a making a 3.5″ x 3.5″ handout with similar art front and back. (Too late to go buy wood and paint!) I rotated the art so it sits on the diagonal. I’m going to punch a hole top corner and make a hang-tag. Thank you! Thank you! Thank you!
love it! thanks so much.
This is a great idea for an activity too. Love your website! Found it on Pinterest.