• Skip to primary navigation
  • Skip to main content
  • Skip to primary sidebar
  • Skip to footer

The Crafting Chicks

Ideas and Inspiration to Create Your Life.

  • Home
  • Meet the Chicks
  • Advertising/PR
  • Contact
  • Blog
  • Printables
  • Recipes
  • Holidays
  • Life
  • Sewing
  • More

Home Decor, Sewing

{Easy Decorative Pillow Slipcovers}

by Jamie · on January 2, 2011 · 25 Comments ·

85 shares
  • Share
  • Tweet

We hope you all had a great Christmas and a Happy New Year! The Crafting Chicks are excited to be back with some crafty goodness for 2011!

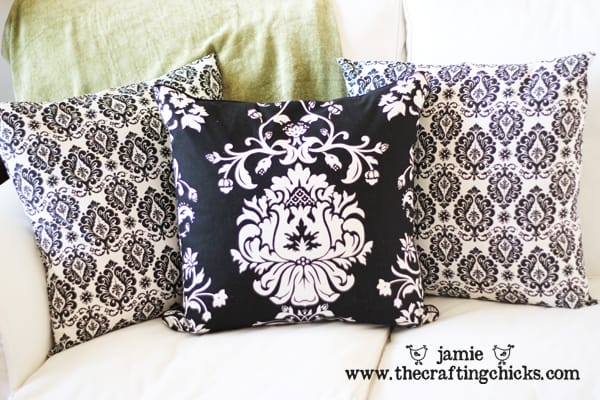
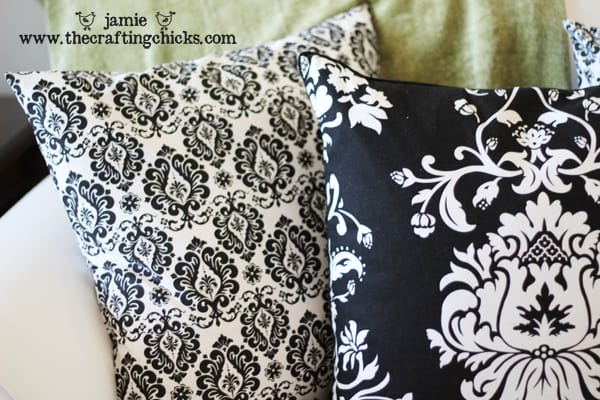
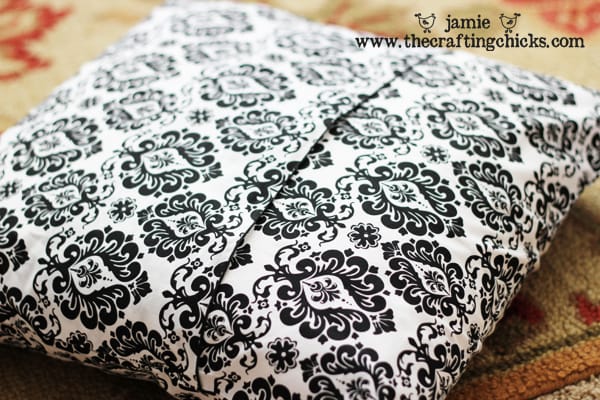
I don’t know about you, but after I take all the holiday decor down, I want something new and fresh for my house. Today I want to share with you an easy way to make decorative pillow slipcovers using fun, sassy cloth napkins! I have been on a black and white kick as of late and made these adorable damask pillow covers for my living room. And the great thing is, if I get sick of them in a few months, it will be super easy to change them out! Pillows are the easiest way to add a change or a pop of color to any room.

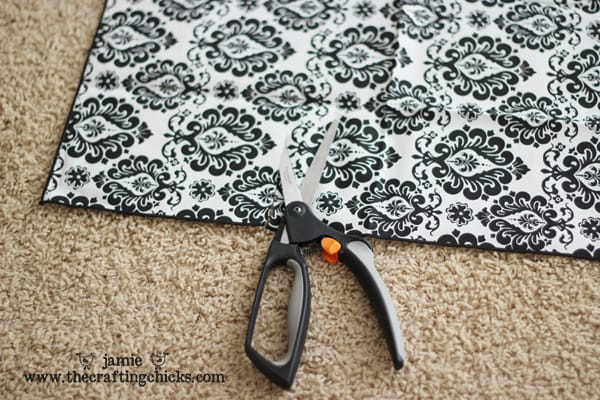
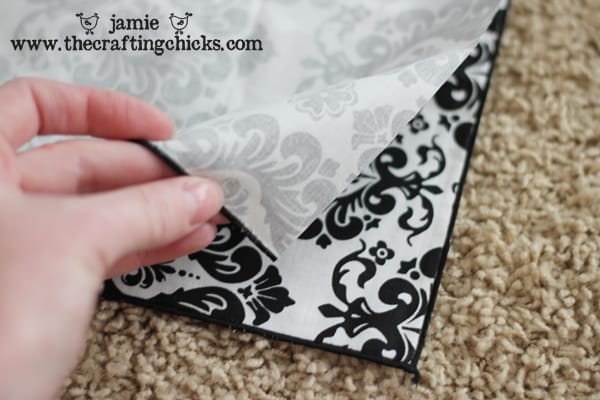
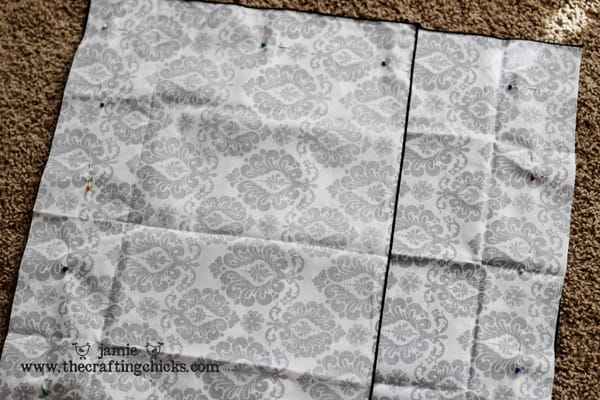
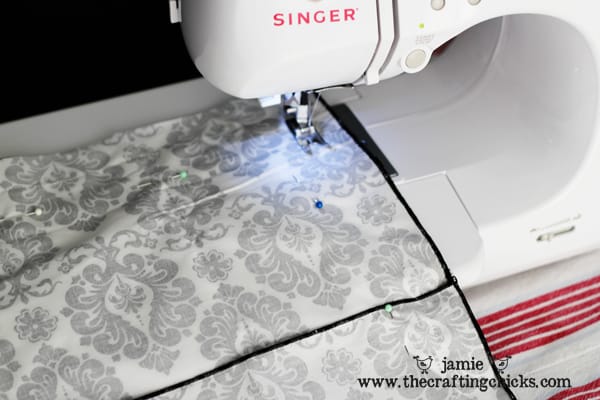
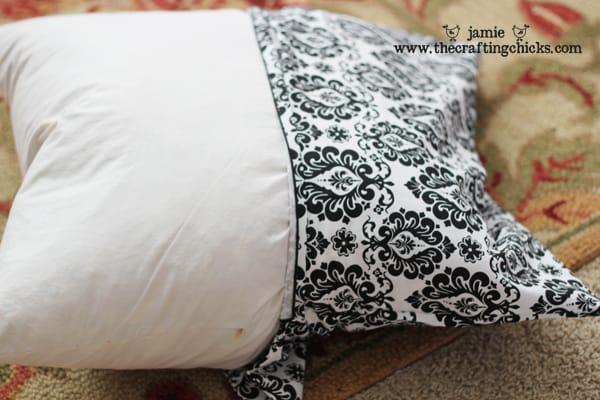
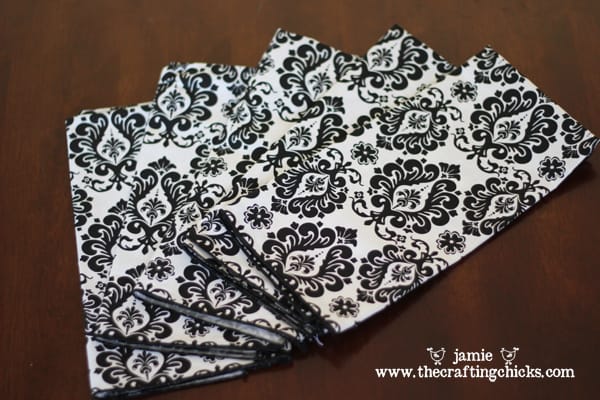
First, you will need to find cloth napkins that you love. Some great places to find these are Pier 1 and Target. You will need 3 napkins to make one pillow slipcover. These cloth napkins are the perfect fit for any 18 inch pillow insert. I like having slipcovers on pillows because with 4 little kiddos, they are bound to need a washing!Next, you will want to leave one napkin full size and then cut the other two about 2/3 from the top. (you will use the larger piece-2/3 of the napkin).Then, lay your fabric, right sides facing each other. With the two pieces that are 2/3, you will want to place the cut edge on the outside of the pillow. Since the other side already has a seam, use that for the inside pocket seam (that way you won’t even have to sew a seam:)Pin the fabric together. (You can see how I pinned the seamless edges around the pillow edge since I will be sewing them together anyway)Sew around the edge of your pillow. You can sew around the whole edge since you will not need an opening to turn it. We already created a pocket by using the 2/3 pieces.Now for the fun part:
Turn your pillow right side out. You have created a slipcover! I like to iron my slipcover and also poke the corners out well.

Then, stuff your insert into the slipcover!

And there you have it-a new pillow! & A new LOOK!Hope this tutorial helps you freshen up your home! I had fun making these and they seriously only took 30 or so minutes to make!
xoxo crafting chick Jamie

About Jamie

is the author of this post. Wanna know more about the Chicks? Click here. :)

Comments

  1. Spark*Amy says

    January 3, 2011 at 6:40 am

    This is my kind of sewing! What a great idea! Thanks for the info.

    Reply
  2. Trish says

    January 3, 2011 at 1:48 pm

    I am in love with those pillows. I need to find napkins just like yours!

    Reply
  3. Michelle Balletti says

    January 3, 2011 at 2:46 pm

    OMG!! What a great idea!! I cannot wait to make these, seriously!

    Reply
  4. monna says

    January 3, 2011 at 5:47 pm

    I so love the black/white….how gorgeous…great job!!!! thanks for sharing…

    Reply
  5. Brittney says

    January 3, 2011 at 6:59 pm

    Those are beautiful! Absolutely love them, in fact…feel free to send those my way 😉 Great job!

    Reply
  6. Monica says

    January 4, 2011 at 11:20 am

    I LOVE these!!! They are beautiful!

    Reply
  7. Brooke says

    January 5, 2011 at 8:06 am

    BEEEEEAUTIFUL! This is also my kind of sewing! I really think I could handle this and want to make some pillows galore now. I also love the green and blue ones you made in your living room. I now have pillow envy!!!! xoxo

    Reply
  8. Caroline says

    January 6, 2011 at 10:26 am

    I made some of these within HOURS of reading your post! Love, love, love them! I couldn’t find cloth napkins that I liked but I did find a 60×84 tablecloth on clearance. I cut the back overlapping pieces from the finished edges of the tablecloth. It was so fast and easy! Didn’t realize just how much my pillows needed sprucing until I did this:-) Thank you!

    Reply
  9. Andrea says

    January 7, 2011 at 1:03 pm

    What a great idea! I can’t wait to find some cute napkins and make some.

    Question – what size seam allowance did you use for these? It looks like your pillow covers fit the 18inch pillow perfectly. Your seam allowance looks wide in the picture, maybe 1 inch?

    This is my kind of sewing project, easy and quick! thanks so much for sharing.

    Reply
  10. Danielle says

    January 7, 2011 at 7:07 pm

    I just learned o
    How to use my sewing machine and this is the PERFECT project to start with! Thanks so much for sharing. I just have one question, how far from the edge do you sew the napkins together? I cannot tell from the picture. Thanks again!

    Reply
  11. sarah says

    February 9, 2011 at 4:22 pm

    Love it! It would be great to use vintage napkins too!

    Reply
  12. Rachel says

    March 10, 2011 at 1:16 am

    WOW! I just googled pillow covers and found your tutorial. Already made two pillow covers in less than an hour!! You rock! Thanks so much!

    Reply
  13. Amanda says

    January 22, 2013 at 12:01 am

    Omg i have been dying to find a tutorial for this. Ive had the material for my daughters room makeover for awhile but ive been putting off making her pillows. It may be because she just turned 10 and wanted a room makeover because shes outgrown her little girl room. Tear. Lol i guess ill have to get to it now. Thanks so much. Your covers are beautiful.

    Reply
  14. Nueyer says

    February 7, 2013 at 7:29 am

    Love those prints!

    Reply
  15. Deborah says

    April 22, 2013 at 8:15 pm

    Love these!

    Reply

Trackbacks

  1. Pillow 24 X 24 says:
    January 3, 2011 at 4:09 pm

    […] {Easy Decorative Pillow Slipcovers} We hope you all had a great Christmas and a Happy New Year! The Crafting Chicks are excited to be back with some crafty goodness for 2011! I don't know about you, but after I take all the holiday decor down, […]

    Reply
  2. Tweets that mention {Easy Decorative Pillow Slipcovers} -- Topsy.com says:
    January 4, 2011 at 10:44 am

    […] This post was mentioned on Twitter by Minda Corso, AW Decorating. AW Decorating said: #Decor #Home Fave! {Easy Decorative Pillow Slipcovers}: http://bit.ly/fYiHx4 […]

    Reply
  3. Decorative Pillows Slipcovers - HOME DECOR WORLD – HOME DECOR WORLD says:
    September 11, 2011 at 11:43 pm

    […] Easy Decorative Pillow Slipcovers Easy Decorative Pillow Slipcovers Sure Fit "Stretch Sullivan" Sofa Slipcover Set with Two Decorative … {Easy Decorative Pillow Slipcovers}Description : We hope you all had a great Christmas and a Happy New Year! The Crafting Chicks are excited to be back with some crafty goodness for 2011! I don’t know about you, but after I take all the holiday decor down,https://thecraftingchicks.com/2 .. […]

    Reply
  4. Felt Flower Pillow says:
    October 25, 2011 at 8:42 am

    […] it through. If you’d rather use a pillow form, you can make an envelope pillow back like Jamie showed last week. I did some each way, but in the end decided that since felt won’t hold up well in the wash, […]

    Reply
  5. Firsts: Cloth Napkin Pillow Covers « First Is Not Worst says:
    November 22, 2011 at 5:11 pm

    […] The Crafting Chicks – Easy Decorative Pillow Slipcovers […]

    Reply
  6. makeover pottery barn says:
    July 24, 2013 at 8:38 pm

    […] and added a few other pillows.  I used the black and white polka-dot and floral fabric to make easy pillow slipcovers.  Throws also add a soft ‘homey’ feel to any […]

    Reply
  7. My Go-To Sewing Tutorials | Bailey Marie and Me says:
    August 21, 2013 at 7:06 am

    […] The Best Slipcover Pillow Tutorial from The Crafting Chicks […]

    Reply
  8. BUILD A Children’s Arbor Bench-ANA WHITE says:
    August 28, 2013 at 11:38 am

    […] So I KNOW you will want to know where I got this LOVELY fabric….because I was DYING over it when I found it.  I purchased this fabric at Quilter’s Haven in Woods Cross, UT during the Spring of 2012.  If you haven’t been there, YOU MUST!  They all the most darling stuff from all the best designers.  I created the pillows with a simple slipcover, must like Jamie’s pillow covers HERE. […]

    Reply
  9. Today's Housewife : Tuxillows says:
    August 3, 2014 at 4:16 am

    […] The Crafting Chicks got me started, though I didn’t use napkins. Instead I cut some material 19 inches wide and 38 inches long. My pillows were 18 inch pillows, so I am sure you can see my mistake. I didn’t give myself enough material  to overlap in an envelope style. One of the first things I did was add material in order to make it long enough. I took a 6 inch wide, 18 inch long piece of material, folded it in half, and then sewed it to one end. […]

    Reply
  10. Jingle All the Way Christmas Pillow says:
    November 20, 2014 at 11:22 pm

    […] I always use this tutorial when making pillows… EASY SLIPCOVER PILLOWS. […]

    Reply

Leave a Reply Cancel reply

Your email address will not be published. Required fields are marked *

This site uses Akismet to reduce spam. Learn how your comment data is processed.

Recent

Best Homemade Playdough Recipe

All About My Mom Free Printable

Creative Easter Egg Decorating

Valentine Candy Taste Off

Gift Guide for Girls Age 7-12

Gift Guide for Boys Age 7-12

Get access to our free crafting guide

We are a participant in the Amazon Services LLC Associates Program, an affiliate advertising program designed to provide a means for us to earn fees by linking to Amazon.com and affiliated sites.

© 2022 The Crafting Chicks. Website by WP Barista. Privacy Policy

85 shares