How to Make Your Own Iron-On’s::Rae Gun Guest Post
**GIVEAWAY IS NOW CLOSED** The winners have been announced here.

Hi, I’m Marissa from Rae Gun Ramblings. I blog about all things crafty, tasty, pretty and just plain life. I’m an insanely huge Harry Potter fan, can’t stop making cheesecake and homemade pasta, and have a new addiction to making hair accessories. Hopefully you’ll stop by my blog and see some of my latest adventures. I also run a handmade baby and toddler clothing shop on Etsy called Rae Gun.
Today I want to share with you how to make your own iron-on’s, as well as give away two gift sets from my shop. First of all the tutorial. I love making iron-on’s because you can use them on virtually anything, it’s perfect for using up scrap fabric and it’s a quick and easy way to give items your own personal flair.
What You’ll Need
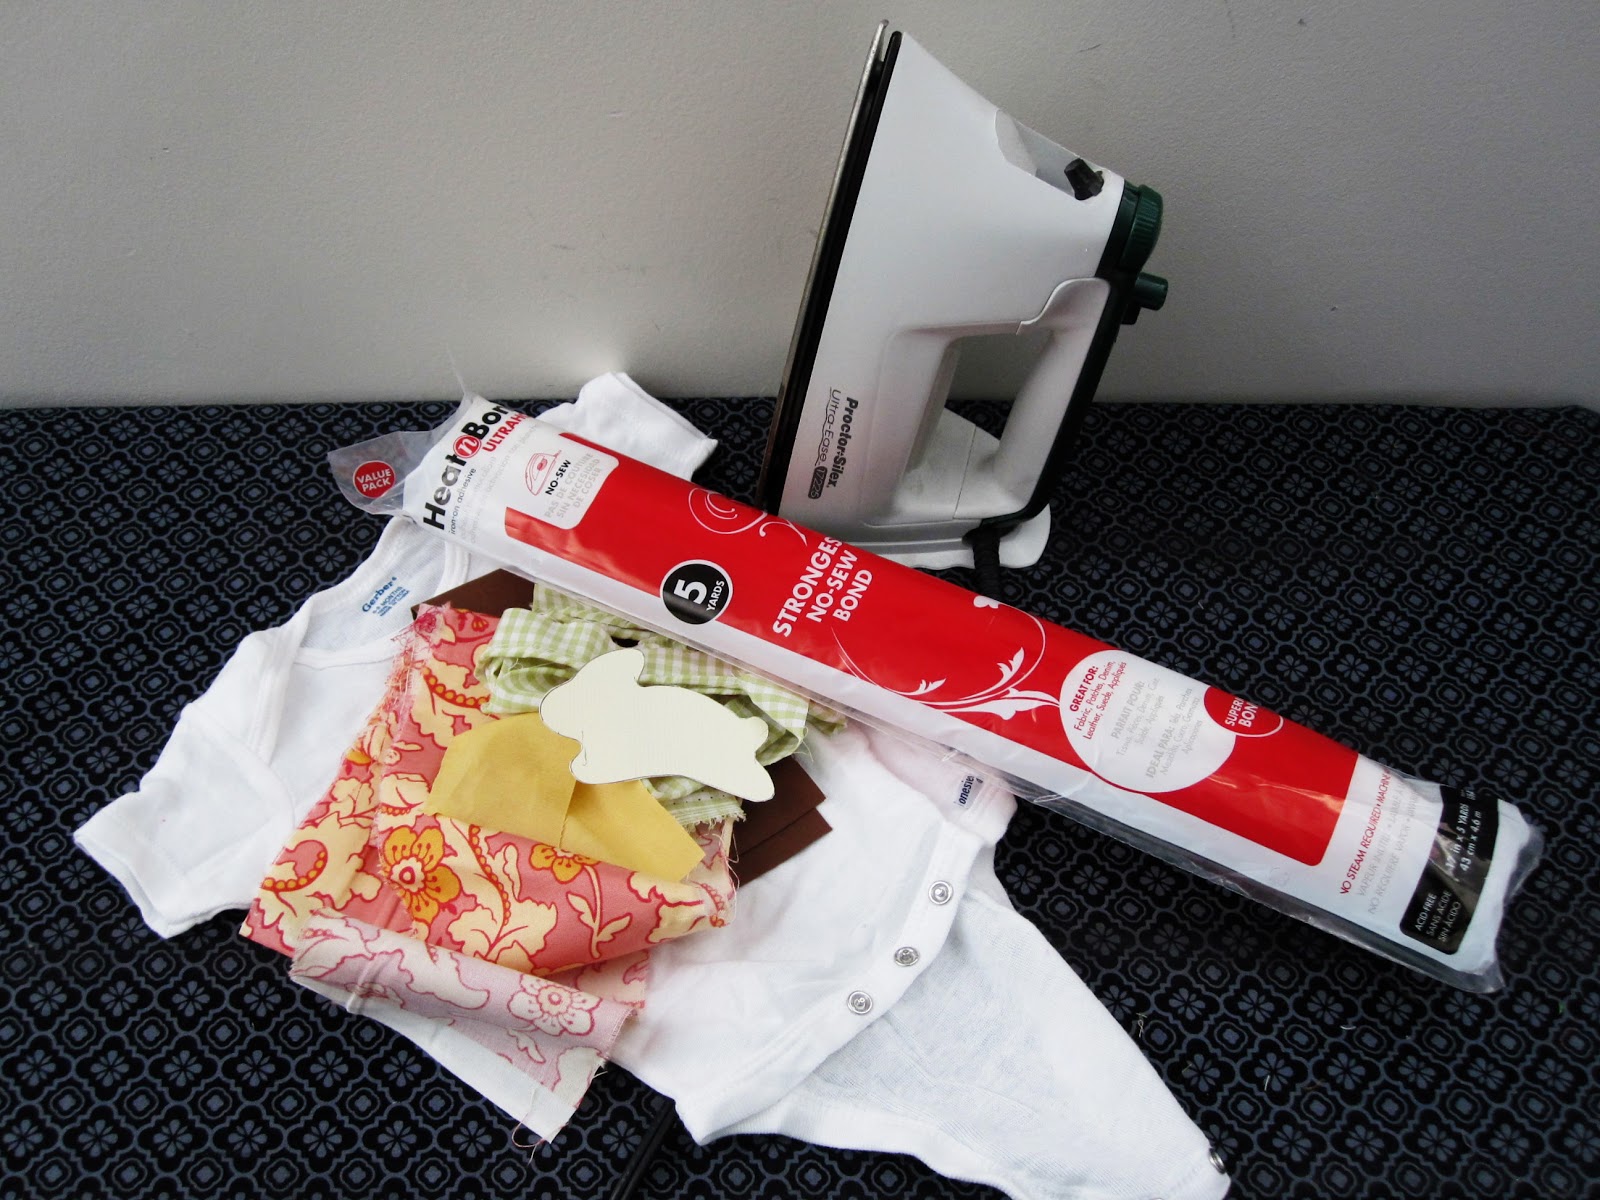
- Ultra Hold Heat Bond (you can find this in the notions section in packs or by the interfacing on the bolt at your local fabric store)
- Design or Pattern
- Scraps of fabric
- Something to put the iron-on onto (I’m using onesies today but totes, napkins, and other clothing would be great too— the options are endless)
- Iron
What to Do

First find or create a design to use. I like to google ideas and I use the word “shape”, “silhouette”, or “outline” since basic designs are the ones that work the best. You want something that you know what it is just from the outline. Then I trace or print the image onto thicker paper and cut it out.
Read the directions on the heat bond if you’ve never used it before. Cut out a piece of heat bond the size of your design.
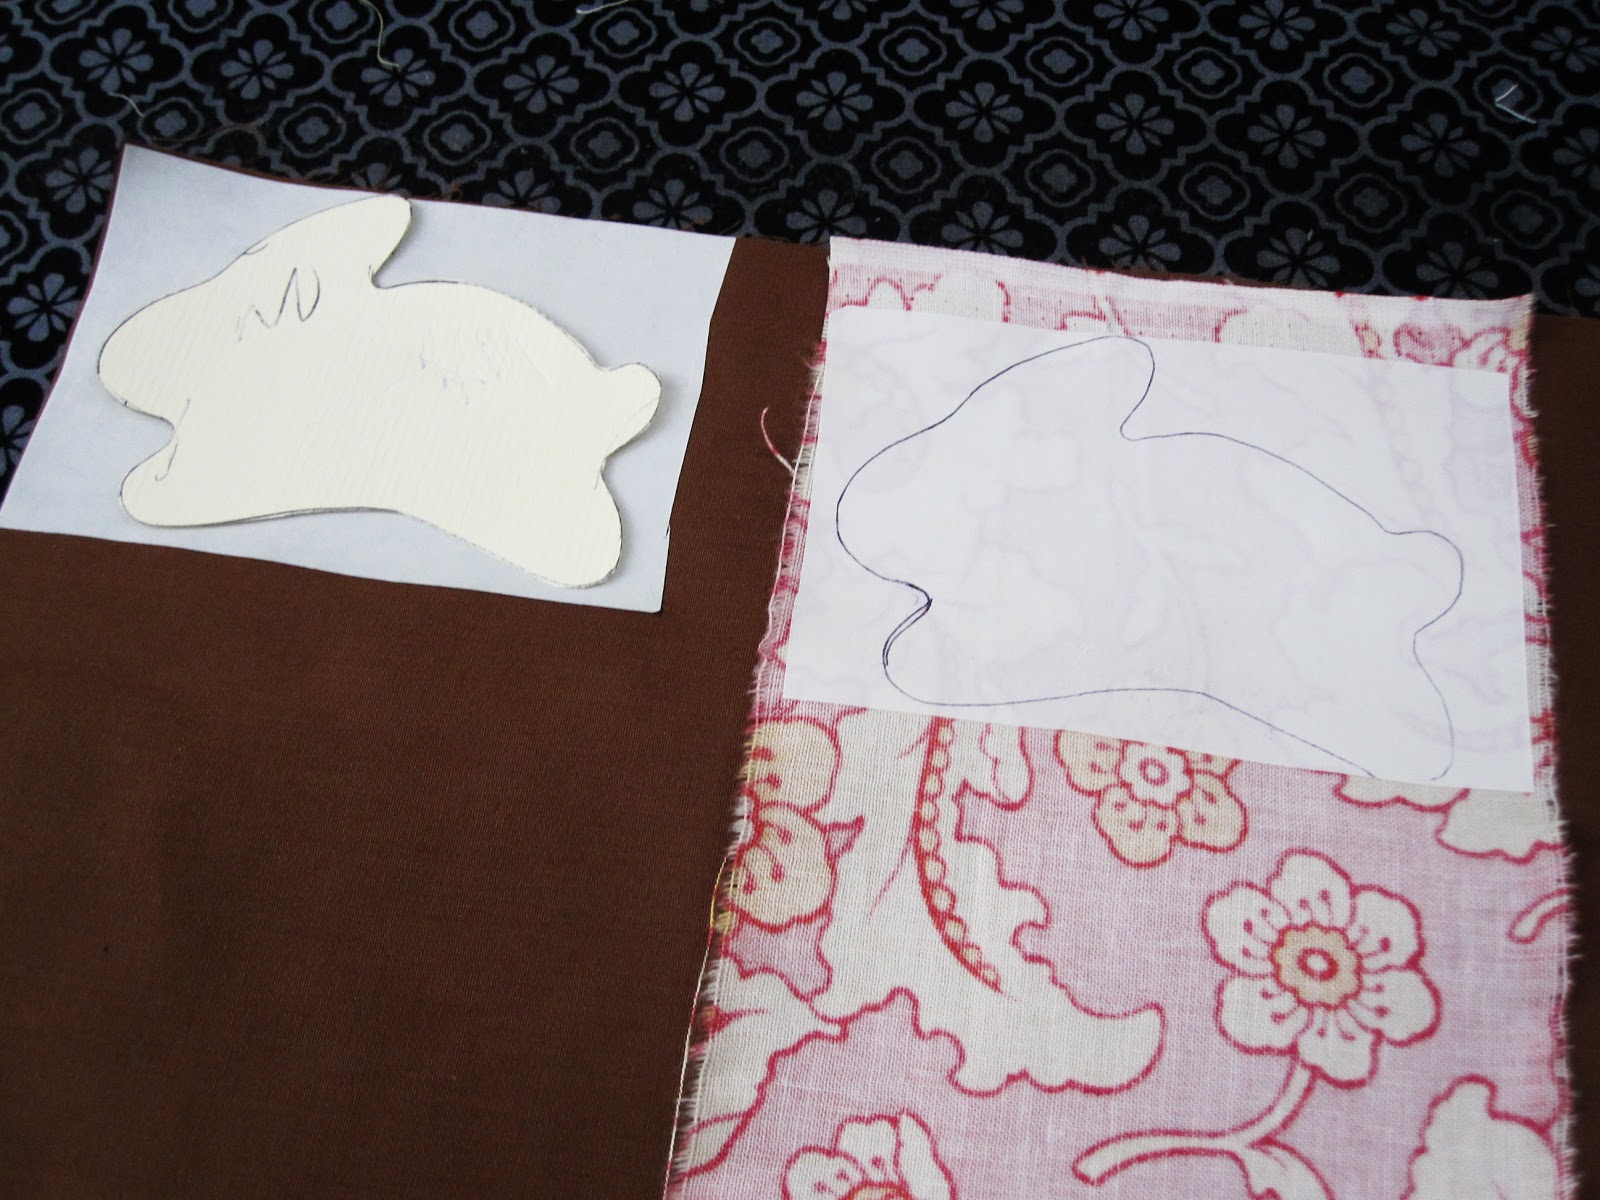
Put your fabric scrap pretty side down, then iron the heat bond to the WRONG SIDE of your fabric. You’ll be ironing on the paper side of the heat bond. And trace your design onto the paper part of the the heat bond. Don’t do this if you’re tired, I’ve ummm ironed it on to the right side too many times late at night!
Next cut out your design. Peel off the paper and position it on your item.

Press the iron to the iron on and hold for a few sections. Lift and repeat shifting the position of the iron. It’s best not go go back and forth but rather to press lift and press.

This stuff holds really well and is washable so you can just be finished here, or if you like you can top stitch for decoration or add beads, ribbons, etc. for embellishments.
Enjoy.
Now if you like these that I made hopefully you’ll enter the giveaway—or if you can’t wait they are in my shop here.
Giveaway

I’m giving away one of each of the sets —the freshcut wrap around bottom bunny set as well as the green gingham chocolate bunny set. So there will be two different winners. The winners will be able to choose what size they want from 0-3 months, 3-6 months, 6-9 months 12 months, and 24 months.
To enter this giveaway you must be a follower of The Crafting Chicks and leave a comment on this post saying whether you’d like the Fresh Cut or Chocolate (which would be great for either a boy or a girl) bunny set . For an extra entry, become a fan of Rae Gun Ramblings and leave an additional comment here letting us know. Giveaway will close Sunday, March 13 at midnight and the winner will be posted on Monday.
Thanks for having me. Hopefully you’ll stop by my blog and say hi! Please let me know if you try out the tutorial; I love seeing pics of everyone’s creations.

So cute! I would love the chocolate!! But I’ll need the 6-9mo as by sweet bebe won’t even be born until Sept. I’ll save it for next year!! :]
I love them both, but I think I’d pick the Chocolate bunny set. 🙂
I LOVE the pink bunny (fresh cut). Our little girl will be born in June, and she would look sooo adorable in that outfit.
I would love the fresh cut set. My cousin just had a cute baby girl and it would make a lovely gift. Thanks for the giveaway!
Love the fresh cut! I’m expecting and don’t know which sex yet, but can’t resist those ruffles!
i liked you on fb!
I love the fresh cut set! I have three little girls and absolutely love anything pink and orange!
DARLING!!! I love the fresh cut set. So so cute and so perfect for spring.
Love them both but, i’ll pick the chocolate one. Sooo cute!
I like the one with the ruffles!!!
I just ‘liked’ Rae Gun!
Thanks for the lesson. So cool! I love the Fresh Cut!
P.S. I liked you on Facebook and will check out your Etsy shop (I love Etsy!)
I love fresh cut!
I love the pink one and could see my little one playing around in it…she’s growing like a weed and is now in 3-6 month clothes already!
BTW I am a follower of your blog!
I have also “followed” Rae’s blog and “liked” her on FB.
Love the fresh cut. After 4 boys we are expecting a GIRL and I can’t wait to dress her so cute!
Just became a BIG FAN of Rae Gun!!!
I have a little girl! The little pink one would be so cute!
LOVE the Fresh Cut! So cute! My little one would rock that in a 6-9 mos!! 🙂
I would be happy with either of them, they are both super cute.
I love the chocolate bunny set. I’m an FB follower 🙂
They are both super cute but I realllllly like the Fresh Cut pink one. =)
Also a fan of Rae Gun Ramblings!
I love the fresh cut onesie! So adorable! And I’m a follower! Thanks for the tutorial!!
I just adore the chocolate bunny! It would be perfect for my new grandson!
Thanks for the tutorial! I’ve been wanting to know how to do this! Love the outfits. I think the brown and green one is my fav.
I’d love the chocolate bunny set.
Great tutorial. I just did this at a baby shower, and it was surprisingly easy.
chocolate 🙂
hisprincess886(at)yahoo(dot)com
I already follow – emillie.
hisprincess886(at)yahoo(dot)com
I would love, love, love the fresh cut bunny! My youngest DD would be an 18-24 month size this summer.
I think I’ll have to try this at home!
I would LOVE the Fresh Cut – I am expecting baby girl #2 in July and I already know those ruffles would be darling on her! 🙂 Great tutorial!!
I would love the fresh cut bunny and I am a follower!
I am a follower of Rae Gun!
Love the chocolate for my sweet 15 mo old grandson. Great tutorial! Will pass on to my crafty daughters in law.
Chocolate bunny set (minus the bow!) I’m having a boy next month…so size 0-3?
fresh cut! so cute!
I’m a follower on my google reader 🙂
Love the fresh cut as a gift for mt granddaughter! She is a very small 6 month old (still wearing 3 months!) but probably would fit the 3–6 mo. eventually 🙂
Love your site, always looking for new things to make! Became a fan TodaY!
They are both adorable! I think I like the fresh cut one a little better.
I am in LOVE with the fresh cut. What a great idea! I am a follower 🙂 PICK ME PICK ME! This would be the first clothing item for my new baby due in September, and it is just perfect!
I love the fresh cut !! My little granddaughter would look stunning in it !!
can you really topstitch after you apply? I have that same “no sew” bonding and it says not to sew it.
Those are so cute! I’m not entering the drawing since I don’t have any kiddos but I was curious: why do you use the iron-on instead of just cutting out the fabric and pinning it on till you can sew it? Does it make it thicker or stiffer or something? I’ve always wondered, because I know that’s how you’re supposed to do it, I just don’t know why.
Thanks for the tutorial!
Absolutely love the chocolate one. Would need 24 months for my 18 month old who is ginormous. They are absolutely adorable. Thanks for the tutorial. I follow crafting chicks!
The fresh cut would look so cute on my granddaughter! She is size 12 months.
So cute! I love the fresh cut. I love getting new ideas. Thanks!
I love the fresh cut one , Grandbaby Mollee is in a 12 month size now.
I love them both! But the chocolate one is TOO cute!
Both are amazing, but the chocolate is so cute!!!!
would love to win the chocolate set!
kcernick at netscape dot net
I would love to win!! My little girl would look adorable in the fresh cut set (6-9mths). Oh I hope I win!!
I love the fresh cut!
I’m already a huge fan of Rae Gun Ramblings
I like them both! Maybe the freshcut. Lovely tute.
fan of Rae gun!
I love them! I would pick the freshcut!
I have to say I love this, don’t know if I could pull it off though! You made it sound very easy, so I guess I just need to try! Love the fresh cut set!! It’s my favorite!
Thank you for the tutorial – I have to try this, like, yesterday!!! and I agree with the other wanna be like you posters – Can I really pull it off? We will see…..
Fresh Cut – 24 months
I “like” / love you on facebook…. for my extra chance… thanks -fingers crossed!!!
I love Marissa’s work over at Rae Gun. I already have a set of her wrap around bloomers, pictured here on my daughter.
http://shopbonnenouvelle.blogspot.com/2011/01/cs-caterpillar-birthday-party.html
Love her stuff! I would love this bunny onesie and these bloomers to add to my collection!
I absolutely love this idea! I am having boy/girl twins – due at the beginning of April, just in time for Easter! I LOVE the chocolate bunny one for my little girl. Size 0-3 months, please! Love your blog, thanks so much for sharing!
I also became a fan of RaeGun Ramblings. =) Just want to be sure I get that extra entry. =)
I love this blog and have put a link to it on my own blog… check it out …
http://histreasuredprincess.blogspot.com/
I hope my friends will read you faithfully!!
I love the fresh one!
I love the fresh one – how fun and bright!!
Love these! Soooooo adorable.
I love the pink bunny set!! I’m having a girl the end of May and she would look just DARLING in it!!! 😉
I am now a Rae Gun Follower on FaceBook! 🙂
I am now a follower of the Rae Gun blog!! 🙂
I absolutely love the chocolate. I actualy found your web site via The Crafting Chicks and love your ideas. I have a nephew that is six months old and I may try to do some summer t-shirts with this technique. Thank you for sharing.
I love both but the Fresh Cut has my heart! : )
Also became a fan of Rae Gun, you are so talented!!!
I love the Fresh Cut pink bunny… I’d love to win it! And thanks for the great tutorial!
I am also now a follower of the Rae Gun blog, and am looking forward to getting lots of fun new crafty ideas from you!
Wow, these are the cutest things ever! I have my little girl in the oven due in time for easter and I think she would be darling in the fresh cut! I also just became a big fb fan and a follower 🙂
My favorite is the fresh cut wrap around!! I would love to have this available for my mom clients who have me take pictures of their baby girls!! I think the colors would look awesome!!!
I am also a fan of Rae Gun on FB!! I love all your items you create!!!
I think I would like the Chocolate one! So cute Marissa!
I follow you. What a hard choice! I love the ruffles on the Fresh Cut one and would love to use it as a photo prop when I do sessions w/ baby girls but since I am having a boy in a couple weeks I think I would choose the chocolate one for my little newborn to wear on Easter, so cute!
Love, Love, Love the fresh cut set 🙂 Wouldn’t break my heart to get the chocolate bunny either, both adorable! 12 month please! I’m going to go follow Rae Gun Ramblings right now!
Would love the fresh cut set for my granddaughter!!
AWESOME tutorial! I’m your newest follower. If you can check my blog out when you’re not crafting!
🙂
Marcy
I have a question about the bonding paper. I am hoping to do this at a baby shower I am hosting in November and went and started buying various materials. I made a few testers using old onesies. The lady at the fabric store told me to get light hold bonding paper. I washed the onesies and the fabric is starting to peel back. Do I just need to go get Ultra Hold? Does it not make the fabric stiff?
I love the fresh cut set!!
I liked you on Facebook as well! (I wouldn’t mind either of those sets to be honest. So cute!)
How do you keep the iron ons from peeling up with washing and normal wear? I’ve made a bunch now following this tutorial, and they look awesome right afterwards. But if baby wears it for a day or I wash it, they start peeling up….Anything you can do besides sew along the edges? I don’t sew much! Stronger heat bond? Glue? Any tricks? Thanks!
Just wondering if we are able to have merrowed borders without the use of a machine.
Cute! Do you use any fabric that already has the bond on it? IF so, what do you recommend? Would like to try this with cricut.