DIY Polka Dot Shorts from Brassy Apple {Spring Fever Series}
We are thrilled to have beautiful, tall Megan from Brassy Apple sharing this fun DIY idea…to help us get ready for warmer weather!
From colored skinny jeans to polka dot shorts!

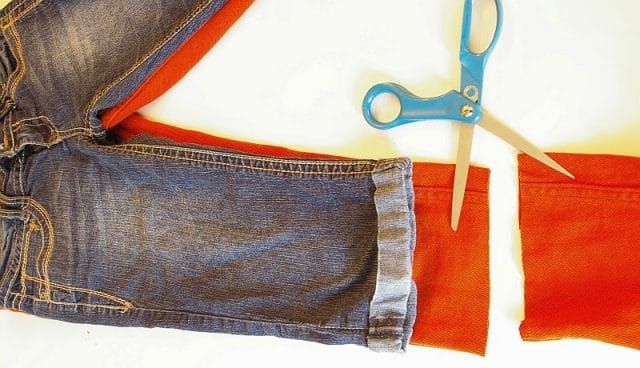
BrassyApple is my name and Refashion is my game! This tutorial is great for jeans that have gotten to short for your kids (any age!) and if you are wanting to give new life and wear, to a pair of jeans! These skinny’s had such a narrow ankle opening I found myself not wearing them as often as I’d like. SO I solved that problem and refashioned them into something I will WEAR – shorts! When the lengths of your jeans starts to get shorter and color reappears in fashion, you know Spring is coming!
Supplies:
Jeans
Scissors
Measuring tape
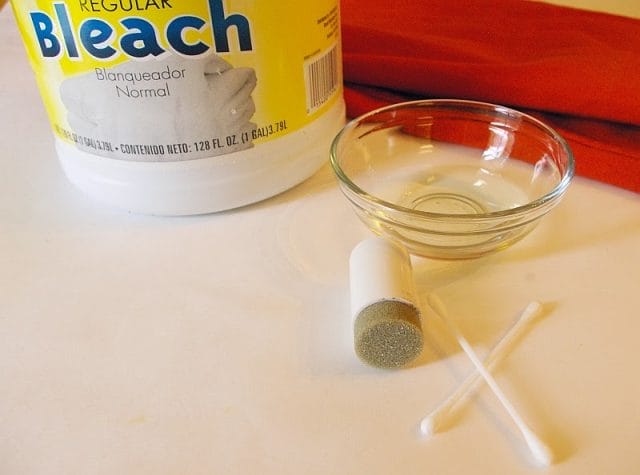
Bleach
Small container
Paper towels
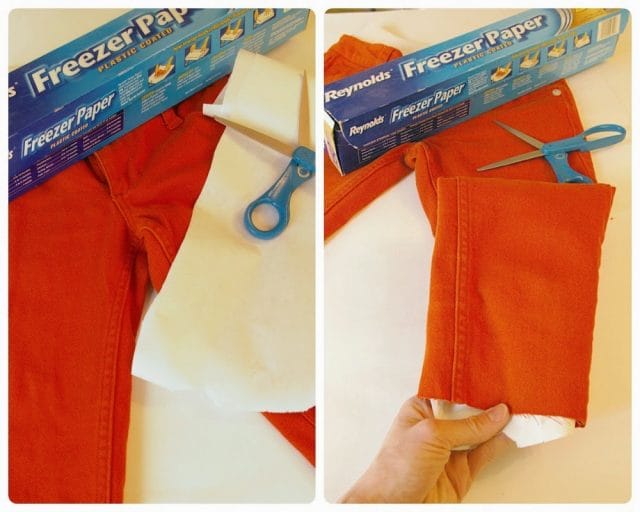
Cardboard/wax paper/newspaper
round sponge or cotton swab
ruler or yardstick
MEASURE: Find the length you want your shorts or capris to be. 1) Use an existing pair of shorts and capris. Lay over the top, measure and cut. 2) Measure from your hip (or where the waistline of the jeans sit on your body) down your leg to where you want them to hit.
**For either technique add a few inches to the end length so you can roll the unfinished edge.**
PREP: Using cardboard, wax paper, newspaper or freezer paper – slip a layer in between the legs of the jeans. This is help the bleach from soaking through one side to the other. We don’t want that. Make sure your layer is thick enough and you are covered from side to side, top to bottom.
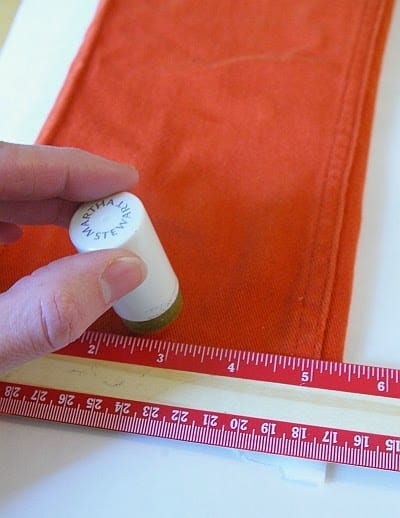
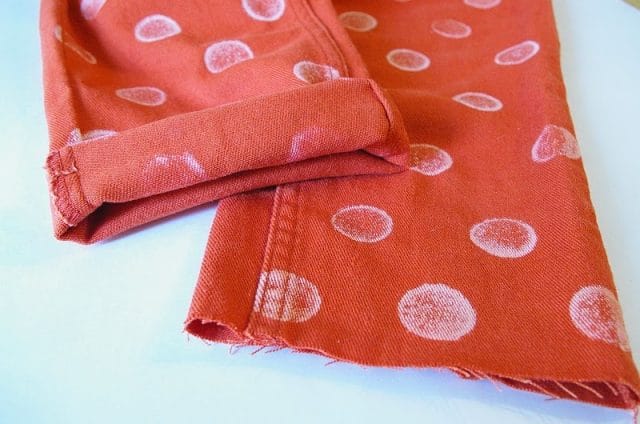
BLEACH: Let’s make dots!!! Now the fun begins! Determine the size of dots you want. Cotton Swabs make a wonderful small dot. If you want a bigger dot find a round sponge brush or cut a sponge to the size you’d like. Pour some bleach into a small dish.
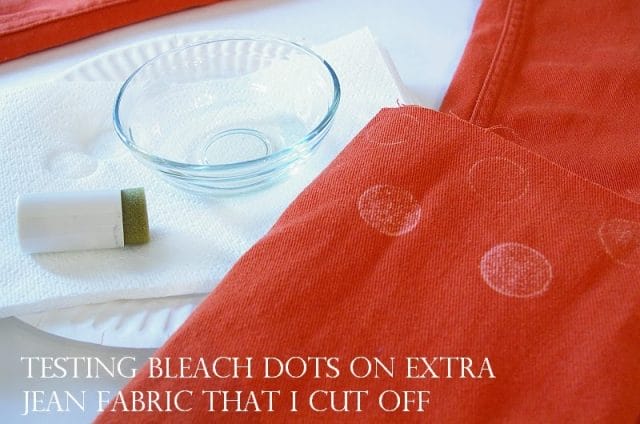
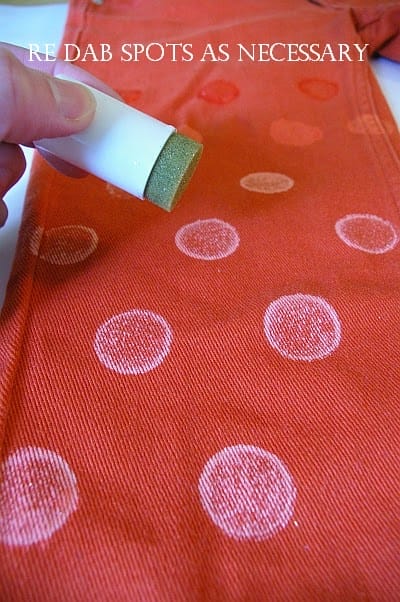
SEEING SPOTS: Determine how far apart you’d like your dots to be – across and the rows up and down. Different sizes will need more or less room depending on the look that YOU like. Dip your sponge or Cotton Swab into the bleach. A bigger sized sponge than a cotton swab might be dabbed onto a paper towel so it’s not dripping wet with bleach. This won’t produce a very good circle. Dip and Dab as necessary on a paper towel. **You might want to do a few test spots on the extra pant legs that you cut off. Better safe and comfortable with the process than sorry!**
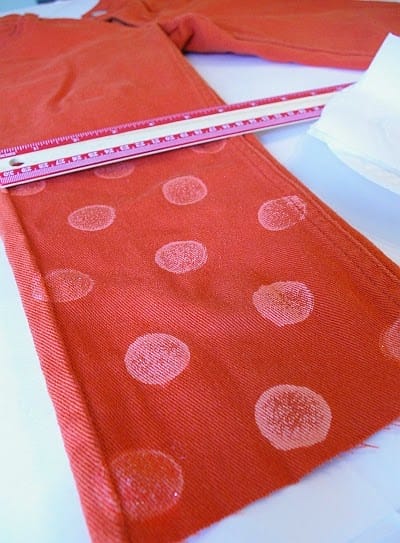
Using your ruler, dab your spots on the jean fabric and refill your applicator with bleach often. The fun part is your spots will start appearing within seconds. If after a minute or two you haven’t seen your spots start to appear your applicator wasn’t wet enough with the bleach. But it’s better to lean on the side of more dry then to wet. To wet with bleach and your shape lines will get blurred out. Go slow and dab away! I like to start at the bottom and work my way up the pant leg. Evenly space your first row using the top of your ruler at a guide. Then alternate your 2nd row in between the dots of the 1st row.
Keep going adding on dots as needed the higher and wider the pant leg gets.
If one of your spots didn’t bleach out as much as you’d like, just redab that spot! I sort of liked mine having more of a washed look than totally bleached out. Some of those completely bleached out spots I didn’t like as much. But I was also working with a bigger circle.
Repeat the process on the other front of the pant leg. Let dry and flip over to add polka dots to the back. Or just have spots on the front! The design it up to you! Let them dry for 24 hours or overnight and then run them through the rinse cycle of your washer and dry.
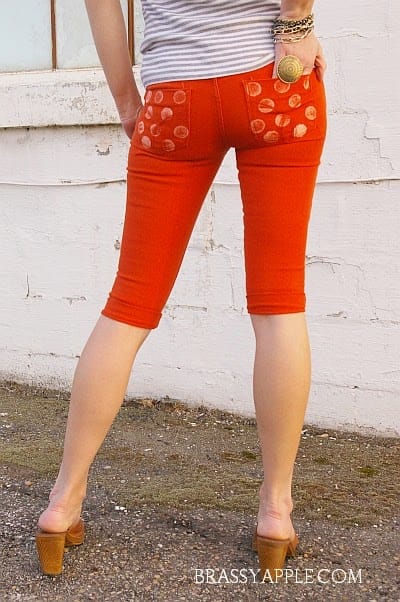
Finish up the hemline by folding it up a few times.
Spring and SPOTS go hand in hand! Create your own DIY look today!

More Refashions and Motherhood fun on BrassyApple.com .
Plus keep up with all my DIY ideas by following on Pinterest.


One Comment