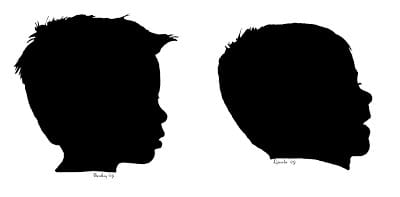
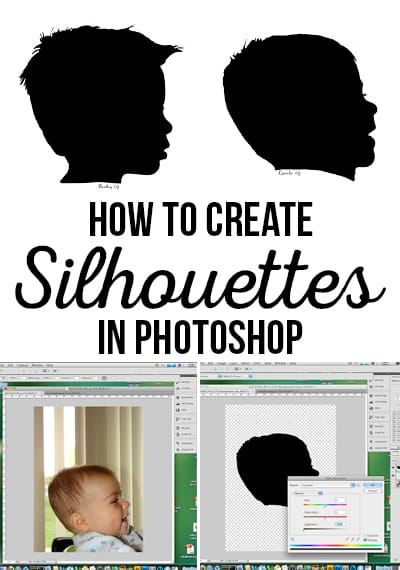
Last year for Mother’s Day we gave the grandmas silhouettes of our boys. It is a timeless gift that grandmas love! I plan to continue this tradition every year and they can swap out the new head for the old and watch the changes as the boys grow. I also hung some in our room, because once the silhouettes are complete there are countless ways to use them. And they are really simple to do! I’ve seen tutorials using Illustrator, but I am pen tool challenged so I used Photoshop. These DIY Silhouettes for Mother’s Day are the perfect gift!
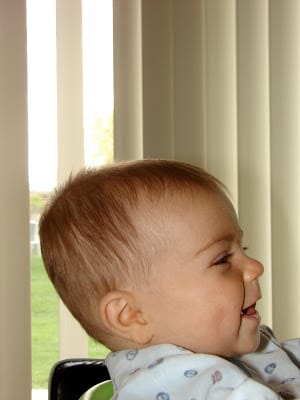
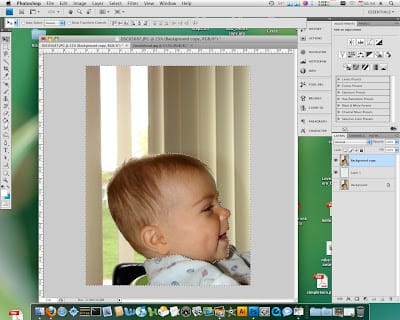
First, you need a profile photo of your child. A solid wall would work best, but sometimes you’ve got to do what you have to. Here he is sitting in his bumbo as the older brother entertains him.
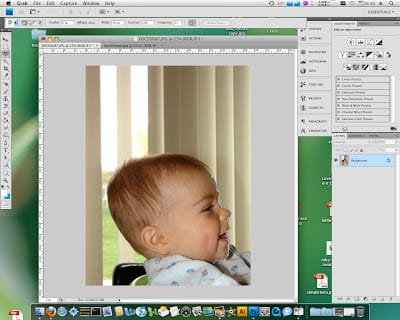
I’m using Photoshop CS4 here, but other versions should work just as well–all you need is the magnetic lasso tool.
Select the magnetic lasso tool and start selecting the child’s face. Pay special attention to detail and be sure to click to make the lasso stick. Smiles, eyelashes and hair add the greatest detail to the silhouette.
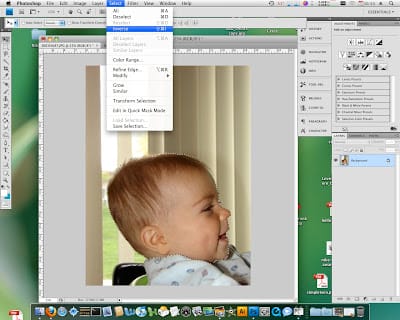
After you have it like you want it (it may take a few tries), select the inverse.
You’ll notice at this point I add a blank layer, moved my photo up a layer and shut off the original–but having a white background will work the same!
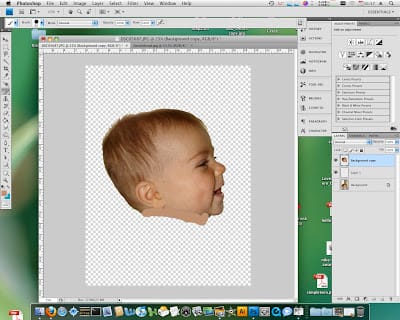
Press delete and watch a floating head appear. Ctrl + D (Command + D for the Mac users) to deselect. I used the eraser to clean up any stray debris remaining and the brush tool to add a little more neck. Remember it is going to be black and white–meaning everything that isn’t white will be black.
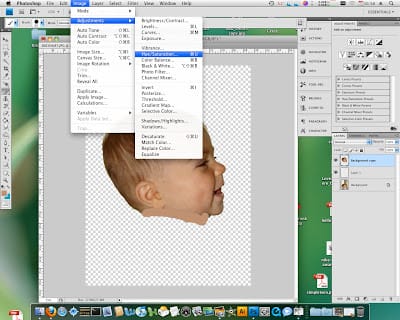
We are almost done. We just need to turn the little guy black. Image > Adjustments > Hue/Saturation
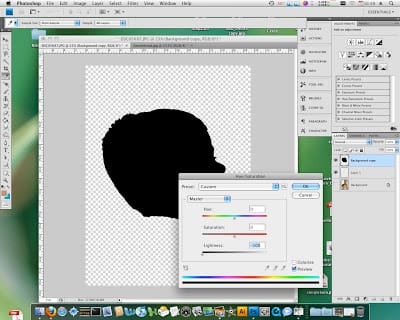
Move the lightness slider all the way to the left and the image will turn black! That’s all there is to it.
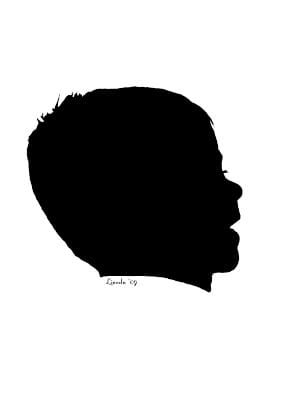
I added his name and the year to the bottom just for kicks. It will be fun to see how he has changed in the last year! And I still can’t get over those eyelashes!

LOVE LOVE LOVE this tutorial Nikkala-going to try it!
I have wanted to do that forever!!! Thanks for the reminder and the know how! THose are WAY cute.
What a cute idea! I don’t have Photoshop, but I’m pretty sure I can get it to work in GIMP. Thanks for the post!
Thank you Nikkala for sharing this wonderful tutorial! I want to try this using my Grandchildren’s pictures.
Thank you so much! I made some for grandparents for Christmas 2008 but did it the “old fashioned” way by printing a picture and then cutting it out along with black paper. This looks much easier;)
this is a great grandma gift!!
I have been wanting to do this for ever! Thanks for the tutorial! Now I don’t have to figure it out on my own…
Wow, this is great! Thanks so much for the tutorial. I’ll be linking in my Mother’s Day Roundup.
I’ve been looking for a silhouette tut for a while now. Thank you sooo much!
This is very cool – thank you for the awesome tutorial!
That is AWESOME! I love this idea. Just hope I can get my 3 kids done and mailed off before Mother’s Day! Thank you!
I am in love with silhouettes too! I recently did some painted ones for my wall and just last week created some pendants for necklaces and earrings, I wear them every day now! Next up? A charm bracelet for my mom for mother day with all the grandkids silhouettes on it!!
Fabulous tutorial, Nikkala!
I have done silhouettes in years past, but trying to get a child to sit still long enough to get an outline drawn on paper on the wall is next to impossible. This technique is so simple and easy!!! Thank you so much, I want to do one of my grandson for my daughter.
Thanks for the tutorial. I have always wanted to do this and even took photos of my kids to do it last year and never got it done. Now I am ready to try again.
Just made some for my MIL! Thanks for the idea–perfect for procrastinators like me (but it definitely doesn’t look like a last minute project!)
I ended up just printing the photo and using it as the pattern to cut out the silouette because I don’t have photo shop. I just rubber cemented the photo and black paper together on the waste edges. My only regret is I didn’t do two at one time so I could have one. It turned out darling and my daughter said she loved it.
Can you adjust the size, such as make it smaller?
absolutely!