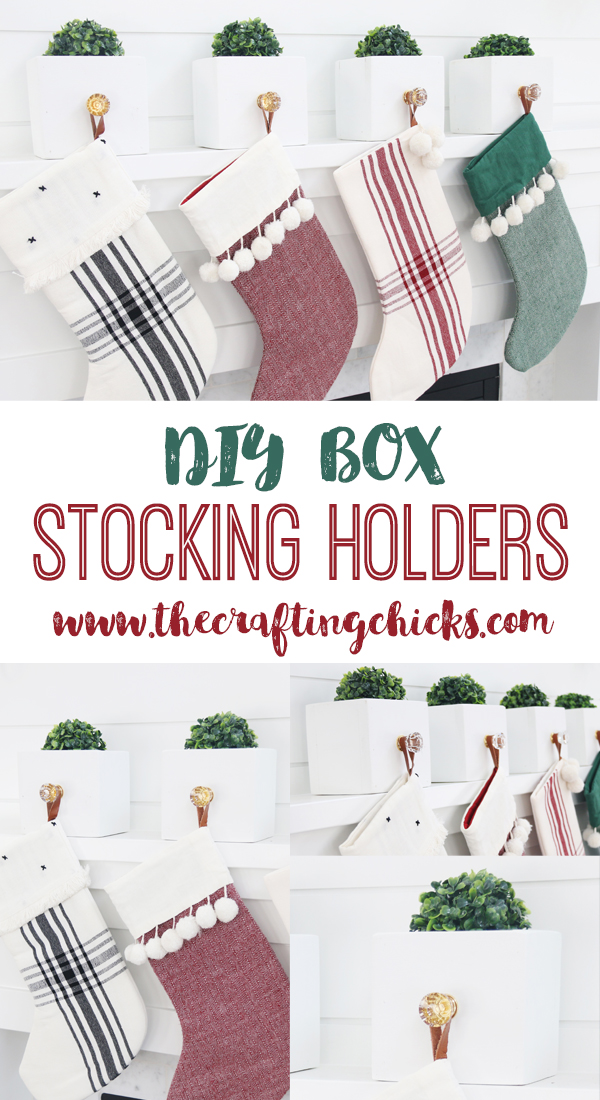
DIY Stocking Hanger Box

DIY Stocking Hanger Boxes
Hello Friends!! Today we are revealing our version of the Home Depot’s DIH Stocking Holder Box Project that we posted last week.
I loved making these DIY Stocking Hanger Boxes for my Christmas Mantle this year.
The chicks are so excited to post our version of the Stocking Hanger Box as part of The Home Depot’s Workshops Virtual Party Tour.
Our creative blogger friends made their own version of this awesome Stocking Hanger Box and added their own twist. Can’t wait to check all of those out too!
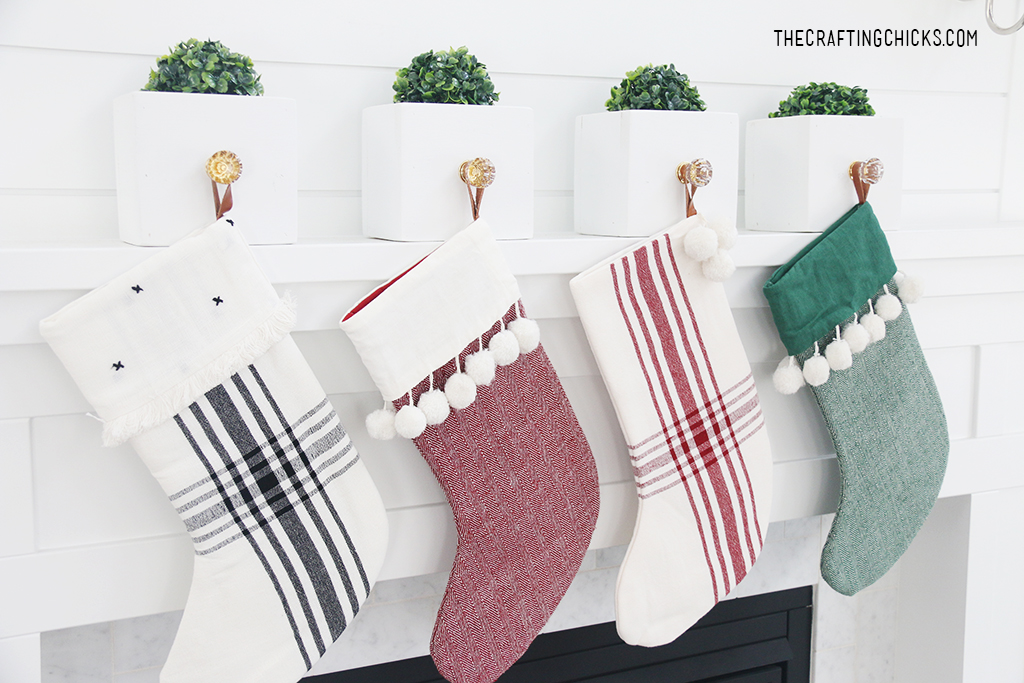
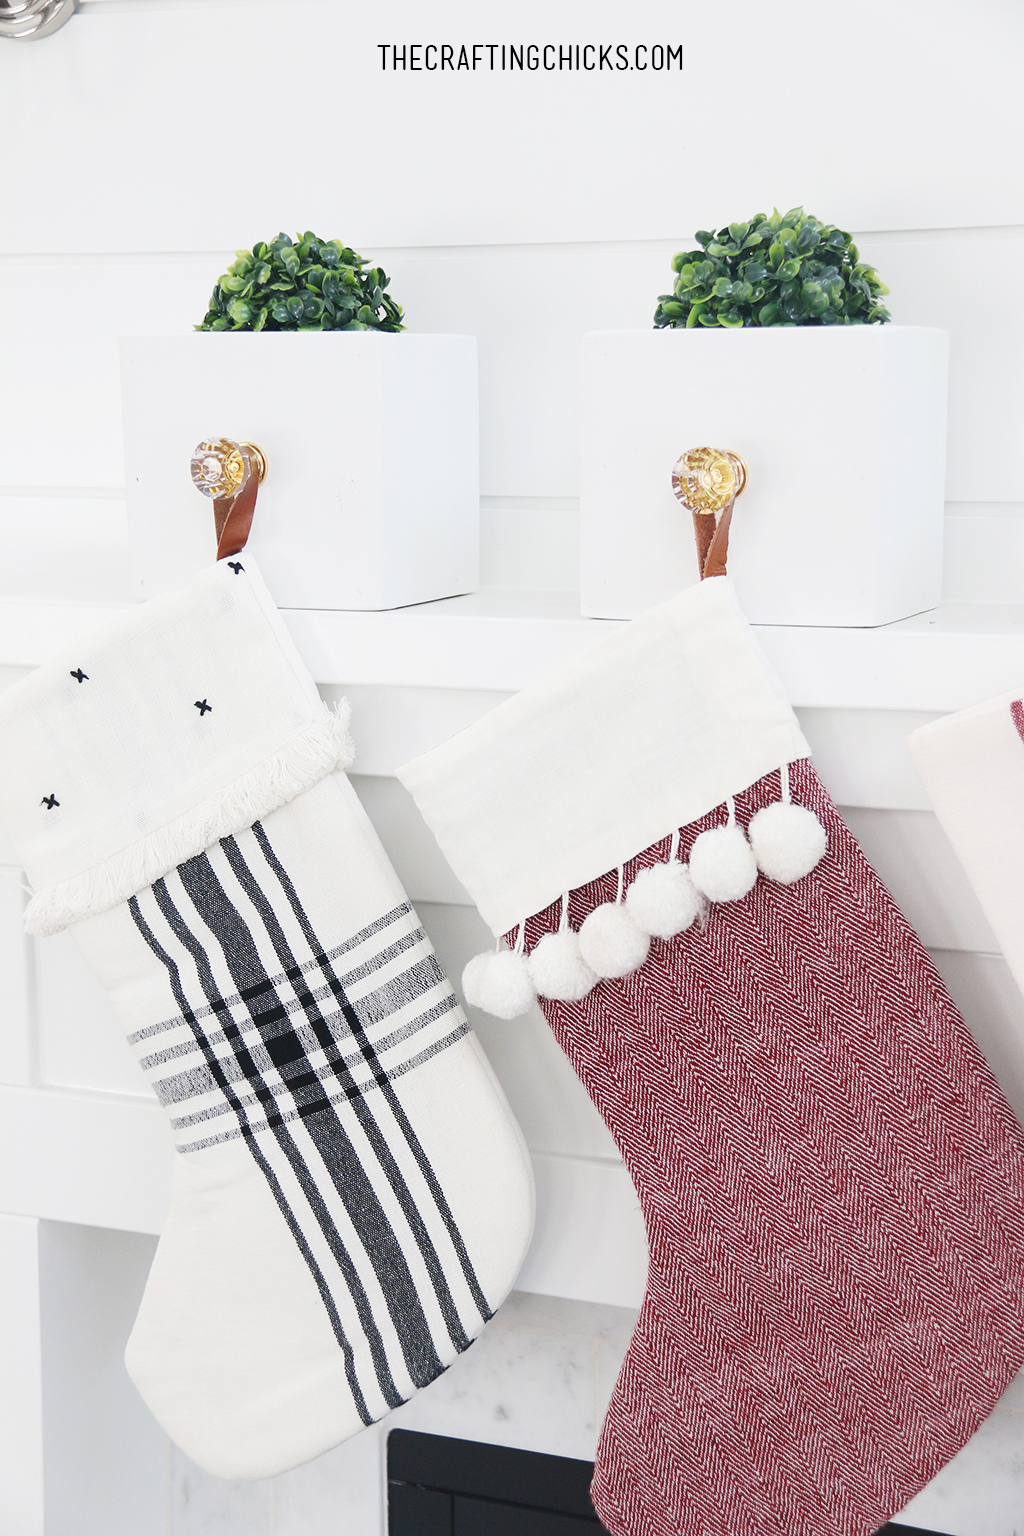
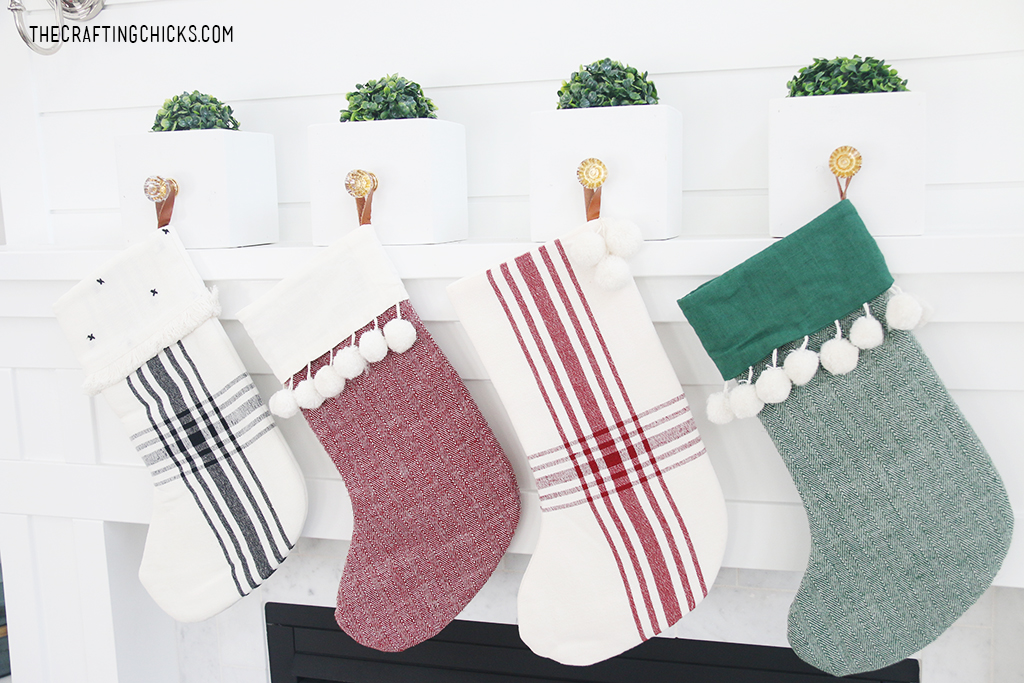
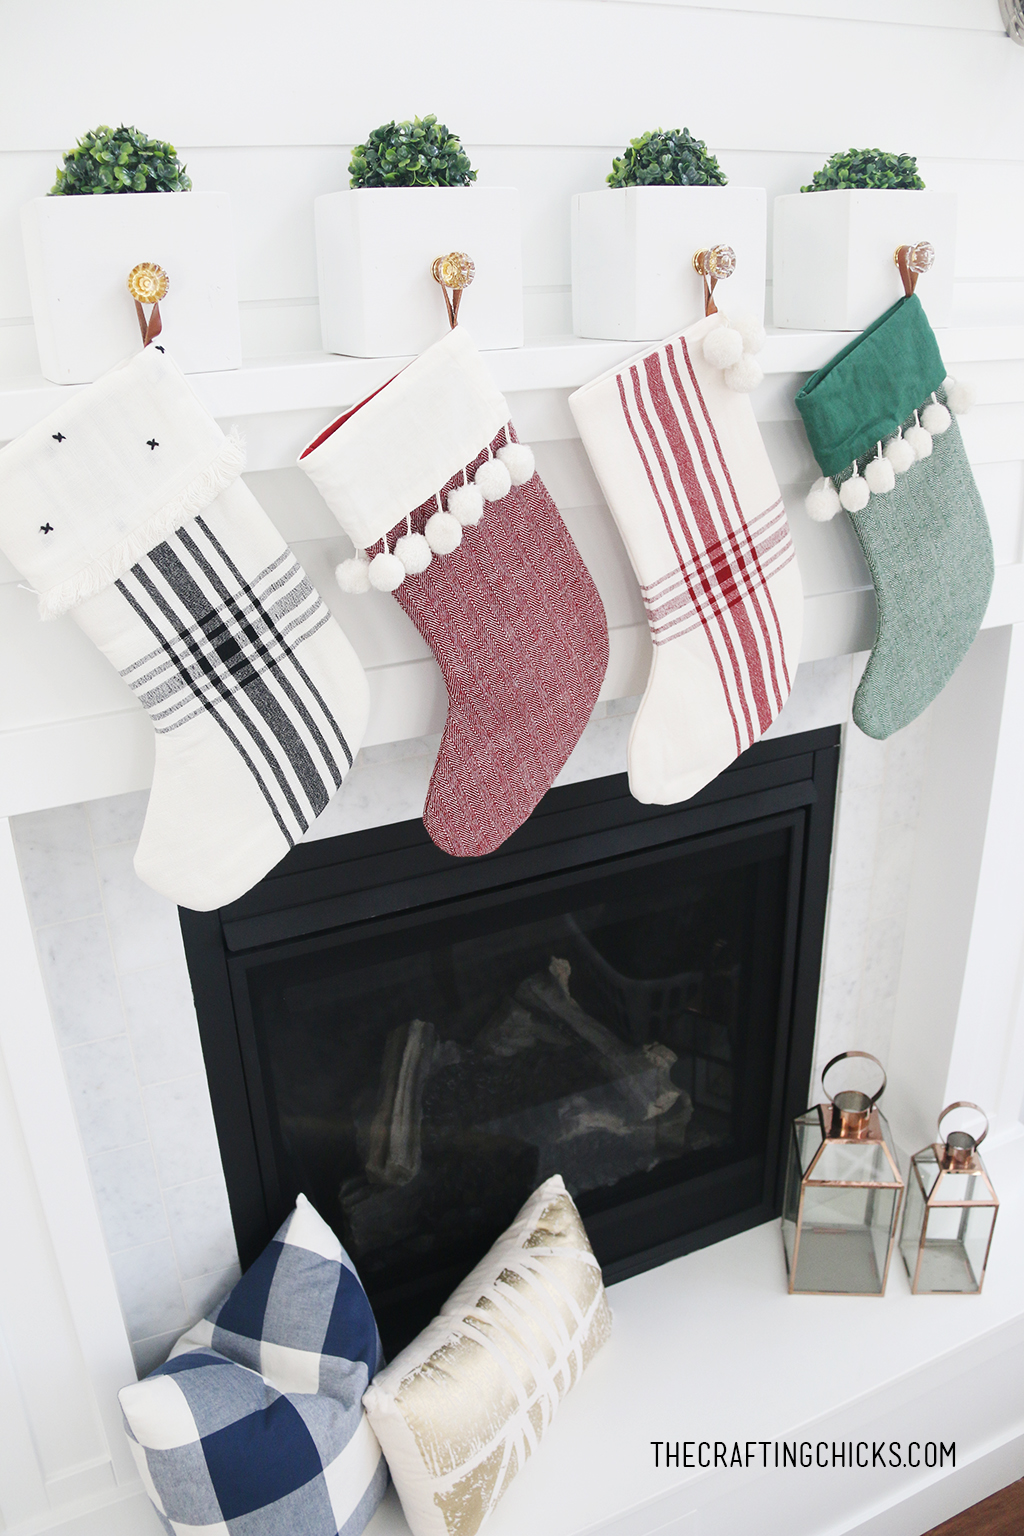
Today, you can see all the details of our individual, white stocking hanger boxes. One for each family member.

The great news! You can make a DIH Stocking Holder Box too! You can register on-line here. We love the idea of joining with friends in making these for a fun Girls’ Night Out! And you can get ready for the holidays!
The Home Depot offers Workshops at all of their locations for do-it yourselfers of all ages and experience levels.
Visit http://workshops.homedepot.com to learn more and see what Workshops are coming up.

What You’ll Need to Make a DIY Stocking Hanger Box:
1×6 regular white board, 6 or 8′ length. I bought two 6′ boards so they’d fit in my car.
Safety Goggles
Finish Nailer with 1 and 1/2″ Brad Nails
Measuring tape
Sander. I used an orbital sander, but sandpaper, or sanding blocks would work fine.
Circular Saw
Crystal Knobs
Drill with 1/4″ bit
Semi-gloss White Paint
Paint Brush

How to Make a DIY Stocking Hanger Box:
Step 1:
Using a pencil and ruler, measure out your wood pieces.
Use a saw to cut out each piece of wood. Remember your safety glasses:)

Step 2:
Using a nail gun, nail together the front and side wood pieces.

Step 3:
Add on the bottom piece with a nail gun.

Step 4:
Add on the back piece with a nail gun. This should complete the stocking box. Leaving an opening in the top.


Step 5:
Using a sander, sand all sides of the wood box. Wipe clean with a paper towel after sanding.


Step 6:
Paint the boxes. I chose a semi-gloss white from The Home Depot. I added a couple of coats to the boxes, drying in between paint coats.

Step 7:
Using a drill, add a hold for hardware.
I used a ruler to measure the exact middle point for my fancy knobs.
Add knobs or hooks to each stocking hanger box.


Line up the stocking boxes on your mantle. If you do not have a mantle, a console table would be such a fun place to add these stocking holder boxes.
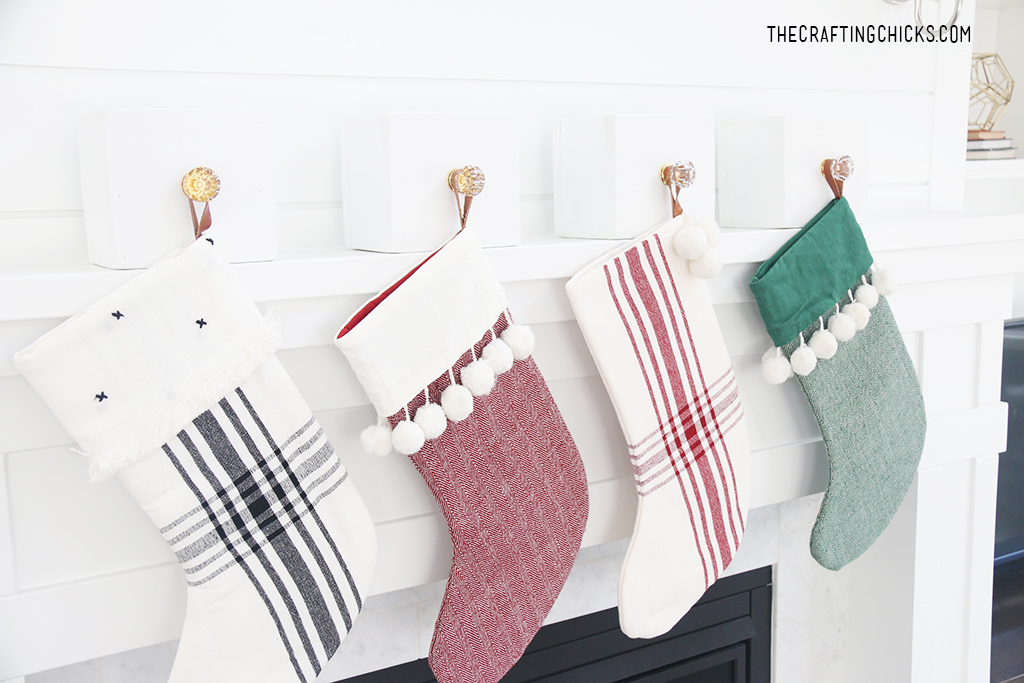
Hang the stockings from each knob. I love how these cute white boxes look lined up on my mantle.

To add some color, we added boxwood balls to the stocking hanger boxes.
We also thought the open top boxes, would be perfect for delivering family notes throughout the month of December.
Theses stocking hanger boxes would also make great spots to leave little treasures from the Elves:)
If you have previously attended any workshop at The Home Depot and would like to provide feedback, please feel free to use this form. Your experience and response helps The Home Depot make the improvements you want to see.
You can find 9 other bloggers take on the same project:


Jamie not only do we share a name but we must have ESP! Love your white boxes, so glam and perfect.
These turned out so cute!